
Brm, Brrmmm, BRRRMMMMMM!
Cockpit and Dash
So for now, I can't do a lot practical on the engine until I get my parts back, and buy some bearings and things. So I returned to working on the car itself (strangely, working on the engine doesn't feel like working on the car - weird).
I was considering looking at the wiring, but then I had to start thinking about all the instruments and switches I'd need, and I can't easily look at the wiring for the engine until it's back together - so I ended up mocking up the dashboard instead. Seems more logical this way.
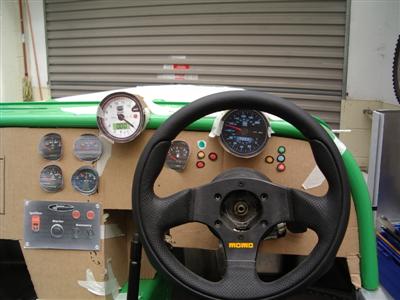
I've been having quite a lot of thinking time about this over the last few weeks, plenty of which involves sitting in the car and, err, pretending. But I've decided that my thoughts regarding the placement of the tacho are sound - I want it slightly above the top of the scuttle, so that the need to move and refocus my eyes from the road is minimised.
The speedo I think can go in front of the steering wheel, again just slightly above the top of the scuttle, but lower than the tacho. My reasoning here is that you tend to look at the speedo most when you are driving fairly straight, in low speed zones, or on the motorway trying to keep a cruising speed. In all these cases, you're not moving the wheel very much, so I don't think that the gauge will be noticably obscured. Whereas for the tacho, I'm thinking of track days and such where I might well need to glance at it during a corner.
So the current mock up looks a bit like this - actually I've moved the switches to be above the handbrake, and the fuel gauge to be in the centre with the others, but I didin't get a picture. The main feature is that the speedo and tacho will live in pods cut into the top of the scuttle - the rest of the gauges (oil pressure, oil temp, water temp, fuel, possibly battery) are not so important from an ergonomic point of view, so can go wherever they look best.
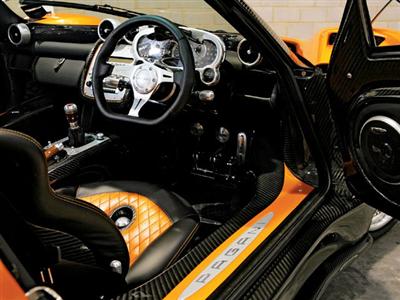
I was finally convinced that this idea could work after trawling the internet and seeing pictures of the Zonda's side air vents, which are exactly like this (below). The trick will be making the pods to a high enough quality so that they look properly manufactured, not bodged on.
I'm also pretty keen on getting some storage holes in the dash - I've seen quite a few cars where people have added them later, which is going to be much harder. At a minimum, there should be somewhere to put a wallet, keys, phone and sunglasses. Don't think I'll worry about a drinks holder though!
18 July 2010
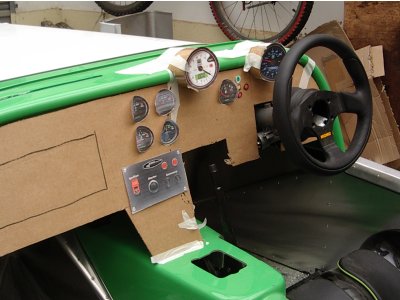
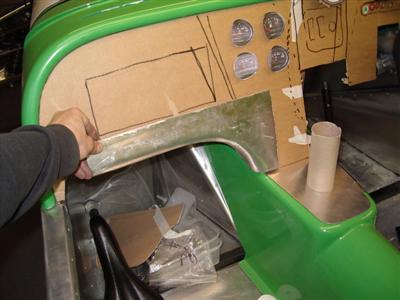
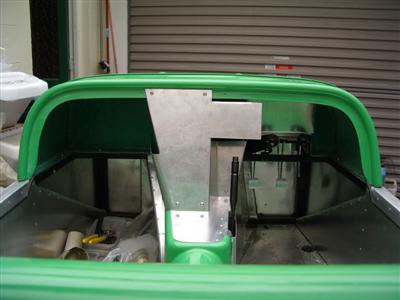
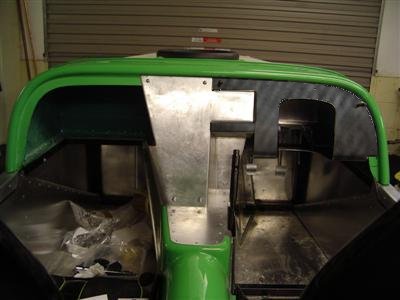
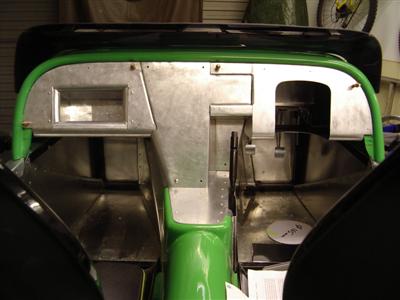
So, there's a lot of things going on in the cockpit, all of which have to fit together without looking like a dog's dinner. The tunnel has to blend into the dash, the gearstick and handbrake lever surrounds need to fit together, the front of the tunnel moulding on the driver's side needs a cover, and finally the underside of the dash needs to fold around to create a lid to the footwells.
First things first - I started with the surround for the gearstick and a cover for the handbrake mechanism. The gearstick surround is a flat sheet atop the tunnel which folds down to form the inside of the handbrake slot. It will also blend into the dash, so it doesn't look like it's just plonked down on top of everything.
Then followed several hours of trying and failing to make a single piece which would cover the handbrake and join up neatly with the gearstick surround. It's the kind of shape which a manufacturer would create a stamped piece for, but there's just too many complicated folds in too small an area to do by hand. So in the end, I did it in two pieces - a surround and a top cover:
I spent absolutely ages making sure the joins were all neat - the usual job of trial fit, a few strokes with the file, another trial fit, etc etc. Worth it though, because this will be the most visible area on the whole car.
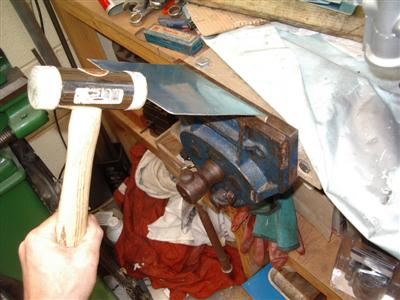
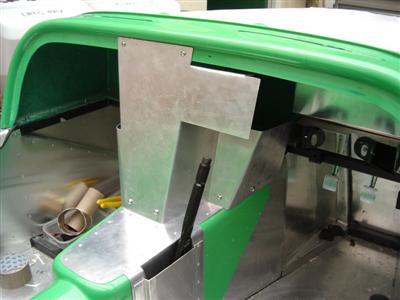
Getting the very tight double bends in the cover proved a bit difficult, and took several attempts. The cover only sticks out by 7mm at one and and 4 at the other, so doing the second bend is very hard because there's no room to get a hammer or even small drift in. Eventually, I worked out that hammering straight on the end of the ally sheet had the required effect. In the picture below, I'm putting the second bend in, bending the sheet upwards and towards the right of the picture.
As I'm doing this, I'm thinking ahead to IVA test time. I don't have a testing sphere, but I've made a 165mm cardboard disc which should be enough to let me see where sharp edges and protrusions are likely to fall foul of the man from VOSA. The top edge of the handbrake cover is one such area, so I will probably need a strip of trim along it. The dashboard cutout for the handbrake lever should be ok though, which will make things easier.
28 July 2010
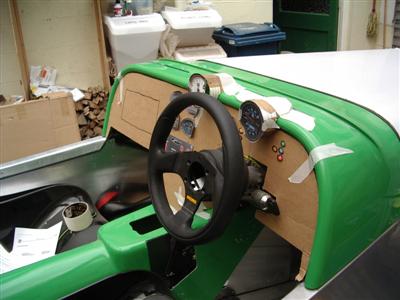
After much, much thought, making up test pieces, and general staring at things, I've worked out how I'm going to do the dash.
I don't want to go down the route of thick padding particularly. Now for IVA, the dash either has to be padded, OR have a large (19mm) radius on the bottom edge. This is fine, except that the bottom edge of the dash isn't straight, it is raised in the middle, which means that a compound curve would be needed. I spent a bit of time making up some test pieces like this, and whilst it is clearly possible to do with ally, I'm not convinced I could get a good enough finish - not without spending a great deal of time learning how to do sheet metal work properly, anyway:
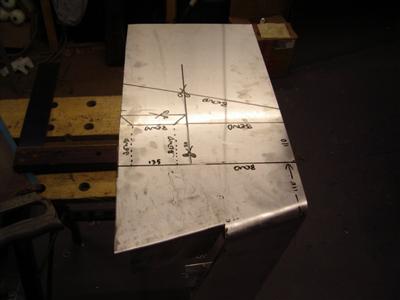
So I decided to make the dash up in several sections, each of which would only have bends in a single plane, which I will then rivet or screw together. This avoids any difficult compound curves and should give me a better finish. The central section with the gauges and switches in will be left as bare metal, the left and right sides will be covered with something (to be decided!), but without much in the way of padding. I'll use 1.5mm ally sheet to make it out of, a) because I've a ton of the stuff lying around, and b) because it seems to be about the right thickness anyway. With all the bends in, I don't have to worry about flexibility as I would if I was just putting a flat board straight across.
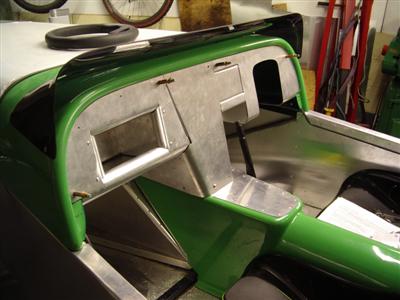
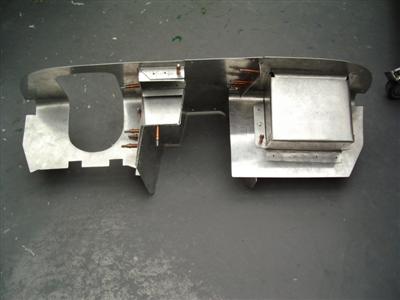
Centre Console
So I started in the middle, as this will form the support for the two side sections. None of this is too complicated in essence, but it's been painstaking to ensure that everything is measured, marked, bent and cut correctly.
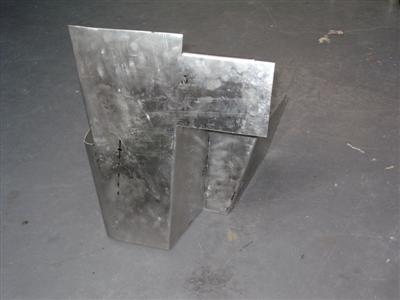
To make the large radius bend on the left hand side (which will form the side of the passenger compartment), I bent it around some 45mm ally bar which I'd bought from Stoneleigh 2 years ago for lathe practice and never used. That gives just over a 19mm radius which should keep the inspector happy.
I made up some brackets out of aluminium angle, with M5 rivnuts to take the fixing screws:
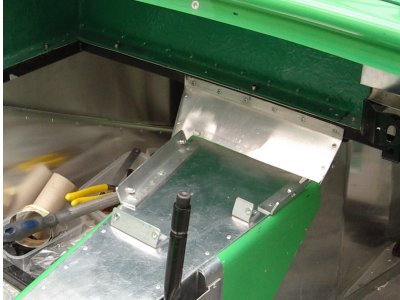
And, after much fettling to get the edges to fit nicely, it fits:

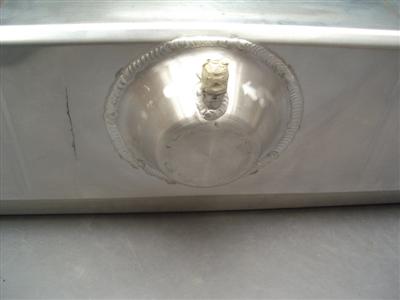
Then to finish off, I cut a hole in the tunnel to give access to the handbrake cable adjuster, and made a simple panel to cover that and the big gap at the front of the tunnel moulding:

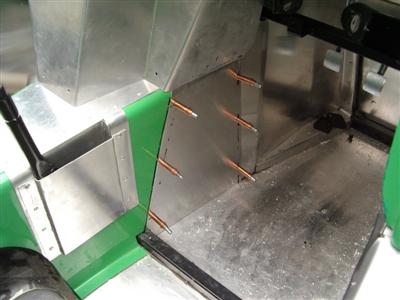
The panel will screw on so that it can be removed, but I ran out of rivnuts...more on order. I've a feeling that it may rattle, so I will look for some sort of rubber gasket/seal that I can run underneath it. So now, it's on to the driver's side of the dash...
Engine News
As always, other things are going on. I picked up my cylinders and rods from the engine shop - bores are nicely rehoned, will get a pic up at some point. As for the rods, he said that one was oval by just over a thou' - his advice was that it probably wouldn't matter, and he's seen engines with much worse. The rest he said were fine, so that's a relief. A new rod is 70 quid, so I might replace it, I'll have to think.
The local motor factor managed to get hold of a gasket set, though it took a couple of attempts to get the right one, for 52 quid, somewhat better than 330. (Though in fairness, the dealer price did include head gaskets which are about 80 quid). The 'factors can't get those though.
Bearings (mains and big ends) I've managed to source from a main dealer, after a bit of ringing around. 150 quid delivered, which didn't seem so bad. They are divided into "red" and "blue" classes, although my bearings didn't have any such marks on. The crank is marked red though, so that's the ones I've gone with, and will check the clearances when they arrive.
Piston rings are no longer available from Alfa Romeo (surprising, since they only stopped making the v6 5 years ago), so I've had to get them shipped over from Alfissimo International in the states - head gaskets too. Their prices are ok, but the shipping is a bit *ouch*
So when that little lot arrives, I can start on the rebuild of the bottom end. There will be other things I need, various timing pullies and stuff, but I'll order that when I need it
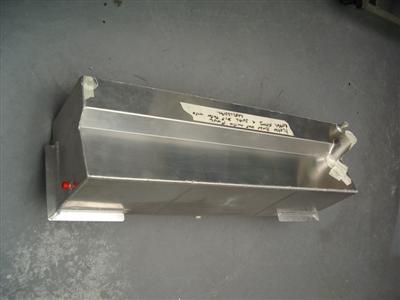
Fuel Tank
And finally, I recieved my custom fuel tank from Allyfab this week. Lovely bit of work, he's put the collector in the centre of the tank and made it a bit deeper than the original design, as one of the first customers suffered from fuel surge in right hand bends (the collector at the right hand side originally:)
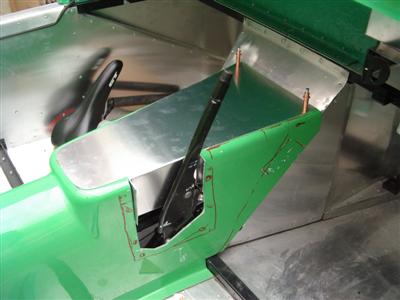
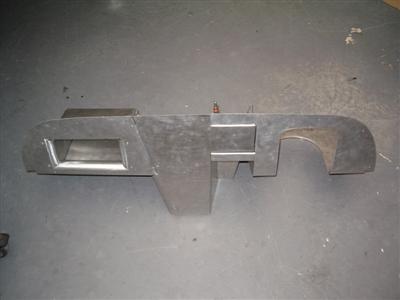
Driver's Side Dash Panel
07 August 2010
Fairly short update this time. I've been bashing on with the dash, making up the driver's side panel. It's been slow going, with fitting it all around the steering gubbins, and matching it up to the centre panel. As usual, I've ended up throwing away a couple of bits and re-doing them.
But it's about finished, then I will be ready to start on the passenger side.
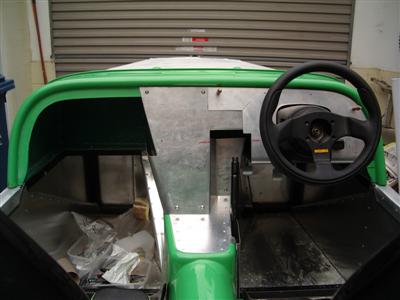
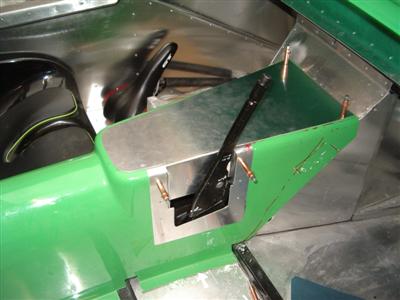
As you can (just) see in the first pic, I've decided to use the standard plastic sierra steering column cowl after looking around a few cars - I thought it might look a bit too chunky, but actually works quite well. I will probably cover or paint it to spruce it up a bit though.
With the side panel covered (I'm veering towards black vinyl or something similar - have considered leather but it sounds like a bit of a pain to keep in good condition), it will look a bit like this:
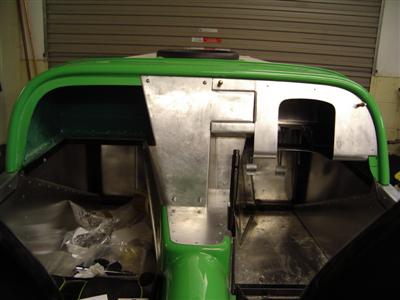
Passenger Side Dash Panel
20 August 2010
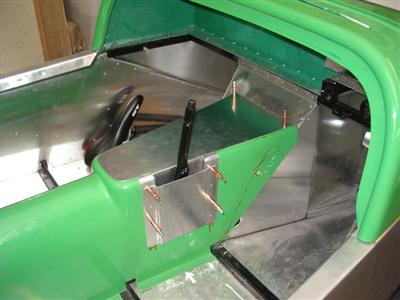
Passenger side piece is now more or less finished. I've built a glove box into it, it has room for a couple of drinks bottles and a wallet:
The rolled bottom and side edges make a nice big lip, about an inch high, which (a) is nicely radiused to keep the IVA peeps happy, and (b) should stop things falling out!
The whole thing should, just, go in (and out) as a single unit, which is nice as it means the structural joins are hidden behind the dash, each piece being joined by flanges which will be rivetted together:
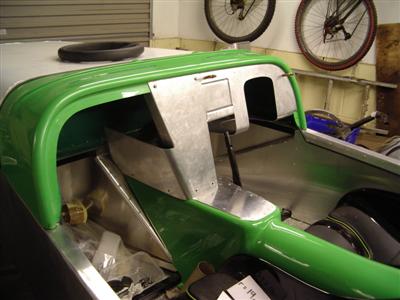
As with the driver's panel, the passenger side will eventually be covered. I will be doing this towards the end of the build, which is a bit of a pain because I won't be able to rivet everything together until then. But I know that the dash has a year of being taken in and out, left on the floor, etc, whilst other jobs are done, and if I cover it now I run the risk of it getting damaged.
So, that's the dash nearly finished for now - enough that I can start putting switches and guages in when I get them. I still need to make an infil panel for the left and right sides, where the dash doesn't come to the bottom of the scuttle. The edges between the covered and non-covered panels will need some fettling, but that will be done when I'm fitting the covering.
Other Stuff...
Eagle-eyed readers may notice the other addition in those pics - an aeroscreen sitting on the scuttle. This came up for sale from a fellow builder who had it custom made, I figured it might be handy for trackdays etc. Not sure if it'll work with my tacho placement, but I can always sell it on if I can't use it. It looks pretty cool though so I'd rather keep it.
I sat down the other night and wrote down everything I could think of that I still had to do, so that I could work out some sort of order of attack. Bloody hell, there's a lot. It seems a bigger job now than when I started! Anyway, the upshot is that there are just a few things left to do before I have to get it onto its wheels - most of the remaining body work in particular has to be done when it's on the ground, and obviously it'll need wheels to go and get the exhausts fitted. Remaining things to do on stands really are the fuel system, first fix of the loom, underbody trays, and probably getting the engine and box mounted.
Also recieved my piston rings and head gaskets from Alfissimo. Not too impressed that the price nearly doubled from what was on the website, and to top it all, I had to pay an extra 20 quid to the courier (after paying 70 for carriage in the first place). I do at least have the bits though. Must get around to seeing how the heads are comming on...