Flywheel, Finally
22nd July 2011
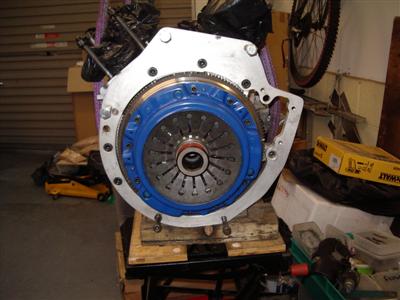
Happy news last weekend when I heard that the flywheel was at last completed. So I bombed down on saturday morning to pick it up, along with my gearbox, clutch etc.
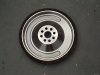
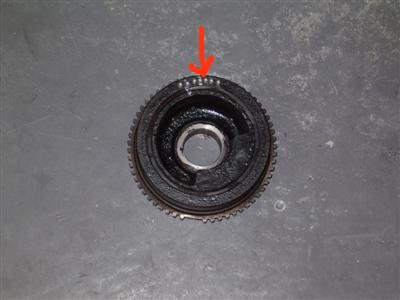
It looks like a good job at least. It has the original ring gear on it, which they removed from the original wheel.:
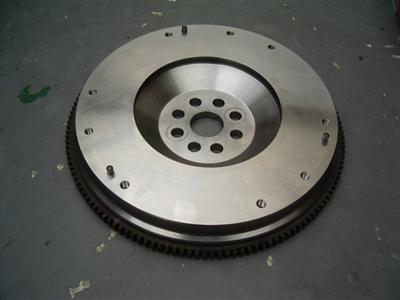
The front face is approx 10mm further out than on the original. Despite that, it weighs around 100g less than the original, which is nice. And there will be a bit more to come off in the balancing.
The large semi-circular slot machined in the rear is a copy of that on the original, and is what makes it off-balance. It should mean that only a little has to be taken out by the balancers.
The engineer advised me to do a test build before taking it for balancing, just to check that the clutch all works. Sounds like a good idea, so that's what I will do.
Rather than go through the pain of fitting the engine again, I figured that I'd build it up on the bench. I'll run a flexible hydraulic line from the clutch pedal master cylinder out to the gearbox. I hadn't got one of these yet, so I got one ordered with the ends I needed.
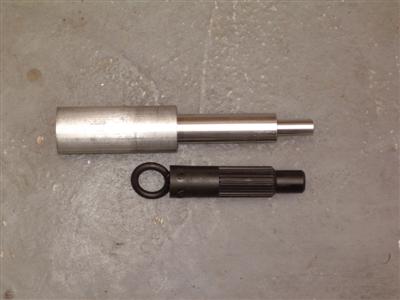
Fitting the flywheel to the engine and clutch to the flywheel was easy enough. First thing I checked was that the started motor lines up with the ring gear, and that all seems to be right. But then I realised that I was going to need a custom tool to align the clutch. The one which came in the kit wont do the job, because my gearbox now has an extended input shaft which fits into a roller bearing in the crankshaft.
A simple enough job to turn one up from a bit of ally stock I had in my big box o' random metal. I took my time to get it to be a tight fit on the clutch plate, taking off half a thou' at a time, until it just slid on. Below is shown the plastic one which came with the kit, and my metal one above it:
...and that's about as far as I've got this week. Yes, the MG has still been taking up most of my time. I spent most of the week changing the dampers all round, and rebuilding the rear brakes. This has (a) made it much better to drive, and (b) really made me appreciate working on the Dax - it's in the dry, it's clean, and all the bolts are new and not rusty. Bliss.
Assuming the clutch works, the next step really is to get the balancing sorted out. The next few jobs are all ones with big bills and not a huge amount of work - balancing, wheels, brakes. So I'm likely to find that money, rather than time, starts being the limiting factor.
Clutch Test
28th July 2011
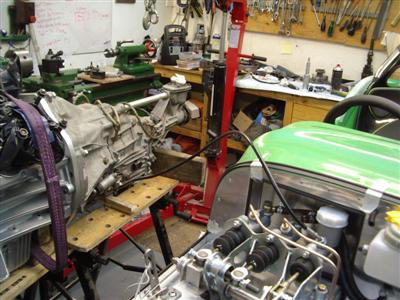
Well, my clutch alignment tool worked fine, and I was able to build the clutch, and bolt the gearbox in place. The hardest bit was actually getting the release arm in - must be a knack to it, as it took me three goes.Anyway, I built it up on the bench next to the car, and ran my newly-aquired flexible hydraulic line from the clutch cylinder on the car, to the clutch itself. It was just long enough:
Unfortunately, it became apparent that I'd chosen the wrong ends - I picked a bend when I wanted a left handed sweep at one end, and at the other, the 60 degree bend would be better as 90. Ah well. Thus we learn.
Anyway, it worked enough for now. I filled the clutch cylinder (using a syringe, as the position of it makes pouring it in from the bottle impossible, it turns out), and bled it through. Then, sat in the car, I could press the clutch pedal, lean over and twist the output flange of the gearbox. Clutch pedal out, it was all locked solid. Clutch pedal in, I could turn the gearbox over easily. Obviously this is the reverse of what happens in real life, but it proves that the clutch is gripping and releasing. Which is nice.
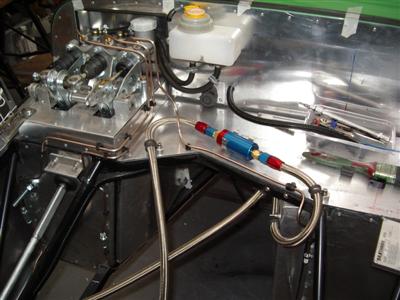
Since I would need to get another hydraulic line made up, I had a bit of a play, and decided that running a hardline across the battery shelf would actually be neater than having it flexible all the way - especially considering that the engine intake ducting is going to run through the same space. So I used some spare brake line to make one up. It has to cross over the fuel line which is unfortunate, but there's plenty of space so it shouldn't be a problem. The join with the new flexi is just in front of the passenger footwell.

A-Balancing We Will Go...
I've booked in to get the engine balanced on monday, at Vibration Free in Oxford. This involves removing the piston rings, so basically a complete strip-down apart from the crank. So after my clutch test, I had to immediately start dismantling everything. Not really what I wanted after taking so much care building it all up, but thems the breaks. It's mostly all done and packed up ready for transport now, so I'll just be doing a few bits and bobs in the meantime. Once we're balanced, I can fit the engine and box properly, and start building things up for real.
Balanced
4th August 2011
I managed to fit the engine and all the gubbins into the back of the car - I thought I might need a van to have room for the crane arm, but with the sump off, and the block resting on a sort of pallet I made from a few bits of 4x2 timber, it just went in. An early start and 3 hour trip saw me at Vibration Free at about 10am. With everything unloaded, I disappeared to spend most of the day at the Heritage Motor Museum at Gaydon - well worth a visit for those of an automotive bent.
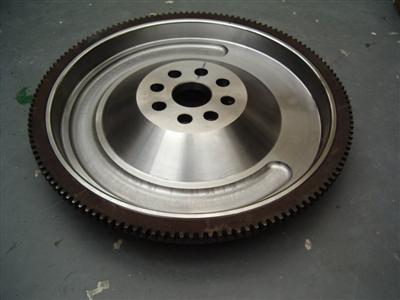
The balancing took all day, finishing up just before 6pm. Every part in the short engine has been balanced, all pistons, rods, even the gudgeon pins, have been matched, and most importantly, the flywheel has been balanced. It was only 8 grams out in the end, so pretty close. The final balance has left it just 0.149 grams out, which I think counts as "unnoticably small".
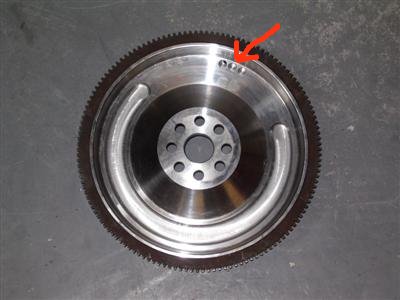
 Flywheel, front pulley, and rods. Holes drilled in the flywheel and pulley to balance them, and on the rod big ends, metal has been ground off
The rods and pistons now all match exactly, before the work the largest piston was 4.7g heavier than the lightest, the largest rod 3.3g heavier than the lightest. On the gudgeon pins, he's taken material from the inside where needed to match them up. Detailed stuff.
Engine Build, Take 2
So, the next evening I got straight down to dismantling it all (again) ready to do the final build. I need to take the pistons out anyway to put the rings in, so I figured take it all apart, clean, and start again from scratch.
I got as far as piston number 2 when, being a clumsy oaf, I snapped one of the piston rings. Cock, balls and arse. I'd never got around to buying a ring expander tool, so was doing it by hand, and this is the result:
 Repeat after me...I am an idiot, I am an idiot, I am...
I was particularly cross, because I thought I'd finally learned THAT USING THE RIGHT TOOLS FOR THE JOB SAVES MONEY. But apparently not.
So, now I've ordered a ring expander. I've also spent several hours trying to find a single replacement ring, since the full set is very costly. Alfa don't have any left, or make any anymore. The local motorfactors can't get any. There are still some in the States, but only full sets for all 6 pistons it seems. I did manage to find a set just for one piston, finally, through a local engine builders. It seems that Alfa changed the specification of the rings in 1996; on my engine, the top ring is 1.5mm thick, the second ring 1.5mm thick, and the oil ring 3.5mm. After 1996, they changed the top ring to a 1.2mm thick version - I don't know if the ring grove is narrowed to match, or if they just wanted more clearance between ring and piston.
Fortunately, the middle ring, which is the one I broke, seems to be the same. So the whole episode should only cost me about 20 quid, and a frsutrating few hours.
Painting
In less angry news, while all that was going on, I finished off the plenum and rocker covers. Having trialed various paints and laquers and not really been satisfied with any of them, I've simply gone with bare aluminium for the stripes and lettering. I filed off the paint, then worked with 120, 240, 600, 1200 grit emery paper, followed by a final polish with wire wool. This left a lovely smooth aluminium finish:
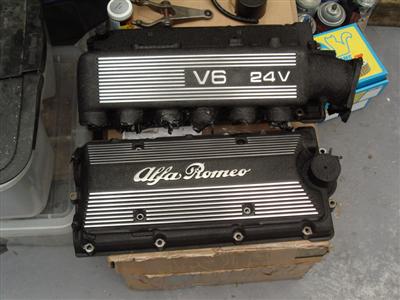
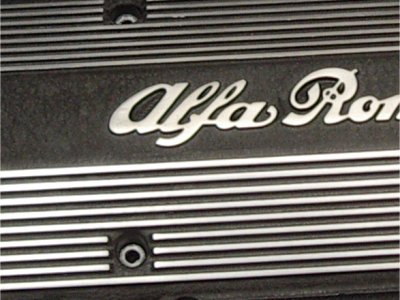
Simple, smart and should go well with the rest of the car.