Short Engine Rebuild - Crankshaft and Liners
11th Feb 2011
The hand started to get better, so I started out on the engine rebuild, because I still didn't fancy doing the metalwork required to finish the boot. I also had a call from the engine builders, the heads are all machined up and the bigger valves fitted, so we're just waiting for the cams now.
I started by having a good clean - clearing the bench and wiping it down with white spirit, cleaning various trays and things in readyness, and putting the engine block on my workmate bench ready to go. An engine stand would be better, but I'm getting a bit short of space, so I'll use the crane to turn the block over when required. Wont be as easy, but that's not the end of the world.
Started with the crank. I gave it a good clean with spirit, using thin bottle brushes to make sure the oilways were clear, and made sure that all the journals were spotless. Then covered it in a bin bag to keep it that way.
Checking Main Bearing Clearances
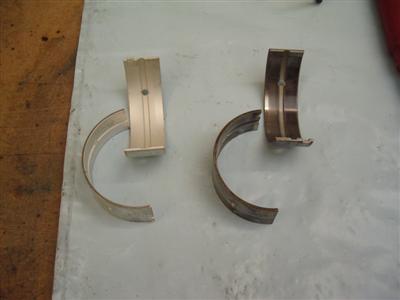 New bearings all round. On the right, a new white one compared with a used one
Next step was to check that the main bearings were within spec. Here I ran into some confusion.
You normally do this by torquing the main caps down without bearings in, and using the dial guage to check the size of the bore. The thickness of the bearing shell can then be measured (see below), and then the oil clearance calculated by [bore size] - [journal size] - [2 x bearing shell thickness].
However, the manual seems to suggest that you put the bearing shells in and measure them directly:
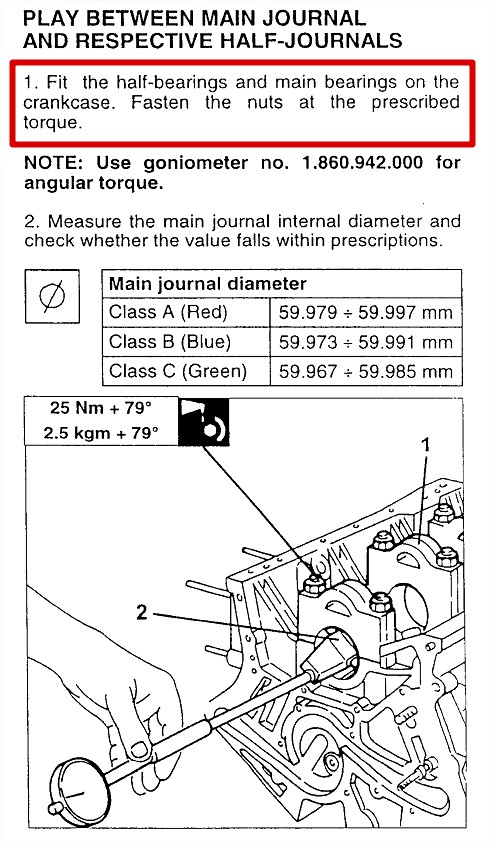
...and indeed, the measurements they give are with the bearing shells in place - the size of the naked bore is some 3.5mm larger than those quoted figures. So that's what I did. And immediately wished I hadn't - the top surface of the bearings is very soft, and the bore gauge put nice big scratches all over them. Though at least the measurements were correct.
I wasn't too happy about this, so I asked around, and was generally laughed at for being stooopid. "Of course you don't measure them directly". The general consensus was that a few scratches on the bearings wouldn't matter much, but in the end I replaced them anyway.
So here's how to do it properly, without scratching your bearing shells:
First, measure the crankshaft journal with a micrometer. I'd already done this when I stripped the engine down, so I had the measurements to hand.
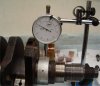
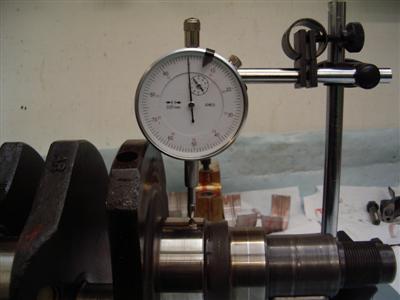
Next, measure the thickness of the bearing shells. To do this, set up a dial guage on the crankshaft journal, zero it, then slip the bearing under the guage. (Hat tip, Pumaracing on this Pistonheads thread). The gauge bears on the back side of the shell, so nothing is scratched:
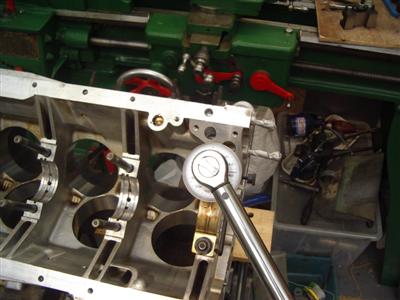
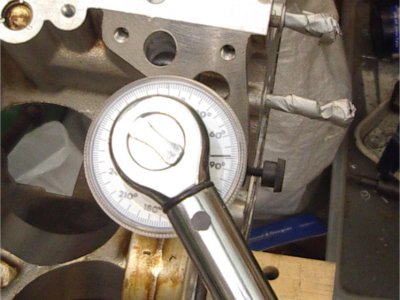
Next, fit the bearing caps without shells. The main caps are torqued using an angle method, so you need an angle gauge - the one below cost about a tenner from eBay. The caps are torqued up to 25Nm (not very tight at all), then turned through a further 79 degrees (which seems very specific), which is then really rather tight.
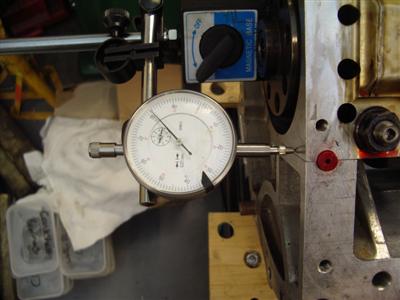
Finally, I set my bore guage to be the size of the crank journal + 2x the thickness of the bearing shell. The difference between this, and the size of the bearing bore, is the oil clearance between crankshaft and bearing shell.
In this case:
- Crankshaft journal: 59.969mm.
- Bearing shell: 1.84mm
- Total width = 59.969 + (2x 1.84) = 63.649mm
Measuring the bore gave me a reading of -0.01mm, or about half a thou in old money. Well within spec which is up to 0.024mm (1 thou).
Then repeat for all main and big end bearings!
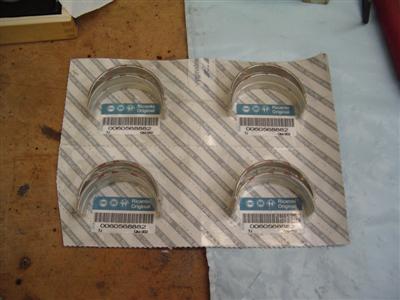
And in case it doesn't seem worth doing, it is. My crank is a "red" class one, so should have "red" bearings, which is what I ordered. But look here:

Yellow dots on these, so they're a different size. In this case I noticed before opening the pack. But it shows that picking issues can and do occur.
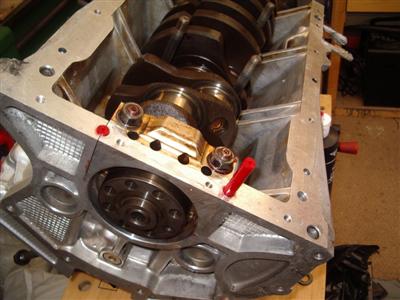
Fitting Crankshaft
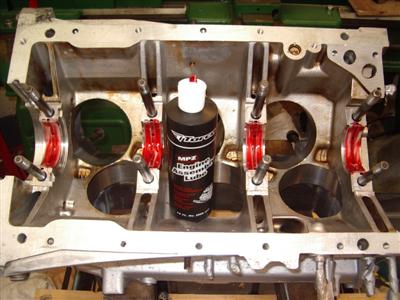
Because the engine is going to stand for a long time before it's started, I was advised to use a specialised assembly lube, which has better staying power in the various bearings etc than normal oil. It's a thick, red oil-based stuff, about the consistency of honey. I gave all the bearings a good coating with it before assembly:
At the rear cap (on the left), there are two thrust bearings - these are half-moon shaped metal strips. They sit in the block either side of the bearing, so you have a half-circle either side, rather than a full circle on one side. They need to go in before the crankshaft - there isn't much to hold them in place, but the sticky lube did the job. The top half of the bearing cap holds them in place once fitted
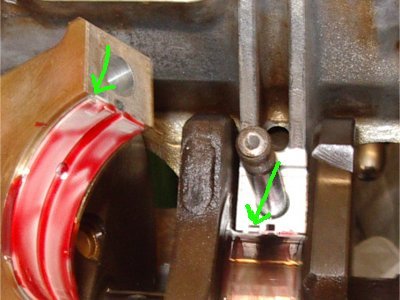
Then it's time to lift the crank onto the bearings...gently. And then, on with the bearing caps. Note that the little tab on the bearing shells should be on same side on both the top and bottom shells - this is important as it makes sure that the cap goes on the right way around. It's a bit hard to see below, but the green arrows show the tabs and their orientation:
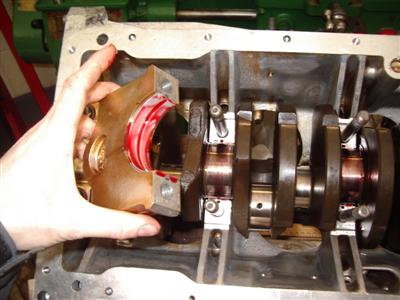
The rear cap is a much larger affair, and incorporates the oil seal which will be fitted later. Down each side is a circular channel, into which you fit a rubber seal - these came in the gasket set. There were red and black ones, it's the red ones which are used here. It's easiest to slide them in after the cap is fitted.
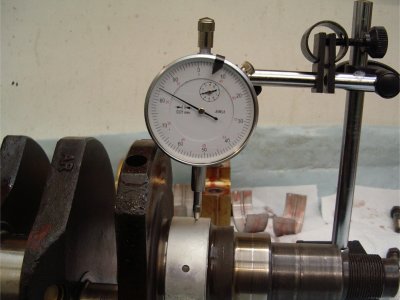
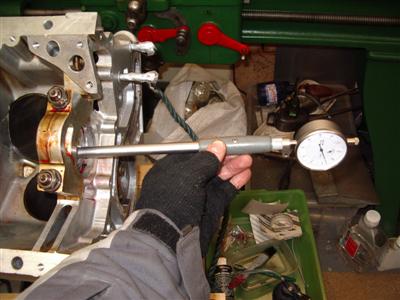
Finally, I tested the crankshaft endfloat. You do this by attaching a dial guage to the end of the crank, then levering it back and forth with a screwdriver, and measuring the deflection:
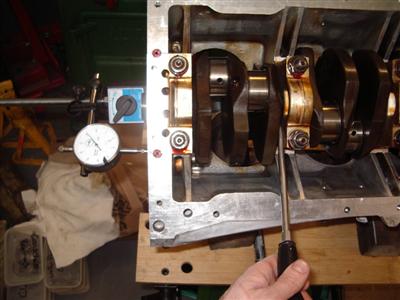
In this case, it showed up 0.19mm, which is nicely in the specified range of 0.08 - 0.265mm.
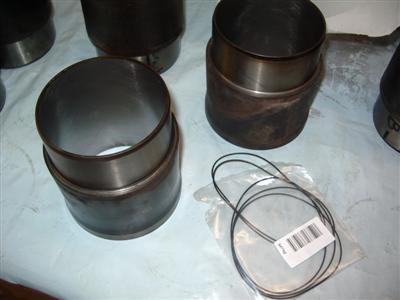
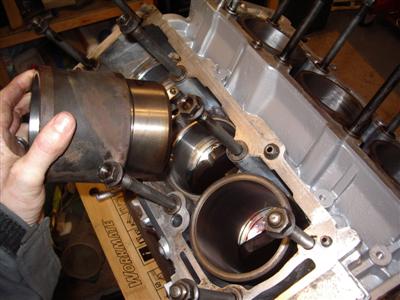
Fitting Cylinder Liners
Before I could fit the cylinder liners and pistons, I had to turn the engine over. I did this by lifting the block using the crane, and turning it over as it sat in the slings, before lowering it back onto the bench.
The liners have a very thin-looking o-ring to seal them, other than that must just rely on a very tight fit in the block. To make sure they fitted properly, I gave the mating surfaces a final clean with white spirit. The liners then slide in, with just the lightest of taps from a soft hammer to help them in. I fitted them in the same orientation as they came out, though I don't suppose it matters much. I wondered whether it would be better to turn them 90 degrees to even out wear, but in the end stuck with how they were.
Once they're in, it's important to fit the liner retention tools straightaway or they tend to escape...ahem.