Clutch, Wiring, Bits'n' Bobs
24 Feb 2011
I'm back pursuing a number of different threads all at once again now, which probably makes this a bit hard to follow. But writing it down helps me keep track of everything, if nothing else.
Clutch
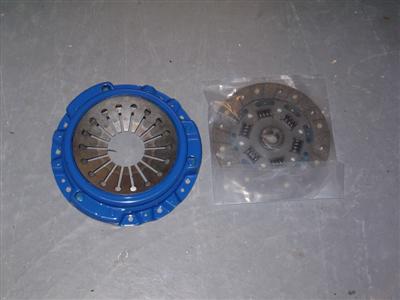
I've been doing a lot of research and ringing around, and I have a plan. I had no luck finding someone who could make a custom clutch (Helix, the usual suggestion, didn't really want to know), so I'm going to get a custom flywheel made up which will take a standard honda s2000 clutch; that means that all of the moving parts, i.e. everything at the gearbox end, is unmodified. Because the adapter plate effectively pushes the gearbox further from the engine, the flywheel needs to be thicker to make sure that the mating surface for the clutch is in the right place. Seems to be the easiest and cheapest option.
Now, because the s2000 clutch is not designed for the torque which the v6 produces, I will need an uprated one. Fortunately, given the s2000's popularity, and various supercharger conversions etc which are available, there are a few uprated clutches available. I'm currently leaning towards an ACT, there are also F1 racing which are cheaper but have mixed reviews, at least on the internets. Whichever, I'm going to stick very much with organic plate street type clutches, not racing-style paddle ones, as I don't want it to be a pig to drive on the road.
Once I have a clutch, I need to take the whole lot down to the flywheel manufacturers so that they can measure up and turn up the wheel. They can also (hopefully) reuse the ring gear from the alfa flywheel, which will be a lot cheaper than getting gear teeth machined into the flywheel. Another option is to use the flexplate from an automatic, which has the ring gear on it, in tandem with a much smaller ("button") flywheel. But autos seem to be rather rare, so I probably wont go down that road.
I dug out the clutch release arm during all of this, and had seen a few things on the internet about wear in the pivot (see this video). Sure enough, I gave mine a shake, and the bush did indeed rattle about. Given that new ones are Ł90 or more, I thought I'd see if it could be tightened up.
The pivot is just a pressed in pin, with the end peened over (like the head of a rivet). So I simply hammered the end down a bit more to take up the slack and make it tight again, blacksmith style.
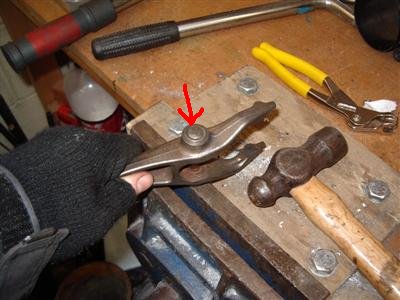
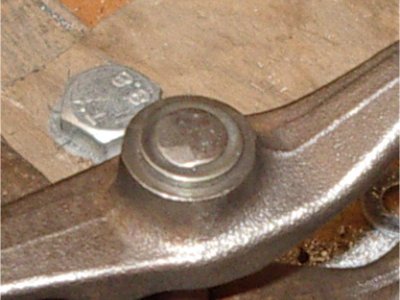
Not very technical, but it's not a very technical part! No idea how long it'll last, but it's definately done the job for now.
Engine
Apparently my cams have arrived at last! But no sign of the pulleys yet. Still, the builder is going to get the cams fitted in the meantime. The heads are all machined, bigger valves fitted, etc, so things are comming on.
I craned the engine itself back onto the floor, and turned it the right way up, so I've got some bench space back. As soon as I get the clutch sorted (or maybe before), it can go into the car and I can start looking at some of the ancilliary bits. I also did some odd jobs like painting up the nearside engine mount (which is steel), the mounting bolts also needed a couple of spacers turning up.
Wiring
I also made a start on some of the dashboard wiring. I'd been dreading it a bit, but having got into it, I'm actually finding it rather enjoyable. Just looking at it doesn't help, but as soon as you start doing a specific job, it all seems to fall into place.
I started by buying some switches; I wanted "doomesday" switches for ignition and the fuel pump on the dash just in case. For each there's then a LED indicator to say that the circuit is live, and a push start switch.
Before drilling any holes I fitted the steering wheel, column stalks, and sat in the car, to make sure that (a) nothing got in the way, and (b) it's all in the exclusion zone for IVA (this is the area behind the steering wheel which is exempt from the tester's sphere of doom). In doing this, I found that the steering wheel is too far away from the column switches - I was going to replace these anyway, at some point, for the sake of appearance, but I might have to do it before sooner rather than later.
With everything checked, I drilled the holes, only one of which was slightly in the wrong place - but fortunately I could enlarge it a little without anything showing. I do find that the stepped hole drills seem to wander off centre quite easily when done by hand.
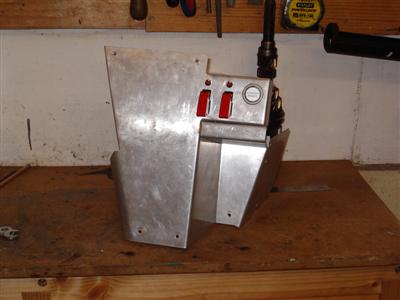
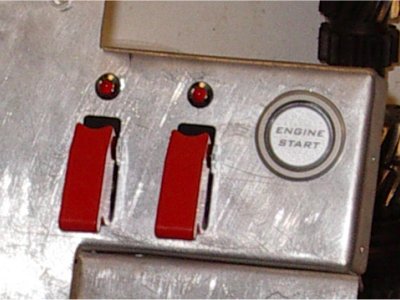
I know that these switches aren't to everyone's taste, but the whole "jet fighter" feel appeals to the small child in me. Plus, they will genuinely provide a very quick shut off in the case of fuel leaks, for example.
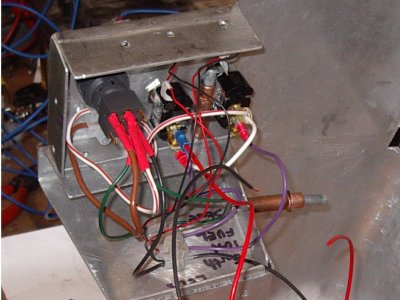
Now I had something to start plugging wires into. I wired up the back of the panel using junction blocks, which will feed out to a click-lock connector (so that I can easily detatch the dash). The use of the junction blocks, rather than wiring the switches and lights in directly to the click-lock connector, means that I can remove the components from the dash completely. This wouldn't be possible otherwise, as lots of the wires would be joined together permanently, in crimped connections. It's more work at this stage, but well worth the effort I think.
This is mainly because I will need to finish the front of this panel towards the end of the build; it's staying as bare ally, but is covered in surface scratches etc. So near the end, when things are no longer kicking around in boxes, I will take the dash out, polish up this panel, cover the others, and put it straight in the car, where it should be safe. To do this easily, I'll need to take out all of the components. If I finish it now, it'll just get scratched up again.
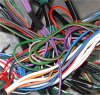
I'm trying to keep to the same colour scheme for wiring where possible, but there are a few places where I just need a few inches of cable, so I'm using whatever I have around - otherwise it'll cost me a bomb, mostly in postage, buying 1 metre each of twenty different colours.
As well as the switch panel, I've taken a feed from the "always on, fused" supply which will feed a 12v power output socket. Useful for charging phones etc. I tapped into the main distribution "node", which is a load of wires soldered together, and crimped in a new one:
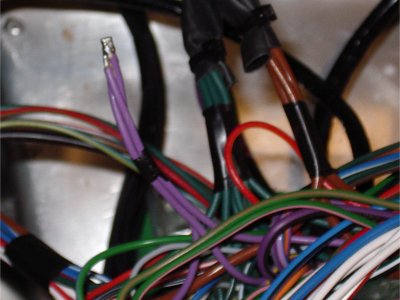
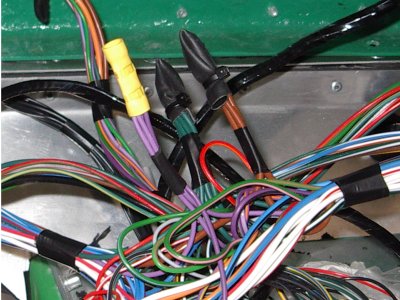
This was then tidied off with some heat shrink. This also needed a new earth putting in, whilst I was there I added two flying earth leads, one for the ECU, and one to take the return from the LEDs on my new switch panel.
6th March 2011
In, Out, In, Out...
More odds and sods over the last week or so. I've spent a fair amount of time fitting the engine and box, then taking it out again. This was so I could work out the last few bits I need, before I get the clutch sorted, then fit it (hopefully) for the last time.
The more I build onto the car, the harder it's getting to winch the engine in - it's becomming a very tight fit. In the tunnel, for example, my wiring routing gives plenty of clearance when it's all fitted - but as the box goes in, it gets in the way, and I had to partially disconnect it. Not a huge problem, but another job which wasn't there before.
So from the fitting, I've got a short list of jobs to be done:
- Gearbox Bellhousing needs painting - I wasn't sure how visible it would be, but it is quite obvious in the engine bay. I won't bother painting the whole box though, as it would consume a lot of time for no real benefit.
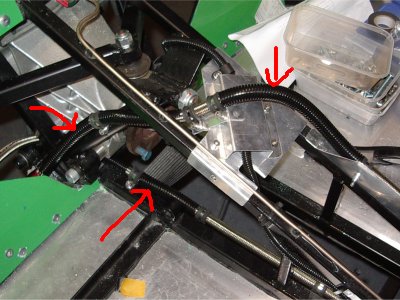
- Fuel lines to be fitted in the front of the tuunnel - the main reason for fitting the box was to determine where these could go
- Fitting a Clutch Line - the honda clutch line isn't nearly long enough, so I need to get a custom one made up, and fit it. I'm planning to route it around the gearbox itself, then run it from the top up through the battery shelf and up to the cylinder. Having toyed with the idea of running hard lines for part of the way, I think I'll just get a single flexible line made up - it's going to be far simpler to install.
- Get flywheel made up and fitted
- Fit new connector on gearbox reversing switch - just need to swap the proprietory connector for a generic one - easier with the box on the floor than in the car.
- Weld earthing points for starter motor and battery - I need to make up two more little earthing studs and weld them to the chassis - again, much easier without the engine in.
Fuel Lines
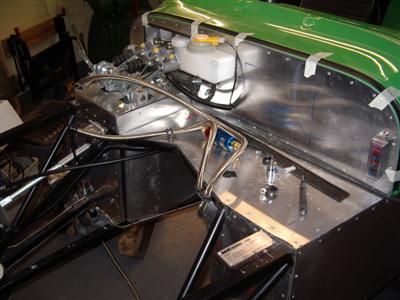
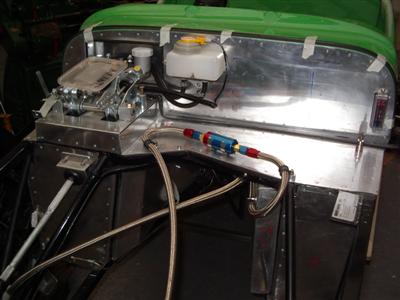
So, out came the engine again (much easier than putting it in), and I set about fixing the fuel lines. As before, working out the routing seems to take more time than actually fixing it. I finally decided to fit the fuel filter on the shelf in front of the scuttle, so that it's accessible. The lines have to cross over, which is a bit of a pain, but unnavoidable. I've not fixed the filter yet, but the pictures show it roughly in position.
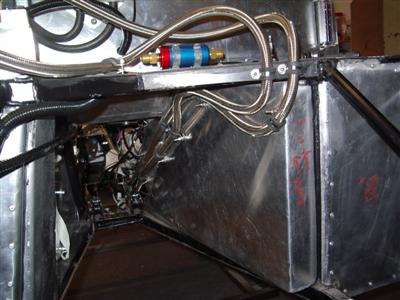
I will fit the connection to the filter, then remove the lines and flush through, before refitting and locktighting all the bolts. The final cuts and connections to the fuel rail will have to be done on the car.
Clutch
Having tried and failed to buy an ACT clutch (I could only find one place in the end that could supply them, and they wanted nearly Ł600, which I thought was getting a bit silly). So I've gone with the F1 in the end, at under Ł300. It's not rated for as much torque as the ACT, but should still be plenty enough.
It also arrived the next day, so can't argue with that. So now I just need to contact the flywheel people and arrange to get it all taken down there.
Wiring
Finally, I've done a bit more wiring - finshed the connector for the dash panel, added a relay for the fuel pump, and made associated changes in the loom. I also ordered and recieved an inertia switch - a clever little device which you wire into the fuel supply, and which will cut the power in the event of an accident. Just need to find a place to put it now.
17 March 2011
Finished the fuel lines, and fixed the filter in place on the battery shelf. I worked out the final routing by holding the fuel rail roughly in place - a bit of a guess since there's no engine to fix it to, but gets it close enough. I've left the two free ends uncut at the momement, until the fuel rail is in place and I can fix them finally. I also turned up two small ally posts to hold the clamps either side of the filter, to prevent any strain on the joints:

Once I'd got it all to fit, I stripped out both lines, flushed through with petrol, then refitted, with locktight on all of the clamp bolts. I also fitted corrugated trunking over a few sections where it the lines ran under/around the diff, just as an added protection against chaffing: