Pre-IVA-Finishing-Off
20th November 2013
The end of the year is fast approaching, seemingly faster than the end of the build but I'm doing my best! I've been rushing to finish off and get it into an IVA-able state. The temptation to bodge is very strong now, I'm trying to avoid it as much as possible. But at the same time I'm trying to reduce my farting around/staring at time to a minimum.
Harnesses / Seats
Both seats were bolted in for good; I had to make an angle iron frame for the driver's side as I'd done for the passenger side yonks ago. To ensure the seating position was right, I'd driven it up and down with various pillows and things wedged down behind the seat until I was happy with it. I am quite finikity about seating position. Once I was fairly happy with it, I drilled through the floor and bolted it in place, just to the ally floor. Then drove around to test it; it was fine, so then and only then did I make up the angle iron and bolt it all up.
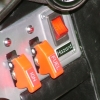
Harnesses were pretty easy, though took a surprisingly long time to fit. I chose FIA-approved Scroth Clubman II, based on advice about good features to have. I wanted an aircraft buckle types (both because they are easier to get out of than push button types, but if I'm honest, also just because they look cooler.) 3" shoulder straps are a good thing for comfort, so I'm told. And pull up (rather than pull down) lap straps are also A.Good.Thing. These were basically the cheapest ones with all of those features, I'm a fairly simple shopper. They're not road approved, but the IVA manual has been changed fairly recently to accept FIA approval.
They fit by means of clip on fittings, which fit to eyebolts that are screwed into the bosses on the chassis. Shim washers are provided so that the eye can be aligned such that the pulling force on them will be inline with the eye, not across it, so that there's no turning force on the bolt. A bit fiddly, made more so because the holes I'd drilled in the sides and tunnel weren't big enough, so I had to enlarge them all which was a bit of a faff.
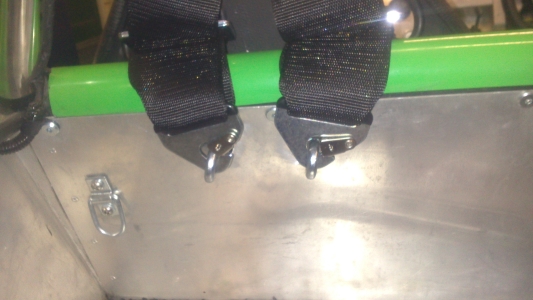
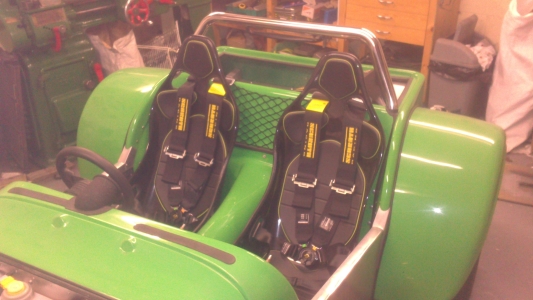
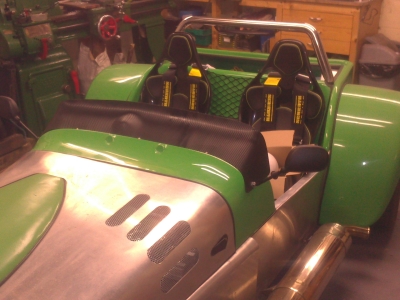
Look bloody great I think, and should be nice and safe of course. One has a slightly different buckle style to the other, though they both work in the same way, but I decided I didn't mind that. Since this photo I've made up some little loops of double-sided velcro (the stuff used for cable ties), to prevent the free ends from flapping around in the wind.
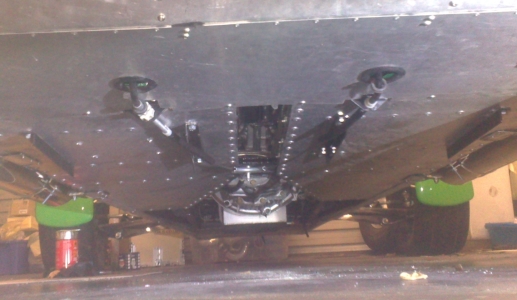
Underneath
I also needed to replace the speedo magnet which had come off. I'd used wurth last time (thinking that the flexibility would help withstand the forces), so this time I've used Araldite "Steel", which is specifically for metal. I managed to get at it from underneath, which was nice as I didn't really want to take the seats out again to lift the tunnel off.
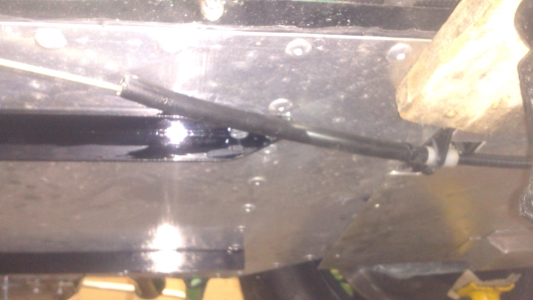
I investigated the handbrake cable while I was under there. There is very little clearance between it and the underside, especially with my seat frames in place, and it's a fail if it rubs when applied. So I put some fuel hose over it to protect it; hopefully that will be enough for nice Mr. IVA inspector:
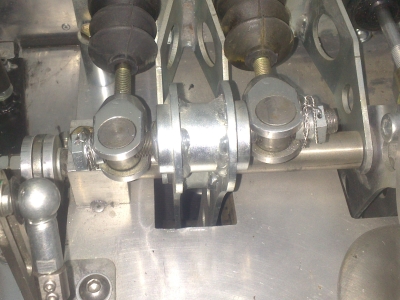
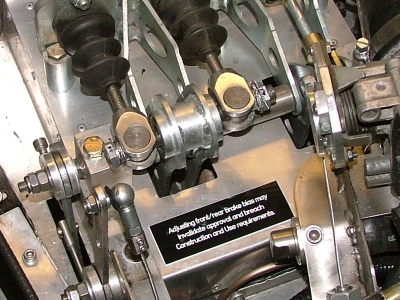
Brake Balance
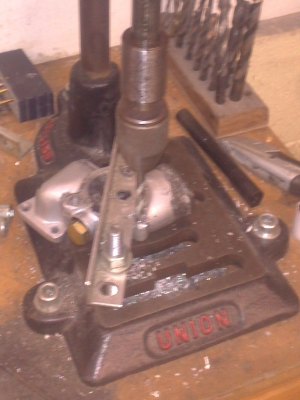
Having previously set the balance, I needed to fix the bar. At various times this has required roll-pinning, then welding, but currently just needs lockwiring according to the manual, plus the addition of a label with specified wording. So I drilled through with a 1.5mm drill (ok, two 1.5mm drills as the first one broke), and used some stainless lockwire on it. Note - stainless welding wire doesn't work, it's too springy! Proper lockwire has been softened so that it bends easily.
Indicators
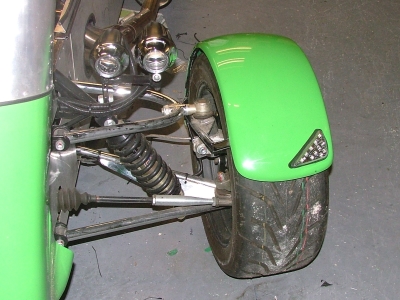
As I'd previously broken one of the indicators as it fouled the arch on full lock, I bought some new ones which are very slightly shorter, modified the brackets, made spacers, and longer bolts, to raise the whole light cluster up by a centimetre or so. This gave me a bit more clearance:
However on a test run around the road I decided I'm still not at all happy with it. With my weight in the car it looks to be virtually touching the arch, factor in a bit of camber and a passenger and it'll still foul I think. The front suspension moves a surprising amount, and I also found that using full lock is going to be quite common for parking and manouvering. So even if it gets through the test (which it might), I don't think it's going to be any good long term.
Back to the drawing board on that one. Playing around kept leading me back to the same conclusions I reached when I was designing it the first time, it's very hard to put an indicator with the front lights in a way that will be compliant with the angles of visibility - unless the front lights are put very high or very forwards, or I mount the indicators on stalks on the nosecone somewhere. ( don't want to do that as I'll have to disconnect them everytime I take the bonnet off).
So a re-read of the IVA manual and a peruse of the lights available has lead me towards fitting them to the front of the wheel arches. There have been mixed opinions about this - some have passed, others are convinced that the IVA manual section 20 forbids it, or that it's allowed, but that they will fail the angles of visibility when the steering is on full lock:
All lamps and reflectors fitted to the vehicle must be fixed and not
move by swivelling, deflecting or otherwise while the vehicle is in
motion, except for:

any lamp or reflector which by design can be deflected
to the side with the movement of the front wheel or
wheels of the vehicle when turned for the purpose of
steering the vehicle (See note 3)
...which tends to depend on how "by design" is interpreted. However, the newly added note 3 seems to be in response to my query regarding the fixing of side repeaters to the rear of the arch, and states:
Note 3:
These lamps should be checked with the wheels in the straight ahead position.
Which seems pretty clear that it's allowed, and that I don't have to worry about visibility on full lock. So that's my current plan; I've ordered yet more LED indicators, soft bendable ones, which I will fix on the front of the arch, assuming it doesn't look crap. I can run a cable from the repeaters on the rear, up the inside of the arch - will mean a small amount of re-wiring but should give a nice neat finish.
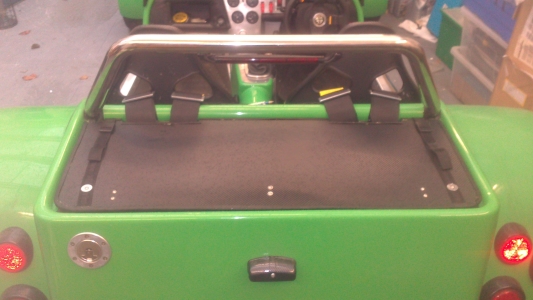
Aeroscreen Disaster
Fitting the aeroscreen was next. My plan is to have an interchangable aeroscreen/windscreen setup, aero for track, windscreen for the rest of the time. Thus it makes sense to go through IVA with just the aeroscreen and fit the windscreen later, as it's fewer things to be tested. What I did want to do was make sure that there are no fixing holes visible when the windscreen is fitted (don't mind too much the other way around). With this end in mind, I wanted to buy the windscreen up front, so that I could see where it sits and where the holes need to go.
Unfortunately, despite trying to buy one from Dax, after 6 weeks they still couldn't tell me when they might have one. Which is pretty useless/poor. So when a lightly-used one came up on the forum, I jumped at it. It meant a bit of a drive, but I could get it in a day. So nice one Dax, that's a sale lost.
I'd ordered some IVA compliant mirrors (there isn't a lot of choice for compliant ones, and they're all a bit goofy, I guess most people fit nicer ones later. The winsdscreen has them incorporated, so I only need them to fit with the aeroscreen. So I elected to use them as one of the fixings. They'd bolt through the aeroscreen and the scuttle, holding it on.
Not that easy of course - the threaded section on the mirror stalks isn't long enough. No problem, I'll just extend it. Oh, they use some motorcycle M10x1.25 thread I've never heard of (So that's 3 different flavours of M10 I've now come across!), so I had to order another die, and special nuts to suit.
Anyway, that done, holes all lined up, I drilled through the screen and scuttle and bolted the mirrors on. They were at a bit of a funny angle so I had to bend the stalks a bit (required vice+hammer).
That was fine, then I wanted to put 3xM5 bolts through the top of the scuttle, in the grove. Drilling through (after a 2mm pilot hole), the (new) drill bit snagged. So I stopped, and reversed it, and BANG! The screen cracked right across:
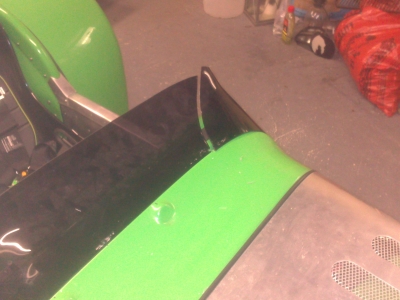
Piss. And also Arse.
Surprised me because it's acrylic and that's normally very friendly to drill, I find. Anyway, World of Suck.
I'd bought it from someone on the forum. Looking back through old posts, it was part of a bespoke group buy that someone organised, so getting a replacement is a no-no. It had already annoyed me a bit because it didn't really fit very well and I was generally not too impressed with it. BUT since Dax's farting around with the windscreen I didn't really fancy buying a new one from them either. So I elected to glue it back together, and do a vinyl wrap job on it to hide the repair as much as possible.
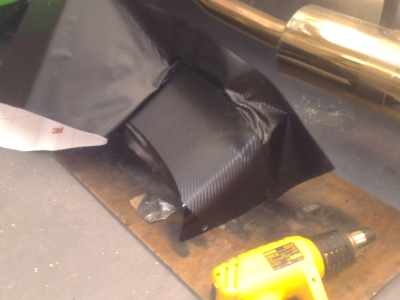
I glued with araldite - I'd had success doing this on an acrylic wind reducer for the MGB, and it held up fine. I gave it a good few days to set properly (inside in the warm), and bought some 3M "Dynoc" carbon-look vinyl, which is, by all accounts, the daddy.
It actually is pretty easy to use; apply heat with the heat gun and smooth it on. I was impressed with the stuff, it's very flexible and very forgiving - if you get a wrinkle, just lift off, a bit of heat, and it flattens back out.
That said, this is a rather complex shape and I didn't do a perfect job. One patch in particular I made a bit of a mess of as I nudged the heat control on the heat gun by accident, so it was faaaar to hot and scorched the vinyl before I noticed. (Top tip - tape down the heat control knob.) But never mind, it'll do for now. (I promised myself I'd never say that during the build, the desparation to finish is setting in.) I also didn't have enough to do the underside with, so I'll deal with the whole lot later.
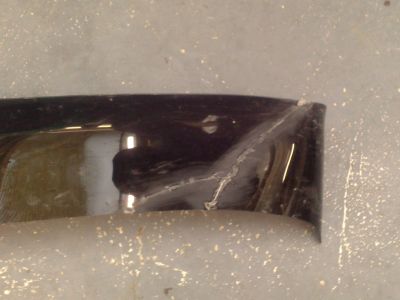
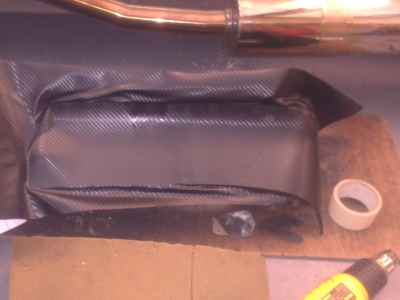
It does actually look pretty good (I think I prefer it to the previous transparent look), apart from the scorched patch.
Anyyway, it's on. I fitted a low rear-view mirror which bolts into the top of the scuttle, and the wing mirrors are fitted. Again I'm not hugely happy with the fixing - they are very prone to catching on the way past and I suspect that the scuttle could easily be damaged if somebody walks into one. They're also not really as solid as I'd like. What I will do later is make up a metal frame to sit inside the scuttle, with welded-on nuts for this and the windscreen to go into - like I did for the battery holder. This will make it all a bit more solid by spreading the load, and also mean that I can bolt each screen on and off without having to take the dash out, which is a right pain. Speaking of which...
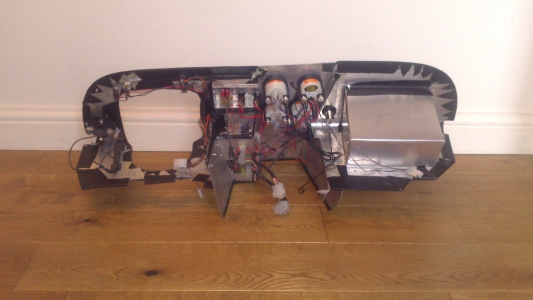
Dashboard
It was finally time to dismantle, polish, and cover the dash.
My first job was to take everything out and sand/polish the central section, which is to be bare ally. It took 2 1/2 hours, starting with 240 grit paper, then 400, 600, 1000, 1200, then Solvite metal polish (which is quite abrasive) and finally McGuires Metal Polysh [sic]. After which it's come up lovely, with all scratches removed, and a very smart look to it.
The side panels are done in leather. I'd bought a small, fine grained hide on eBay for less than 30 quid, which compares very favourably with the cost of vinyl alternatives. I'm not a fan of overly padded dashboards as you often get puckers and creases; but it was clear that with no padding, various rivet heads and edges would show through. So I used the thinnest padding in the missus' sewing box. I glued this on first, with evostick. Then glued the leather to the back edge, and stretched it over. Where there were odd edges or joins, I folded the edge of the leather over, to give the apearance of a sewn seam, and glued it on. We had looked at stitching but decided that some of the compound curves would be extremely difficult to get right without a great deal of practice attempts, so glue seemed to be the better choice.
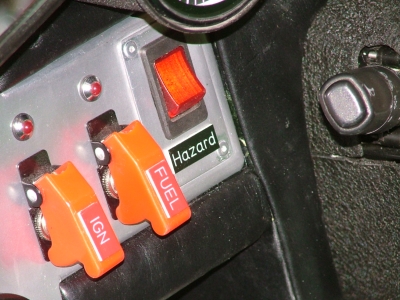
I also needed some labels for some of the controls. I used an online place that makes up engraved plastic signs to order, you just type in the text you want, choose a colour and size, and off you go. Very pleased with them, they look very neat, and just over a pound each.
I'm very pleased with the finished article. A couple of slight imperfections in the covering but I think I'm being overly perfectionist to be honest. As I said before, it's got a good "aircraft cockpit" thing going on, functional rather than symmetrical:
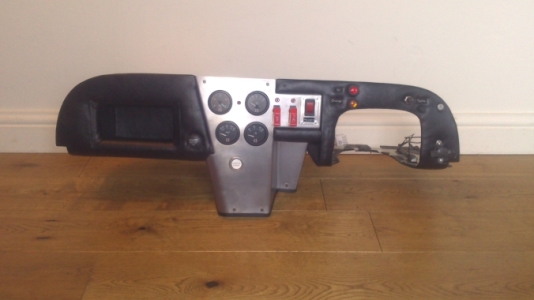
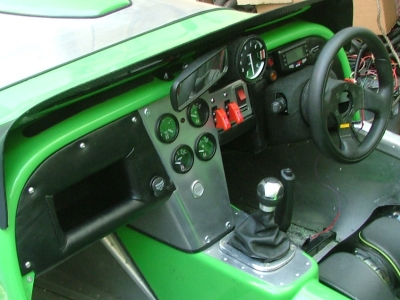


It's actually not quite finished here, I need one more label to go next to the brake light test switch, and there are two small side pieces to go on the outside of the bottom of the dash.
This was all good, but unfortunately, the oil pressure gauge appears to have stopped working again. I've swapped the sender for the old one and tested the wiring again, but it seems completely unresponsive. I'm convinced that the gauge itself is faulty; I've removed it and have ordered a variable resistor so that I can give it a bench test. While not needed for the IVA, I don't think it'll help my cause to have something so obviously not working on display.
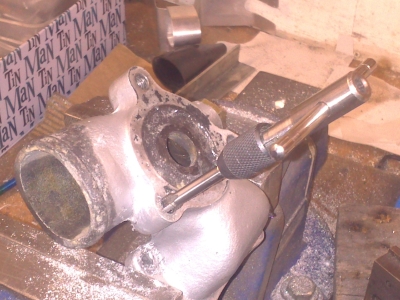
On a related note, the oil temperature sender in the sump plug wasn't working too well. The end didn't protrude enough (ok, at all) into the oil, so it was just measuring the temperature of the metal sump. While I was changing the oil and filter (the running-in oil having done its job, so it's in with some fully synthetic stuff), I machined up a new plug which lets the sensor protrude a lot further. We'll see what difference that makes. There's quite a long hole for the plug in the sump itself, so the sensor will still be masked a bit...we shall see.
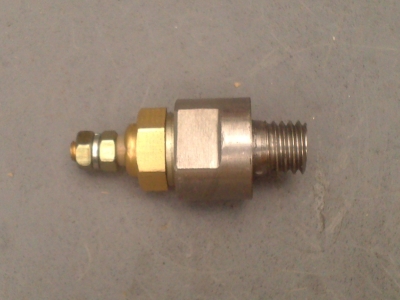
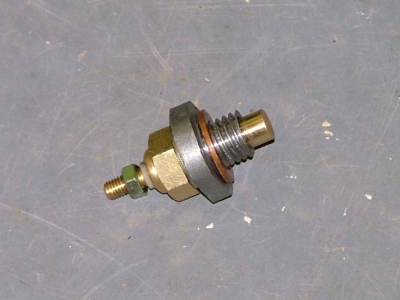 Old on the left, much slimmer new one on the right
Remaining "To Do"
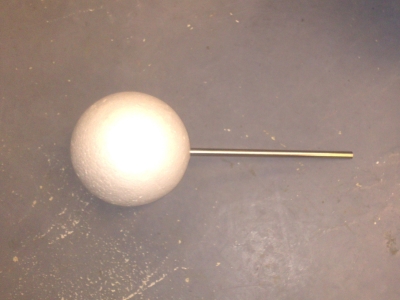
The main tasks left then are the indicators and gauge - hopefully both in hand. Aside from that, it's going round and checking the edge projections, and I've ordered a noise meter to test if I need to ram something up the exhausts. For the former, I came across a secret weapon: Polystyrene balls sold for craft purposes, which come in more or less the same sizes as the tester's "spheres of doom"
Briefly, the inside looks fine, and I've a few bits and bobs to trim/cover on the outside; the top edge of the aeroscreen, nut covers for the headlight bolts, a bit of filing off of the exhaust bracketry, and I'll need some wing piping to go along the bottom edge of the bonnet. Just a couple of night's work there.
Interlude
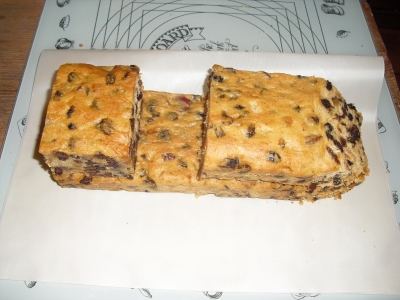
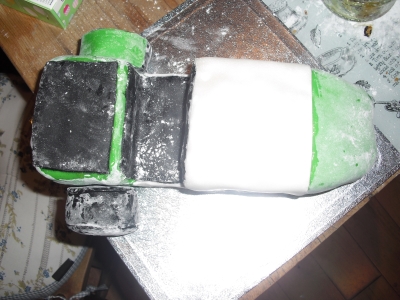
Apparently, I turned 40 this month. So much for my original deadline of having the car when I was 31! Anyway, the missus surprised me with the most fantastic cake in the shape of the car. Even the candles were hand made! So perfect was it in every detail that it deserves its own mini build diary:
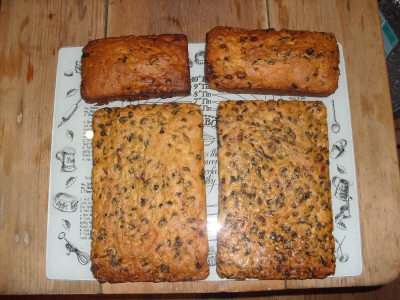
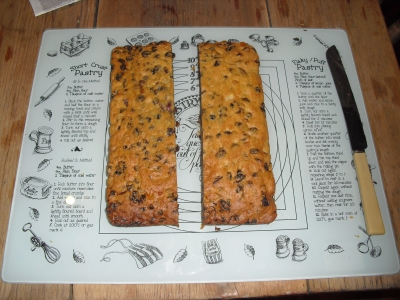

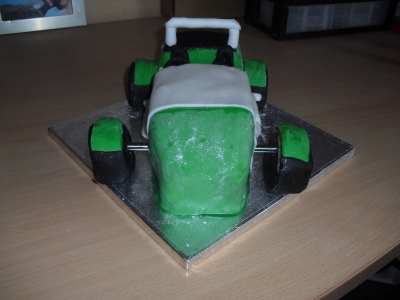
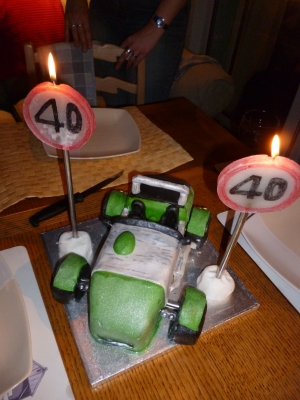
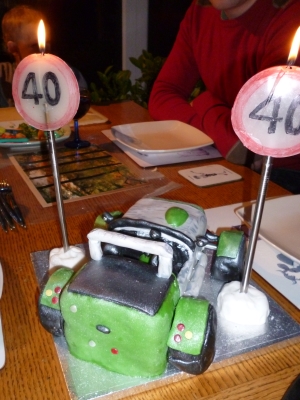
It has all the lights, mirrors, rev counter, everthing. Most tasty it was, too.
Indicators
December 2013
After being farted around by an ebay vendor (claimed to be UK but was blatently trading from China), I bought some slightly different lamps, motorcycle ones, from a genuine UK seller, which were much better anyway.
Fitting was no trouble, and the shape goes well on the cycle wings. I then spliced a new cable in from the repeaters, and run it around the inside of the arch to the new indicators - all protected by convoluted sleeving:
After going through all of that, I actually much prefer the look of these to my original versions. And it's far more practical and visible. So I'll call that a success - providing it gets through IVA of course!
Final bits
My run around with the testing sphere didn't through up too much in the way of sharp edges. I needed some trim along the bottom of the bonnet, a bit of wing piping sorted that. Also, a couple of plastic nut covers on the nuts on my headlight mounts, but they seemed to be the only exposed nuts outside the exempt area of the front suspension.
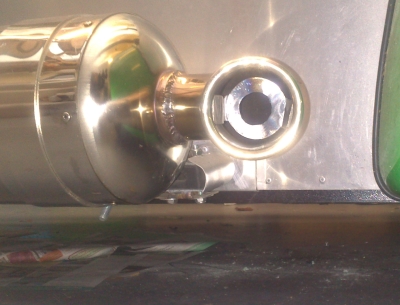
Two of the exhaust mounts could be touched by the sphere, they're behind the exhaust itself so I don't know if that counts; but anyway I've put ally covers on them to give a radiused edge:
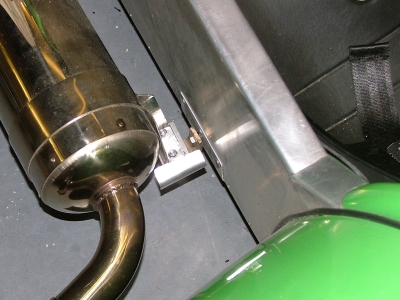
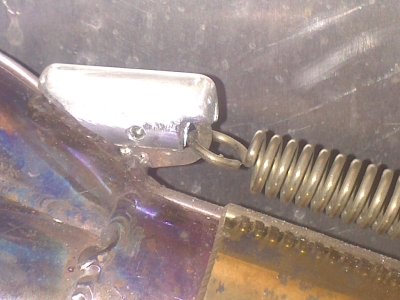
Another thing I'm not sure about is the mounts for the springs holding the exhaust together. I've rounded all the edges with a file, not sure if that will pass or not. Otherwise I guess I'll need to build a cover around the whole lot, which will be a pain:
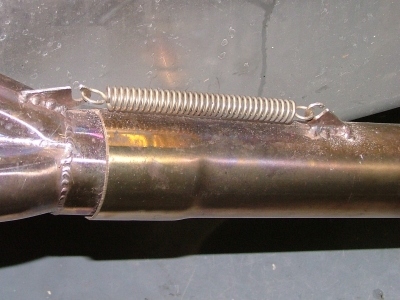
A bar in the nosecone to keep the sphere out of the pointy bits of the radiator and fan. This is just a stainless tube, bonded in with wurth, which seems to be the standard thing. I considered mesh but that was going to be pretty hard to do neatly, and I rather like the open nosecone look.

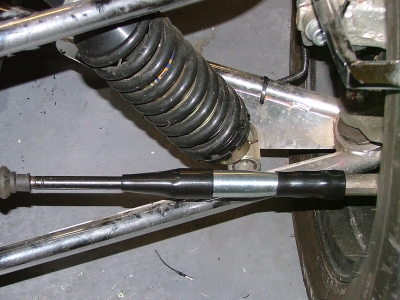
The biggest arse was the covers for the track rod bolts. The whole area inside the suspension arms is exempt, but the track rods aren't, which seems rather stupid to me, but anyway. The standard fix is to use pvc covers (which I believe are cable glands for armoured electrical cable) and slip them over. A complete pain in the arse as it meant redoing the tracking. Back when I started, people were getting away with pipe lagging and all sorts, but they've tightened up on things now. Looks neat enough anyway:
The mandatory "don't mess with it" label for the brake balance, and also one saying "DOT 4" on the brake fluid resevoir (not shown)
I engraved the VIN number on the driver's side chassis rail, at the front, as the IVA requires. I used the dremel with a round diamond engraving bit for this, after some practice on scrap, and it wasn't too bad. The round tip seemed easier to use than any of the pointy ones. A light coat of paint over it and it's still legible, and hopefully rust-proof.
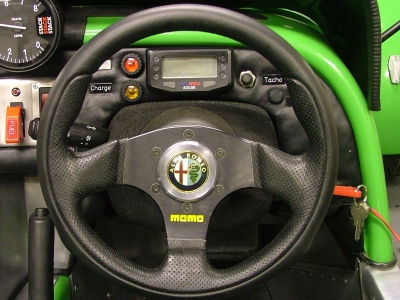
And the final piece; a centre piece for the steering wheel, turned up in aluminium, using the badge from the donor car:
With that, we cracked a bottle of champagne as, although there are more bits I want to do, it's finished as far as getting it on the road is concerned. The build phase is over, everything from now counts as an enhancement or modification :) I ordered the car 5 years and 7 months ago, bought the donor 5 years ago, and collected the kit 4 years and 7 months ago.
IVA Booking
In the meantime, I've booked the IVA. Gawd knows what weather I will get on the day; it's been pretty mild until a week or so ago, now it's rain and storms. As long as it's not torrential rain or snow I will probably survive it.
Unfortunately I found out a few days after sending the form in, that I'd made a mistake on the form (missed the first 3 numbers off the VIN number), so I am currently waiting to see what will happen about that. They've cashed the cheque anyway!
Final, final, final bits!
December 2013
OK so there were just a few more bits to sort out! One is a boot cover - I have ordered a soft one from Dax and thought I'd wait to see what IVA date I got, and if the soft one wasn't going to arrive in time, do something else. Well, it isn't due until the end of Jan according to Dax, so I had to make something temporary.
I didn't want to spend much time on it, nor did I want to drill any holes in the boot tub which I wouldn't need later. So I came up with the following cunning scheme:
The cover is made of plywood, covered with more carbon-look vinyl and edged with rubber trim. I didn't use Dynoc this time, but a cheaper copy. And you can certainly tell the difference - Dynoc recovers its shape when heated, this stuff did not - I'd certainly recommend spending the extra if it's for anything good. This looks fine but it would be much harder to get a good finish on a curved shape.
At the rear, I made 3 spring clips out of strips of stainless - these just pop under the lip of the boot tub and hold it in place:

The front is then held down by some nylon straps - actually replacement belts for walking trousers, bought for 2 quid apiece from Mountain Warehouse. One end is bolted to the boot cover, the other bolted into some existing tie-down points in the boot.
All in all, it don't look bad - as long as you don't inspect it too closely! It'll do the job until the proper one comes along anyway.
Noise
A break in the rain meant that I could get the car outside, and with the missus' help, tested the noise with a decibel meter I'd bought. Only about 15 quid so I figured it was worth the investment. At 75% of max power rpm (4800-4900), and 500mm from the exhaust outlet, I was getting 101dB on the driver's side, and 102 on the passenger's. I'm guessing that the extra is because of the air intake on the passenger side. Anyway, the limit is 99, so I was a bit over. Surprising with such mahoosive silencers on it really. Anyhow, all of the decibel reducers you can buy to stuff up the exhaust need a foot of straight pipe to go in, which I don't have. (OK, all but one type, which costs 50 quid apiece). So instead I took a couple of penny washers, enlarged the hole out by "some", and welded a couple of legs to each. I then stuffed these up the pipes and was rewarded with a drop to 97-98dB. So hopefully should solve that particular problem. Interestingly, I couldn't really tell any difference by ear.
Oil Pressure Gauge
Now there's a story. As mentioned above, it wasn't working again. My variable resistor arrived, so I dismantled the dash (which I've made rather fiddly despite my best efforts to the contrary - it takes about an hour of swearing to remove, 90 minutes of more obscene swearing to refit), took the gauge out, and tested it. Worked perfectly. Tested all the wiring, everything seemed fine - no obvious loose connections, and using a multimeter I could watch the resistance on the wire to the sender drop as the engine fired up, exactly as it should.
So I put it all back together, and lo! It didn't work, again. Hmmmm.
So, a few days later, it all came out again, I tested everything, nothing seemed wrong anywhere. I was convinced it had to be electrical, either inside the gauge or in my wiring, but everything checked out correctly again and again.
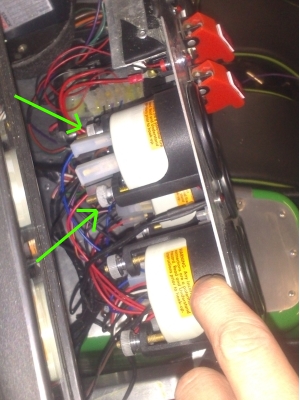
So I put it back together, but this time tested it (by starting the engine) at every point during the reassembly. It all worked, up until I actually fastened the gauge into the dashboard, then it stopped. Aha! I loosened off the screws about an 8th of a turn (just thumbscrews which clamp the gauge in place - arrowed below), and it suddenly came to life. Apparently I'd been nipping the screws up too tight, and must have been just bending the casing enough to trap the needle!
I was a bit surprised by this, but very pleased that there was nothing wrong with either the gauge or my wiring. I must have spent days chasing this bug.
No wait, there's more....
Firstly, I got an IVA date. 3rd Jan 2014, probably the worst time of year but fortune favours the brave and all!
I got worried about the exhaust spring brackets, and a few posts on the Dax forum reckoned that they would probably fail...so I managed to squeeze a few hours over Christmas to make up a couple of covers. These are bits of ally bar, slit with an angle grinder so that they fit over the brackets, and with an M4 grub screw going in the side to hold them on. I then just filed them so that all the edges were nice and rounded.

So that was ok. Then I looked under the bonnet, and noticed that some coolant had leaked out. It seemed to be around the thermostat housing. Anyway I cleaned it up, run the engine up to temperature, no leaks to be seen. Puzzled, I left it to cool down.
A day or so later I looked again, and guess what - more water had leaked out. But only when it was cooling down it seemed...how odd. Anyway, it was definately comming from around the thermostat housing, so I thought I'd just make sure that the bolts were nipped up tight.
First one was a little loose perhaps, so I gave it another quarter turn or so. The second was much the same, so I turned it...and was greated with that horrible feeling of it just going round and round, and not getting any tighter. The sodding thing had stripped the threads! Arse, and I only had a couple of days at home before the test.
Nowt to do but strip it down and have a look. The bit with the threads in was the outlet from a 12v engine which had taken me ages to find, and then had to get repaired, so I couldn't just get another one...there aint many left. Fortunately, the holes were blind, but there was a good 10mm of metal under them. So I was able to just drill all the way through and tap it, then fit longer bolts, to give plenty of new thread. A bit presurising as it wasn't something I could afford to screw up!
Cleaned it up, fitted it all back together using lots of silicone sealant on everything, then went away for a few days. After struggling with oil leaks for so long, I am very keen to give the sealant at least 24 hours to cure properly before putting it under stress, so this was ok. When I came back, I ran it up to temperature again, no leaks, and nothing the next day either. Dodged a bullet with that one I reckon.
I also had a trip down to Demon Tweaks just after Christmas to buy a helmet; so with that I was all ready to go