The Plan
18th December 2012
I'm feeling very much that I want to get the thing finished now, like it's been going on long enough. I've not really felt that pressure until recently, being happy to bimble along. But I suppose that now the end is getting to be in sight, I want to get there.
The only thing stopping me really is cashflow; I've spent what I had put aside for the car, so now what I have is whatever I have spare each month. So based on some rough estimates, my plan is now:
- December - Order radiator, get sump shortened.
- January - Water pump, fans, sort out cooling system.
- Feburary - Timing kit, time the cams in, fit oil cooler and finish oil system.
- March - ECU and engine bay wiring
- April - New injectors, finish engine bay
- May - Gauges, Engine Start
- June - Engine run in and rolling road tune
- July - Front lights, finish wiring, finish dash
- August - IVA
Assuming an IVA retest, I could be on the road for setember/october, which is a bit late in the year, but unless I win the lottery is looking about as fast as I can go. It seems like not a lot, but at the same time, a massive hill to climb.
So in the meantime, I've ordered the the "high performance" radiator from Dax - this is the one used for the v8s and is proven to work well, I don't want to mess around and risk overheating all the time, so I figured I'd go with the off the shelf option. Unfortunately, there's a bit of a lead time, so it'll turn up....sometime.
I've also found a motorsport fabrication company that can shorten the sump, I need about 1.5" taking off the bottom and some baffles putting in, to get me to the 80mm ground clearance that people seem to quote as the minimum. So I've removed that and packed it off. Annoyingly, I broke the end off of a sensor doing it, I think it's the oil temp sensor, so I'll have to sort that out at some point. While it's off, I've taped some bin bags over the bottom of the engine to keep my big end clean.
While I'm waiting for all that, I've been doing odd bits, like the rear reflectors, some IVA-related stuff, and some trimming. I'm really scratching around for bits to do, but in reality there are a lot of odd jobs to sort out. It's frustrating when you want to get on with the big bolt-on bits that make you feel like you're actually getting somewhere though.
Rear Reflectors
I started farting around with some GRP reflector plinths a while back, and have continued farting around as a background task in the meantime. The initial attempts using GRP filler didn't end up so well, so (as with the bonnet bulge) I decided that "properly" was really the only way to do it.
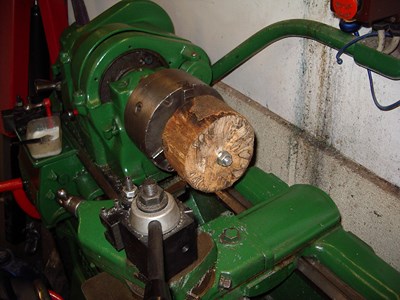
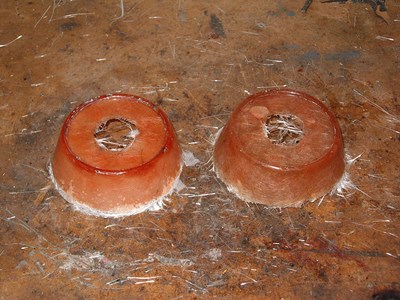
So, I'd need to make a buck, a mold, and then churn out the two plinths as GRP shells. A material for the buck had me stumped for a bit, as I'd need quite a large lump of "stuff". I eventually decided on a bit of log, which I turned to shape in the lathe. I ground a bit of HSS to have a simple rounded end and a bit of back rake, copying the profile of a wood turning chisel, and it worked a treat:
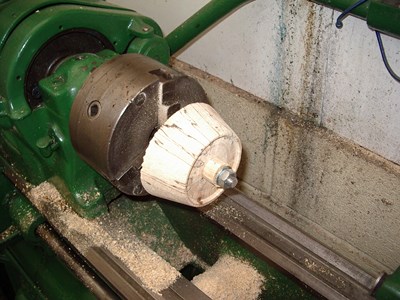
The wooden surface wooden be smooth enough to take a mold from See what I did there?, so I thought maybe I'd use filler and paint. But then I had a brainwave - why not coat it in laminating resin? So that's what I did. 5 coats in total, I put the lathe on to turn at its slowest speed while it dried so that I got an even coat:
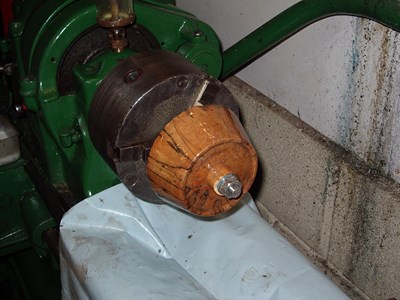
Then finally, turned it down and sanded it to get a nice, smooth finish. It was quite attractive actually, like a very thick coat of varnish.

Then I waxed it up and took a mold from that, which worked fine, and then made the final parts from the mold. Much filing and sanding to fit them to the arches, a touch of filler to cover any belmishes, a few coats of paint, and lo:
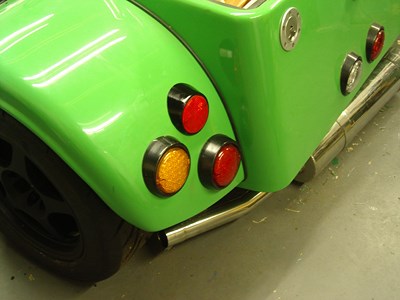
I think it might have been a bit less "in your face" with black arches, as everything stands out against the green rather heavily. But I'm more concerned with whether people can see me braking / indicating, which they certainly will be able to! I was torn between black and green arches at the time I specified it, but I figured that they'd be fairly easy to paint later if I got the urge. I like the look of the tripple cluster though, it's turned out as well as I'd hoped.
IVA Bits
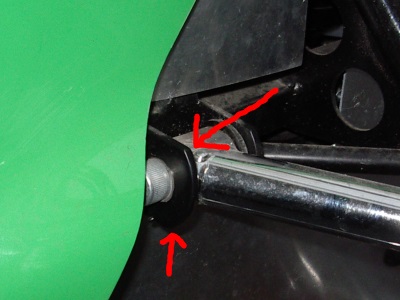
I also started having a look at some of the IVA radius requirements, around the front suspension. I made a 100mm radius disc out of card (they use a sphere, but a disk will do for checking as long as you remember to check every angle). One bit which I've seen people fail on is the top wishbone mounting bracket, which for some reason isn't rounded like the others. So I took a file to it. Take note, this would be MUCH easier to do before you put the suspension on! The other brackets are covered by my infil panel, so no worries there.

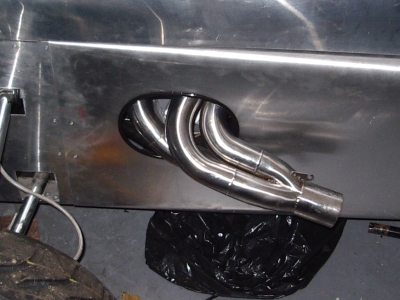
Another bit I picked up with the disk was part of the edge of the exhaust hole; sheet metal edges "must be turned over", you can't have uncovered edges that can be touched with the sphere. So I've put some edge trim around it; not sure if it'll stand the heat or not but there's only one way to find out...
Trim
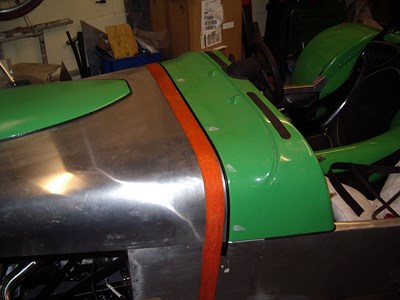
Also finally got around to doing the bonnet edge trim. I'd originally stuck this to the bonnet as per the manual, but I found that it peeled off at the edges fairly quickly. Sticking it to the scuttle seems like a better idea, so I did that. Unfortunately I'm left with a bit of a mess on the underside of the bonnet where the old trim was, will have to sort that, somehow. Here it is, the strap is holding it down while the wurth sealant dries:
Apart from that, I've made a start on making up some carpets, since I had a couple of rolls I'd (very optimistically!) bought at Stoneleigh 18 months ago. So with little else to do until the radiator gets here, I figured I'd do some of that. I'm not going for the "full carpet" as per the standard kit, just a bit on the floor and outside of the cockpit. The tunnel and rear bulkhead will remain uncovered to let the green-ness shine through. I'm also going to fix it with press-studs, so that, when it inevitably gets wet, I can just pull the carpets out to dry. So far I've cut out the shapes for the passenger side, will do the driver's, then the missus will be giving me a sewing machine lesson so that I can put some edging around each piece to prevent it fraying.