
Exhaust
19th October 2012
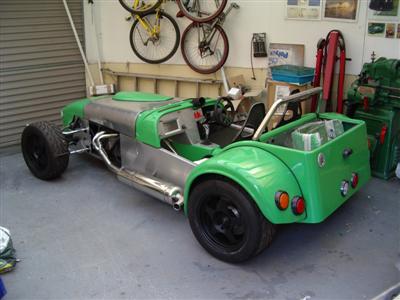
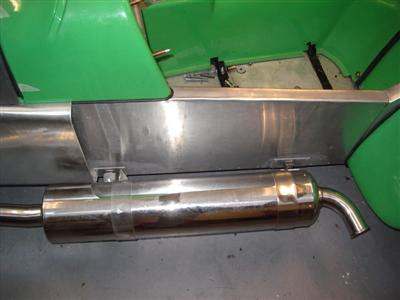
A brief update to say that the car has had its 10 days holiday, and is now back complete with two rather shiny exhausts:
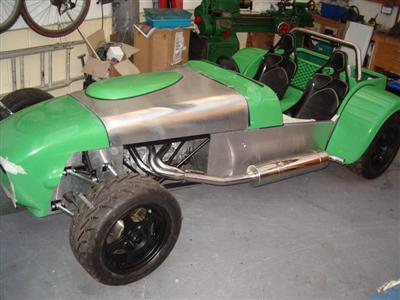
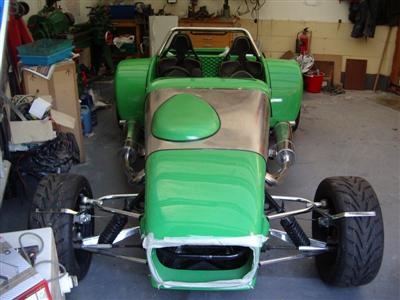
I'm very pleased with them, they look very well made and I like the way they've swooped the pipes back. The catalytic converters have been incorporated into the silencer cans so that I don't have any "unsightly bulges".
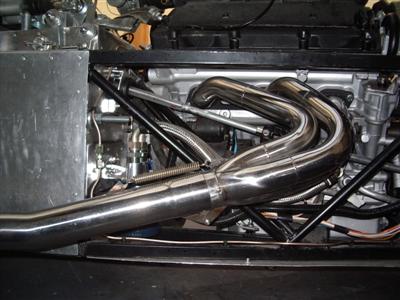
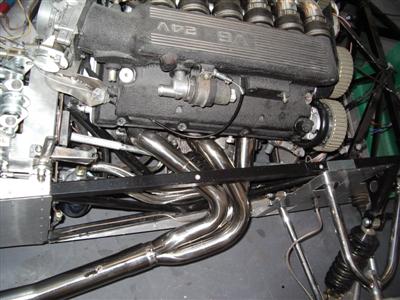
Nice neat equal length manifolds: (nearside)
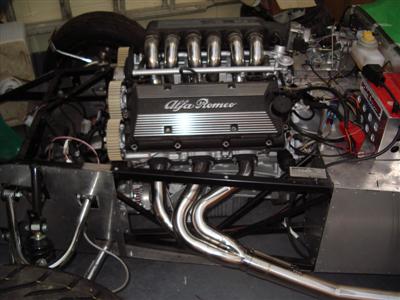
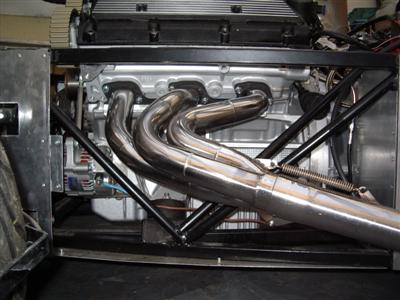
Offside: A bit of a sudden bend to clear the steering column, but not much more than on the standard manifold.
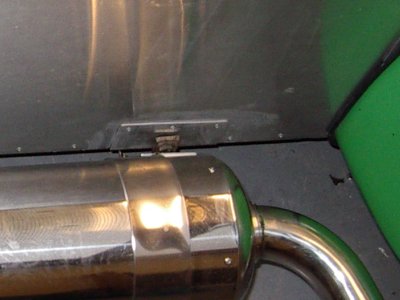
One thing I wasn't expected was for them to build me custom mounts for the silencer. I thought I'd have to make my own - obviously it will have cost more, but they've done a nice job. They seem to have welded spacers into the chassis rail and bolted through, whereas I'd have gone through the floor bars, but it looks a proper job so I'm not complaining.
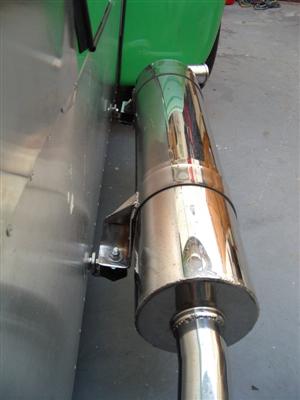
So that's a pretty major piece done. It's also emptied my wallet in a rather shocking manner, but that seems to be par for the course with this lark.
Oh Dear...
18th November 2012
A bit of a gap since the last entry, and there's a reason for that. My comments above regarding the silencer mounts being a "proper job" turned out to be a looooong way from the mark. Rather than welding the mounts in as I'd thought, what the chap had actually done is drill two 22mm holes into the 25mm chassis rail, then fit a loose spacer. This massive hole for a poxy M8 bolt! Given that the rail has 2mm wall thickness, this completely took out the side of the rail. In the second pic below, I've removed part of the bodywork so that I could get at it:
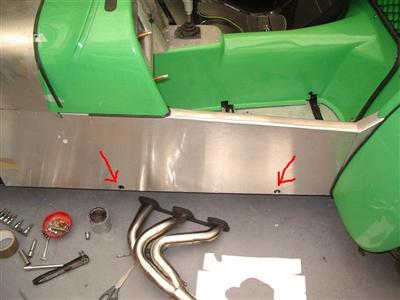
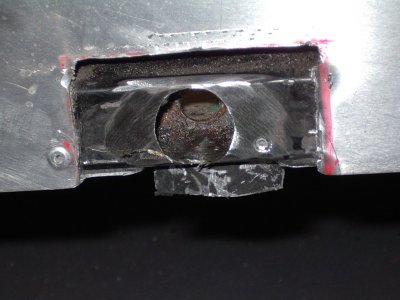
Note also no attempt to waterproof it, so the thing will fill with water, and rust for fun as soon as it goes outdoors.
This didn't look at all good to me, so I spoke to Dax, who confirmed my worst fears, in that this was "disastrous" for the chassis.
Much discussion then ensued, the outcomes of which were that Dax (and the good people on the locost builders forum, where there is a lot of welding and chassis design knowledge) helped me come up with a way of repairing it; and I agreed some compensation with the exhaust people. In fairness to them, they were quite helpful about it all; I'm just staggered that anyone with the skill to fabricate exhaust systems like this could make such a boneheaded mistake.
Anyway, I decided to repair it myself, largely because I would care more than somebody else, and secondly because I didn't really want to have to ship it somewhere, again.
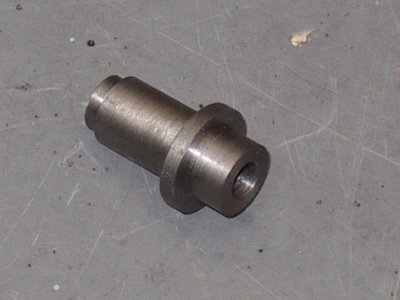
So, to the repair. This consisted of making bushes to fit the holes, which would then be welded in place. This would, by all accounts, return the rail to full strength. Partly for my own piece of mind, and partly to get a bit of welding practice in (since I'd not done any for a bit), I made some test pieces up, in half size, from some metal oddments I had lying around. I then subjected these to various types of brutality with big hammers until I was convinced that it would indeed be as strong as it was before. Obviously I can't exactly replicate the forces on a rail in a spaceframe with such primative techniques, but it was enough to show that a repaired rail didn't seem noticably weaker than an untouched one.
One of the bushes shown below. I decided to thread the bush, so that the mount would screw directly into it, rather than bolting through - this way I don't have a nut protruding into the interior. I was advised to make the flange similar in thickness to the wall thickness of the rail it was being welded to, to prevent stress raisers, so it's 3mm thick compared to the rail's 2mm.
Before I could weld them in, I had to strip back the bodywork inside and out, and the floor, and grind the powdercoat off. Taking a drill, hammer and chisel to my carefully made body panels was not a pleasant thing to do.
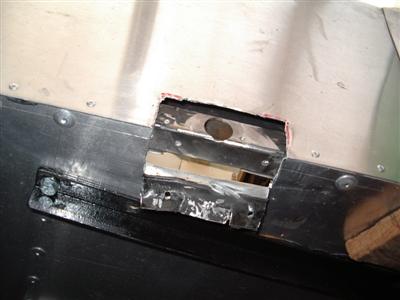
Then I could weld the bushing in, along with strengthening plates where the damage was particularly heinous.
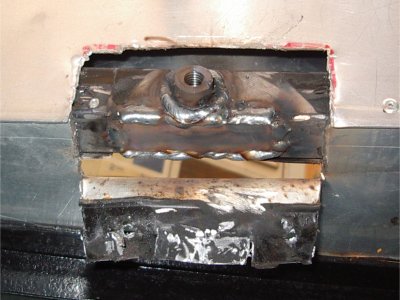
I then gave it all a couple of coats of paint, before making up some aluminium patches which were rivetted on along with copious amounts of wurth. I won't say "good as new", because it isn't, but I don't think it looks bad in the end. And more importantly, shouldn't fall apart.
Exhaust Cut-outs
So that was all pretty sucky, but it's sorted now. While I had the exhausts off, I figured I'd make the cut-outs in the side panels. I did this using cardboard templates, tried a few different hole shapes until I settled on a simple oval which seemed to look best. Then transfered the template to the side panel, and chopped it out with the power nibbler.
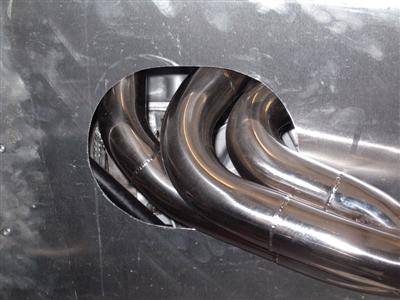
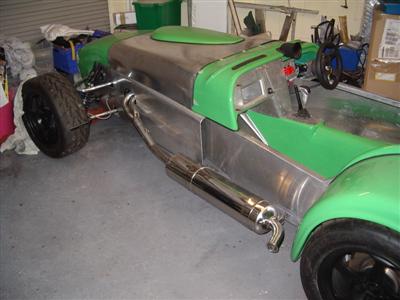
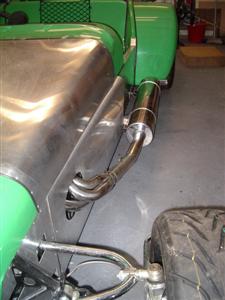
It's a bit small in the photos, but adding the side panels and exhausts has really improved the look of the whole thing; looks very purposeful. The slight downside is that, without cutting a much bigger hole, it's necessary to loosen the manifolds in order to get the sides off and on. Not really a problem once it's all finished, but for now I'll need the sides off for access, so I can't bolt the exhausts on properly yet.