Nibble, nibble
Sides & Front Suspension
28th March 2010
First job was to put some fixings on the scuttle - I'll be taking it on and off a lot and I don't want to be having to measure it every time. The manual suggests the use of self-tapping bolts, but I'd rather not use them if possible. So I elected to use M6 rivnuts. I just put a couple in for now to tack it in place.
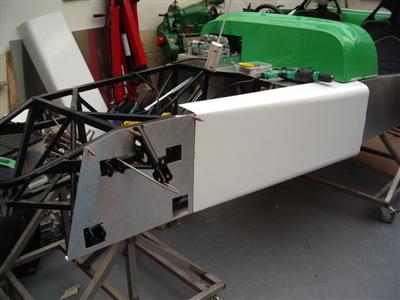
I measured up for the sides, then decided to have a look at fitting the rear tub properly. This turned out to be quite a long job, taking a couple of nights. In theory, the two "horns" of the tub just slot over the tops of the GRP corner panels. In reality, there's a lot of bending, forcing, and horrible cracking noises. I approached it rather gingerly at first, but eventually overcame my worries. It goes on, but you do have to be a bit brutal.
Then followed a long process of trimming with the dremel and angle grinder until it all fitted properly.
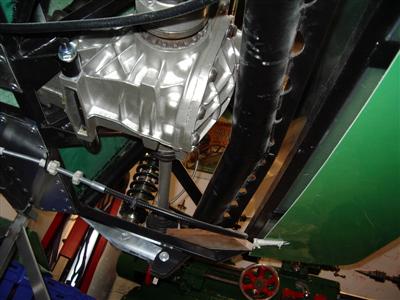
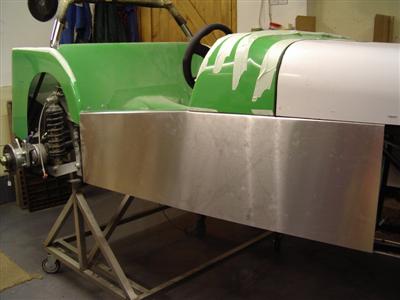
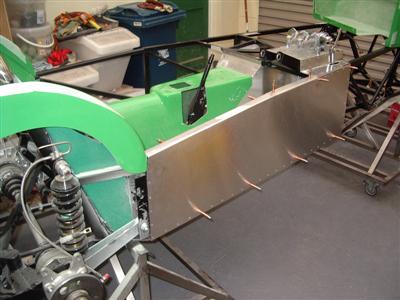
A couple of days later I got some ally sheet from my local stockist - I went for 1.2mm which is the same as the Dax-supplied ones.As well as the sides, I got an extra sheet, because I've also decided to panel over some of the underbody of the car - particularly just behind the nosecone, and under the rear tub. The latter is often described as a parachute, and it's easy to see why from under the car (below). At the nose, I'm guessing, but it looks to me as if there will be massive turbulence immediately behind the moulding; a flat panel will effectively extend the bottom of the nosecone and this may help this and improve draw though the radiator. Later, I may cover the transmission tunnel and engine bay as well, but that must wait until the engine is back in.
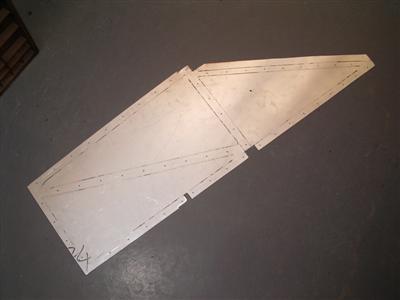
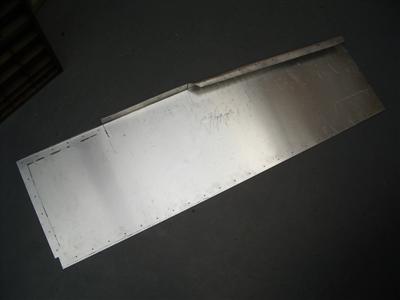
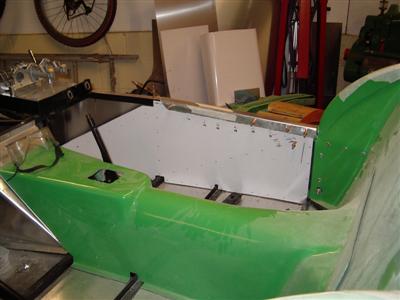
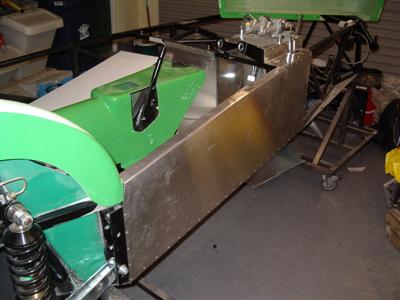
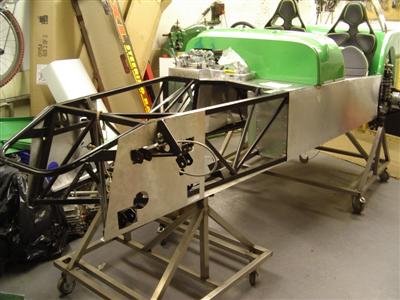
So, onto the sides. To start with, I used the panels dax supplied to make panels for the insides. That was straightforwards enough because they were just flat.
The outside panel is rather harder. In order to make it meet the scuttle where it overhangs, I'm making a flange at the top which will then wrap over the top of the chassis rail and down over the inner panel. This will hold the outside top of the panel further out from the chassis (about 10mm) so that it meets the scuttle overhang. At the bottom, it's just fixed directly to the chassis, so there's a gentle slope outwards from bottom to top. This is all further complicated by the fact that the chassis sides aren't straight, so it all has to bend in 3 different planes. But the bends are very slight, so just allowing the panel to bend naturally around gives a nice, barely perceptible curve to it all. Finally, I have to think about the flared side panels which must fix on top of it all, and which I want to be easily removable (so not rivetted under several other layers of bodywork.)
There are a huge number of holes to mark out and drill, and lots of nibbling and filing. Also, since this is a highly visible area, I'm making sure that I have wing piping around all of the visible edges. So a long slow process, I've spent about 10 hours on one side so far, with probably a few more to go. At least the second one should be quicker as I'll know what I'm doing by then!
06th April 2010
Not much garage time over easter because I had to build a greenhouse instead. Seems that everything involves drilling holes in aluminium at the moment! Anyway, I did manage to finally fix the driver's side inner and outer panels. This was the usual process of grinding off the powdercoat, applying wurth, and applying the panel and rivetting on. All done in about an hour and a half. Beforehand I'd given the car a good hoovering to remove all of the GRP dust and metal filings which had accumulated.
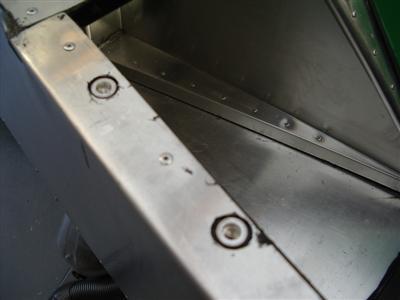
The way I've done the panel gives a line of rivets front and back, both of which will be hidden (under the side panel and wheelarch respectively), and a line along the bottom, which will be behind the exhaust. So the panel should have a nice clean appearance with no, or very few, visible rivets. It would be possible to hide even these, by wrapping the panel under the bottom of the car and rivetting it from underneath - but since the floor is already rivetted on, there isn't much room - and I don't want to be drilling rivets out and filling the chassis with lots of rattly bits of metal. I'm happy with the (very minor) compromise of having a line of rivets along the bottom - most cars will have this anyway.
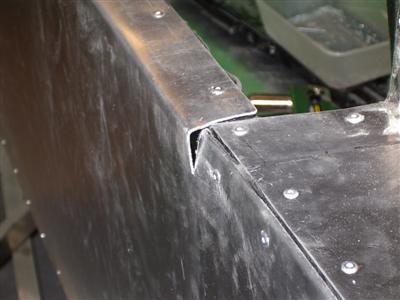
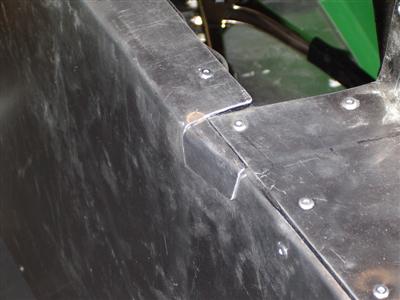
Towards the front of the panel, I had to bend it so that it lies flat against the chassis. This required a small slit in the aluminium which results in a gap (below, left). This will be hidden deep inside the flared side pod, and is small enough that it could just be filled with wurth, but in the interests of doing a "proper job", I knocked up a small aluminium cover for this which I'll just bond on (right).
So that's one side done...now onto the next.
14th April 2010
Second side completed, in considerably less time than the first. That feels like another milestone completed, another definate "chunk" done.
So what's next? I'm still waiting for news on the engine, and for my new fuel tank, so fuel lines, clutch, propshaft are out really. I can carry on with bodywork things and fit the flared sides; I've got my underbody panels to fit as well. I need a catch for the bonnet, I could start on a dashboard. Or I might take a break from ally bashing for a time - there's front suspension, I could start on the wiring, get the brakes on, or the steering rack in. Have to see what takes my fancy...
19th April 2010
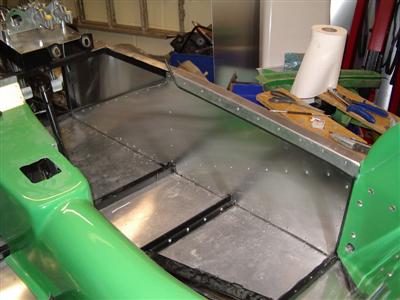
I kind of just carried on in the end, and fitted the footwell top panel. That done, I thought I'd put in the fixings for the scuttle, and check that it all lined up properly.
Although the manual calls for self-tappers to hold the scuttle on, I didn't fancy that much, so used M6 rivnuts instead. I recessed them by cutting holes in the ally sheets using an end mill in the dremel, so that the scuttle would have a flat surface to sit on:
This worked nicely; I put 3 down each side and 4 across the front, with M6 stainless cap head bolts. It's worth mentioning that the ones in the side do a lot more to hold it in place than the ones at the front, because of the way the moulding can flex. Had one slight issue where one of the rivnuts hadn't seated properly, and spun in its hole when I was screwing in one of the bolts. This was a real pig, as it meant that I couldn't unscrew it (as the rivnut just spun around). So I had to grind the bolt out, and rather brutally drill and hack the rivnut out. Predictably, half of it fell into the chassis - no way of getting it out, so I had to resort to squirting in a big blob of wurth to stop it rattling around.
On saturday, had a most pleasant sunny afternoon on for the NW Dax Owners Club meet. Not been for ages, so it was good to look over some cars with a bit more knowledge about how they went together. One thing I noticed was that the car bodykit has infil panels which fill the sides behind the front suspension. My ally kit doesn't so I figured I'd make some, then put the front suspension on. Then I'll also be able to fit the side pods in their final position.
A bit of work with a cardboard template, then a couple of hours of gradual cutting and filing, and I had a panel which fitted pretty nicely around the suspension pivots:
This wraps around the bottom and will be rivetted upwards into the small triangular infil panels I fitted way back when doing the floors. If I'd know that I'd be doing this back then, I wouldn't have bothered with the triangular panels, and just extended the side panels round. Doesn't really matter, but it would have been easier and a bit nicer. Not that anyone will ever see it.
 Underside of the panel, showing how it fixes to the triangular infil panel (shown in purple).
21st April 2010
Have almost finished the panel for the driver's side, and ooops! Realised that I haven't cut a hole for the steering rods to go through. Good job I hadn't rivited it all on yet. I think I'll fit the rack and see how it's all going to line up.
01 May 2010
Just over a year since I started building, and 18 months since I started stripping down the alfa. Blimey, time flies. Still, spring is definately here - at the top of this page I was still getting togged up in thermals, coat, hat and gloves before going into the garage of an evening, now it's just t-shirt and jumper, far more pleasant.
So, I had to fit the steering rack to work out where the holes needed to go. What I'd expected to be a 5 minute bolt together job turned out not to be, as usual. The kit contains two nice machined ally clamps to hold the rack on. First problem, however, was that they didn't fit - obviously machined to nominal tollerances, and the rack itself has all manner of moulding lumps and bumps. So I had to file and mill both rack and brackets before they would fit together - I've left it as an interference fit as play would obviously be bad.
Now the manual mentions that the rack goes in a pair of rubber bushes, but after going through everything, I couldn't find any. So I went back to read a few build diaries, and Alex came up trumps. There are no bushes anymore, just two roughly cut nylon shims, of different sizes. For information, here is where they go:
So then it was a simple matter to bolt in place, and measure where the holes needed to go. Then the usual cutting and filing the panels were nearly finished.
Before I rivetted them on, I thought I'd better check that I'd be able to get everything in and out (like, er, the steering rack), and actually do up all of the suspension bolts etc. So I clecko'd the panels in place, then roughly fitted rack and suspension. Had to relieve a few of the holes a little so it was a good job I checked! Then it was the usual wurthing and rivetting.
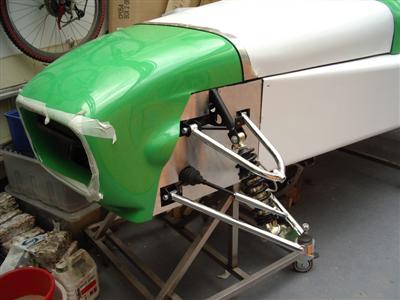
Next day, it seemed a shame not to carry on, so I set about installing the steering rack proper (now easy since everything fitted), and the front suspension.
The lower suspension arms carry a large balljoint which needs to be pressed in. It's rather bigger than the ones in the rear de-dion arm, and I didn't fancy my chances too much. So I dropped them off at my local independant garage who I'm on good terms with, and they pressed them in for me inside of an hour, for a few quid apiece. With that done, there are two of the smaller metalastic bushes to press in, as per the diff and rear suspension arms. Now I've had a bit of practice with this, they only take a minute or so each
Then, with a bit of help from the rubber mallet, the arms just bolt on to the chassis. I haven't torqued up the upper arm yet, as there are SVA bars and things which use the same mounting bolt.
On a roll, I moved to put the coilover on. The bush in the lower mounting needed filing down a touch before it would fit into the lower wishbone. As with the rears, the real problem is compressing the spring to get the top cap on. I had a quick look at doing it with ratchet straps as I did before, but due to the sloping shape of the wishbone, it doesn't really look "on". Fortunately, it's Stoneleigh show at the weekend, so I will try to pick up a spring compressor there and do it proper, like.
The other pain is that I don't seem to have the right sized bolt to go on the upper balljoint. This is the same item which holds the centre of the de-dion arm in place, and as I recall, I had to ask Dax for a new bolt there - I've got three which are almost right, but they are metric rather than imperial, so I guess someone put their hand in the wrong parts bin. So I need to pick up a couple of those as well. Other than that, good progress I think. I'm pleased with the look of the infil panels, worth doing I think even though it took an extra couple of weeks. I just need to fettle the front a little, so that the nosecone sits properly.
And Finally... Engine News
My man tells me that:
- The inlet ports are oversized for the valves - so there's not really any flow improvements to be made by reshaping the ports. This does fit in with AHM's claim of 300hp on standard heads, so is not that surprising. Fitting larger valves is the way to go, but these are looking difficult or impossible to come by. Still waiting to find out if he can source any.
- The exhaust ports can be cleaned up, but nothing too major is wrong with them
- The Flapper air meter is a restriction - I can replace this with a much more modern, low restriction sensor if I use a custom ECU
- The chrome inlet pipes (even the larger 45mm ones) will be the next flow restriction, but according to folks on the Stratos forum, not until high RPMs of 6500 and more. So my thoughts on ITBs aren't really changed, and this seems borne out by most of the folks on there. You can, ultimately get more power using them, but only right at the top end, and it's also very easy to loose power further down. Fine for racing, but probably not worth it for what I'm after. I was almost tempted by some low profile ones, as I thought I'd be able to fit them under a standard Dax bonnet scoop - but you still need trumpets of around 170mm length, going into an airbox, and I don't think that'd fit - will have to measure. I will consider them for this reason, but not as a way to get much more useable power.
So it looks like cams, a new ECU + remap, with the possibility of larger valves if he can find any.
I must get round to selling the supercharger and 164 radiator as well...