Bonnet Bulge
15th August 2012
Another month with not much done on the car, partly due to being on holiday. But back on it now.
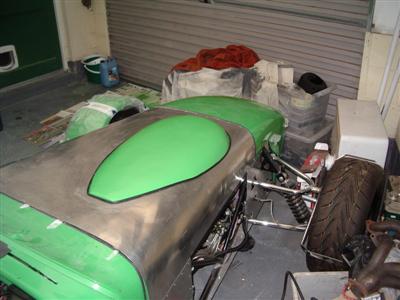
The main thing I've done over the past month is the bonnet bulge. Not quite finished yet, but it is getting there at least.
I'd invested in some release wax ("Honey Wax") and some PVA release agent. So first I made a test piece to check that it all worked, which it did. So suitably emboldened, I moved onto the real thing...
First off, I cleaned the mold and coated with 5 coats of release wax. Then I sprayed a couple of coats of PVA release agent on top. It seems quite hard to get a good even coat without puddles (since the PVA doesn't want to stick to the wax).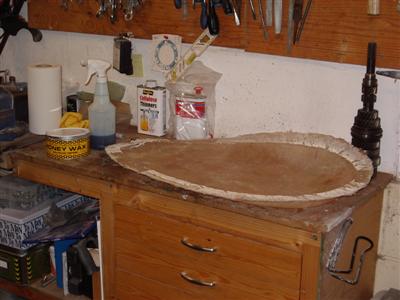
When that was dry (I left it overnight), it was time to start the lay up. Which went ok, although did stink the house out something rotten. I managed to avoid getting too many air bubbles in. I initially tried doing a whole layer at a time like I'd seen in videos, but quickly came to the conclusion that I aint good enough! One of those things with a definate knack to it. So I took it more slowly, cutting the mat into smaller squares and doing a section at a time. This worked well but took hours. Getting the edges neat seemed to be the hardest bit, and I wasn't always succesful.
One thing I had trouble finding out was any advice on how many layers of glass to use. Searching online, the answer is always "well, it depends on the shape, and how strong it has to be...". Which is correct, but not helpful. The mold had two layers and that was clearly not enough, as it is very flexible. So I did 5 layers in the end, and can report that this seems to be a good amount for this size piece - it's plenty strong enough and not stupidly thick. You might get away with 4 even.
The next day I went to remove it from the mold. Firstly, trimming the edge back to the level of the mold:
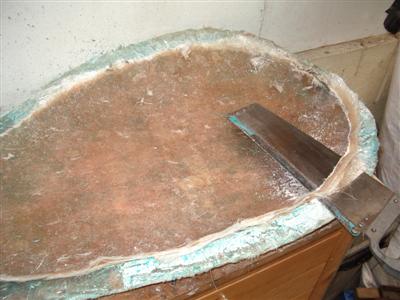
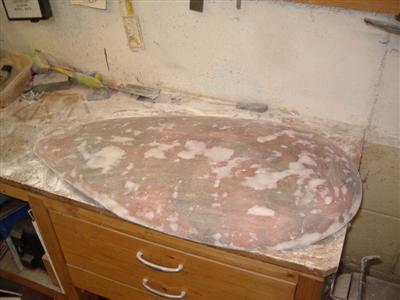
Then the moment of truth - would it come out cleanly?
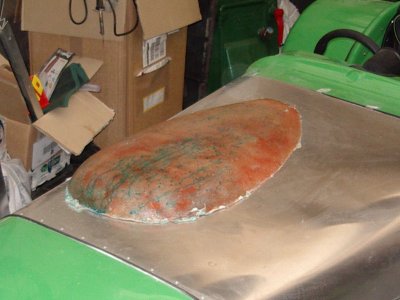
Well it was quite well stuck, so I carefully started levering around the edge, running water in between the mold and piece at every gap. But slowly, carefully, it did eventually come out, all in one piece! Quite a relief.
I'm pretty pleased with it - the surface finish isn't anything like professional standard, probably because I haven't used a gelcoat, so it needs sanding and filling. Mostly pinholes, though there are a couple of larger bubbles. But nothing serious, and the overall shape is good. Not bad for a first try I reckon. The missus reckons it looks like an alien egg which isn't far from the truth:
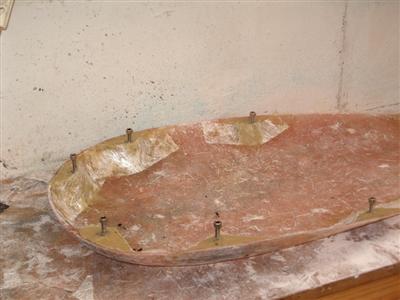
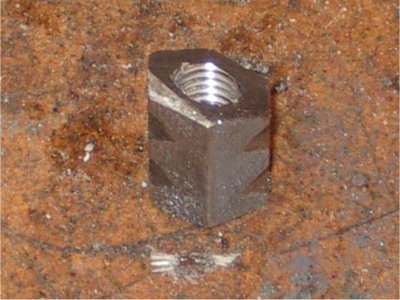
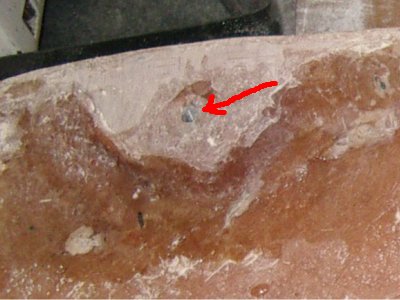
Before I did much in the way of fettling to fit, I wanted to work on the fixings. I'd decided to embedd threaded metal inserts into the GRP, and bolt through from underneath the bonnet. So first job was to drill and tap some hexagonal bar with M6 threads and cut to size.
Then I glassed them in using uPol chopped strand filler:
Alas, for the first time ever using resins, I didn't put enough hardener in (found it quite hard to judge what 3% was), and so it didn't cure. So after a few days I had the sad task of scraping it all out and cleaning it all up for another go. The second attempt was much better, BUT...on my first trial fitting, the inserts simply pulled out of their holes. I thought that the GRP would bond to them, but not so.
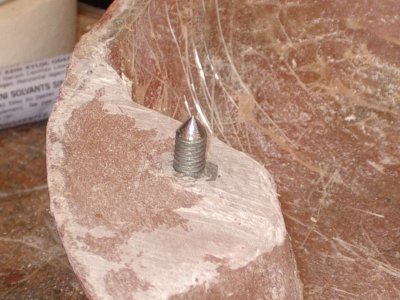
So I needed to sink them further down, so that I could get some glass over the top of the insert - effectively burying it in the resin. Cue lots of filing and dust. I also filed notches in the sides of the inserts to give some vertical purchase:
This attempt has seemed rather more succesful, below you can see that the insert is well resined in:
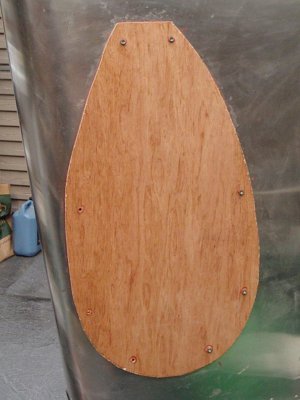
So then I could fit it and start filling and sanding the surface. To drill the holes in the bonnet, I made a wooden template out of ply. Then using a trick I'd seen on the internet, I quickly made some threaded pointers (by filing down bolts in the lathe). I screwed these into the bulge, then pressed the wooden template down on top, so that the pointers make indents exactly where the holes need to be drilled. A simple, but neat trick.
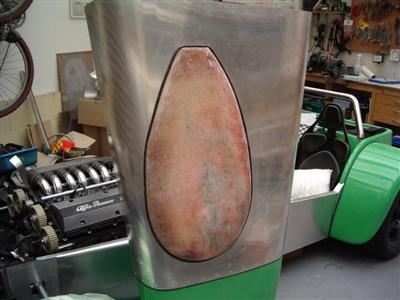
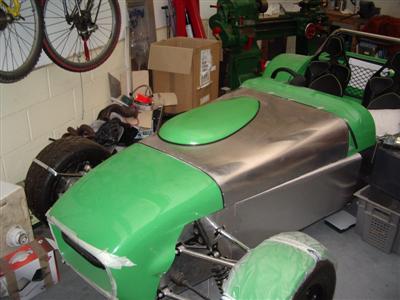
Then simply drill the holes in the template, and use that as a guide to drill the holes in the bonnet. Then it's cutting trim, filling, sanding, and painting. I'm part way there, and it's looking promising (below). I just need to get some custom paint ordered.
One other thing I did is to think about what happens when the bulge is removed. I settled on using round headed bolts to blank the holes (below, left) which looks fine. Inside the bonnet I've made a small bracket (right) which holds these blanking bolts and nuts when the bulge is on, and will hold the bulge bolts when it's off - just so I don't have to carry them around loose.
Other Stuff
And while things are curing etc, I've got on with a few other bits, mostly wiring. In particular, I've got the Hazard Switch Wiring sorted.
Long story short, because I'm not using the ford control stalks, which handles a lot of this stuff, I ended up with a problem where, because both indicators are connected at the hazard switch, turning one of them on using the indicator stalk turns them both on. What's needed is either a separate flasher unit and circuit for the hazard switch, or the easier and cheaper method which I've used, a diode in each of the wires from it to the indicators. I haven't drawn a diagram as there are a number on the internet already.
I also copied a neat little idea from John's Cobra Build. That is, to wire the light on the "engine start" switch to earth via the oil pressure switch. That way, it will light up when you first turn the ignition on, and go out once it's started. Much cooler than having it on when pressed as I did before.
I've also been organising the wiring to the dashboard and speedo so that it goes through a few multi-connector blocks, rather than lots of individual connectors to each guage. Takes a time, but will be much, much better in the long run.
So, next I intend to finish and paint the bulge, then move into the engine bay and fit the remote oil filter, then get the exhaust looked at. I want to put the filter in first so that it's clear exactly what space is left for the exhaust, and nothing gets blocked in.
Painting the Bulge
4th September 2012
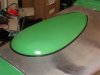
I ordered some cellulose paint in aerosols - unfortunately (a word I seem to use a lot on here), I thought my bodywork was a standard RAL colour, but no, it's a Llewellyn-Ryland colour, Light Bright Green (3765). This is only standard to Llewellyn Ryland...which means that I couldn't "just" order some paint in that colour. I had to send off a piece of GRP and get it custom matched, which cost rather more than I'd planned for - nigh on �80. Ouch. That's an expensive couple of aerosols! A very good match though.
Anyway, before the painting, I had lots of prep to do. Sanding with ever finer paper, filling, re-sanding, filling again, resanding, priming, sanding, priming again, then painting. Here it is just before priming:
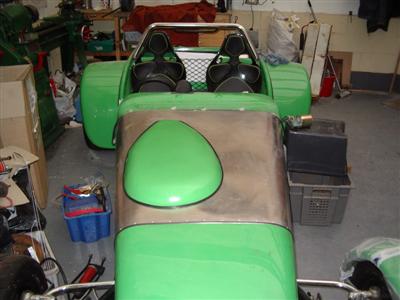
Then it was on with the paint. I was a little nervous here as I've never been great with a spray can, but I seem to be getting better - no runs and a decent enough finish. There are a few tiny imperfections in it even after all the rounds of sanding, but overall I'm pleased with the result. On with the trim (wurth everywhere as usual) and she's done:

Oil Filter
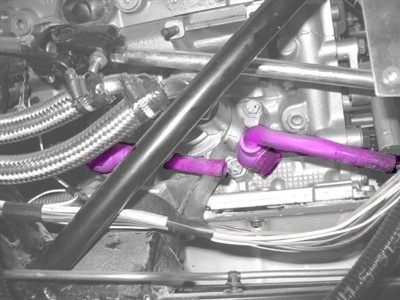
In between all that, and various wiring malarky, I managed to order and fit the remote oil filter. All the remote filter heads seem to use 3/4 UNF thread for the filter, which is different to the M10 thread which alfa used - so I can't use a standard alfa filter. Instead I did a quick ebay and bought one for a VW/Audi A6 3.0 V6, which shares the same thread and is the same size engine. Huge great thing it is, must take about a pint of oil. I went with Mocal braided hose and push on fittings - was looking at Aeroquip again but the price starts getting silly, 4 or 5 times more expensive. Anyway the Mocal ones seem very very secure, as I found when I put one on as a test and then wanted to take it off!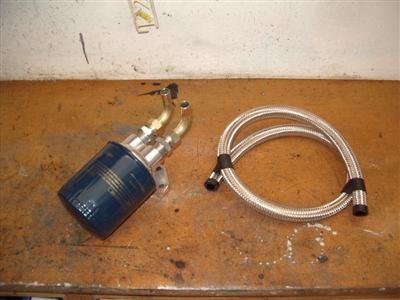
The obvious (only) place to put it was on the driver's footwell panel. This is where, if you knew all of this at the begining, you'd not just use a sheet of 1mm ally, but would put some proper strenghthening bars in. It's a bit of a patchwork now, with the steering column, pedal stop, and now this, all with spreader plates bonded on. Anyway, I didn't know at the begining, so I duely cut some 1.5mm ally sheets to go inside and outside the panel as strengtheners, bonded and riveted through, and onto the chassis rails where I could get at them.
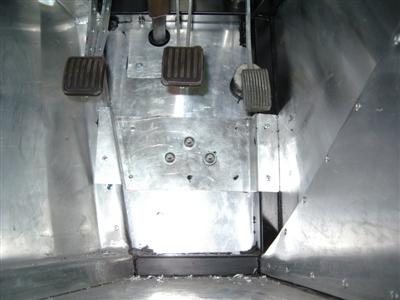
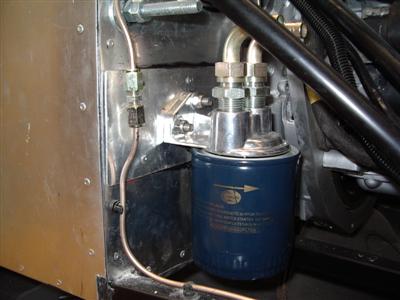 Left - strenghtening plate inside the footwell. Right - Remote filter head and filter mounted to the front of the driver's footwell. Additional plate on the outside.
Then on with the hoses. Plenty of room to get clearance around the steering column, which was the whole problem in the first place. I was having a chat with some fellow owners at the Donnington Show at the weekend, and Frank kindly gave his v8 a rev so we could see how much the engine moved. The answer is, not very much at all - probably less than a cm. He's got some very tight clearances to the frame on his, and no rubbing is evident - so that put my mind at rest somewhat. I still might fit a torque damper as a just-in-case, as the clearance to the cam pullies is still a bit of a concern...but as far as the oil fittings go, I've no worries.
Oil Cooler Take-Off
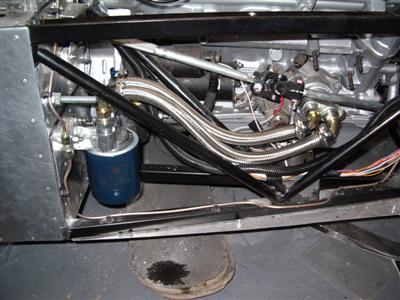
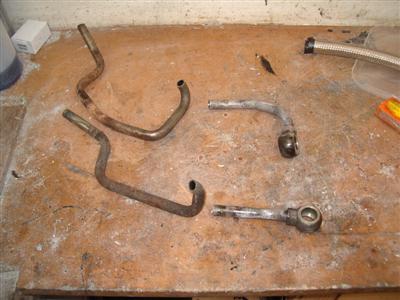
While I was down there (fnarr), I thought I'd have a look at the take-offs for the oil cooler. These are banjo fittings with integrated steel pipes that originally ran to the front of the engine, what would now be the left. In a fit of cheapness, and because I could do it now rather than wait, I thought I'd reuse these fittings. The pipes needed cutting down and rebending to point them towards the front of the car. They are thick steel so cannot be easily bent, so I put one end in the vice, heated them with a blowtorch to red heat, then gradually bent them to the shape I needed. This avoided any kinking and worked rather well. A quick coat of engine enamel and on they went. I can't fit the cooler itself yet (I'm thinking it will have to go in front of the radiator), but they're there ready for when I need them.
 Left - pipes cut and bent. Right - fitted. Kind of hard to see as they are under everything else. You can also see them in the image of the oil filter above.
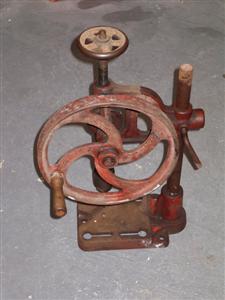
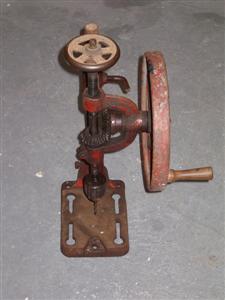
Next Time on Alfadax...The Exhaust
I've just started arranging to have an exhaust made and fitted, and getting the car transported there. I hate sorting out this stuff, and did consider having a go at making it myself. Chatted to a guy at Donnington who had done just that, and there are a few internet threads where people have done it. I'm sure I could do it, but I realise that it will take absolutely ages. Months and months, realistically, and will still cost loads. So in the end I decided to get it professionally done. Not looking forwards to writing the cheque, mind...And while the car's away I've a mini-restoration project. An old Mancuna A2x drill from the 1920s which, for some reason, I bought from an antique fair. I seem to be turning into an old tool geek and I don't know why! Anyway, it'll be good practice for when I do the lathe properly. I've added an 'old tools' section to the site (see to menu)to put stuff like this in, so as not to distract from the car stuff. I despair at myself, I really do...