But why would you hide it?
Bits and Bobs
15th May 2012
Not much time spent on the car of late, as I'm still summerhouse building. Nearly done now but it's been a bit of an epic!
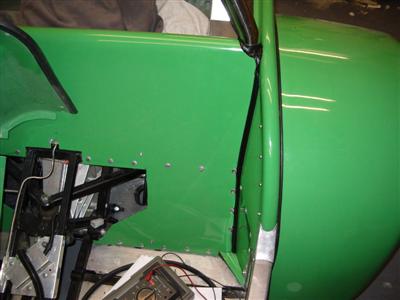
So I've stuck on a few odd bits of trim, and finished sealing in the tub where it joins around the rollbar. This is one of those places where "big wodge of wurth" is the only way, which is a shame but it's the same on all Rushes. I added some trim to cover the seam where the two GRP panels join, this is normally hidden by carpet but I'm leaving mine exposed.
Note - do NOT use wurth for sticking on trim. Seriously. It gets absolutely everywhere and is very hard to clean off any excess to get a clean finish. Takes ages, gallons of solvent, and tons of paper towel. Contact adhesive is where it's at.
I also riv-nutted a few d-rings into the boot so that I can attach bungy cords to stop things flying around. Stoneleigh happened again, pleasant weather this year though again I had a stinking cold, which is becomming a habit. Dax had their new BMW based rush there, which doesn't look vastly different, though I'm sure the chassis changes have taken time to get right. The straight 6 engine fitted in rather nicely anyway. If I'm not mistaken they also may have improved some of the bodywork mouldings a little.
Also looked at the Westfield stand in some detail. I'm not a huge fan of the styling of westies any more, particularly the rear end, but I will say that the way the panels fit on and together is streets ahead of the Rush. No big gaps of blobs of wurth to see here, but then the Rush is getting on for a 20 year old design now, and Westfield have a lot more cash. They're also a lot more limited in terms of things like choice of lights etc. So I guess you pays your money and...
I spoke to the Powevamp/Oddessy battery guys at Stoneleigh and bought a battery. I was advised to go with the 30 or 35, which is bigger than the ones usually used for a 4-cylinder engine, in order to get enough cranking current. I went for the 30, which is a bit wider than I'd originally reckoned on, but hopefully there will still be space on my battery shelf for the ECU!
I've used their standard bracket and bolted it to the front of the scuttle. Rather than just bolt it through, I made up two stainless strips to go inside the scuttle and welded the nuts to them. These strips are then bonded into the scuttle so that the battery can be bolted on and off without needing to remove the dashboard! Easy to forget things like this during the build when everything is in pieces. Connecting all of the nuts together means that I don't have to worry about the twisting force from tightening them up, which would easily tear the bond away if I did them all separately. I'm wondering if I should bond the scuttle down with all this extra stuff being attached to it, in theory it shouldn't ever need to come off again now.
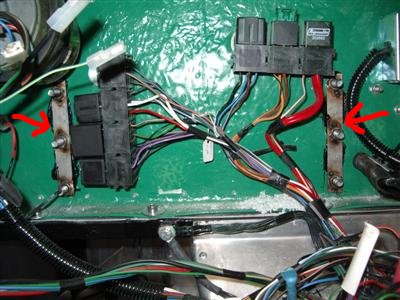
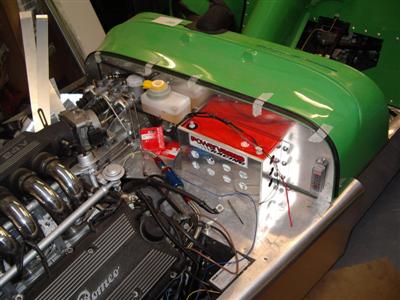 Left - inside the scuttle, showing strips which hold the nuts for the battery bracket. Right - battery fitted
I've ordered a propshaft from Dunning and Fairbanks, which should be done any day now. As soon as that comes I can get the tunnel finished and closed up for good. In the meantime, I've made a start on the bonnet bulge, well a couple of starts actually.
Bonned Bulge
Attempt 1
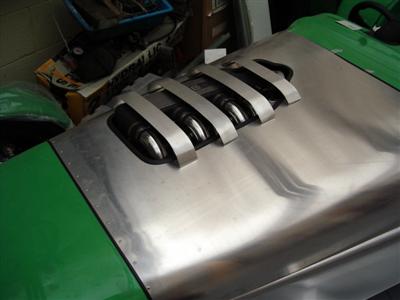
Much as I like the look of the plenum sticking through the bonnet, I think that some sort of cover will be a good thing, at least some of the time. I'd like it to be removable so I can show off my shiny crome inlets if the mood takes me. First job then was to finish off the hole and trim it, then I could see exactly what size and shape the bulge would need to be. Didn't get a picture yet unfortunately, but it looks pretty neat - a bit of edge trim works wonders for smartening things up.The problem is, building the bulge the right size and shape to cover the engine - it's hard because you can't really see where the engine sticks up unless the bonnet is in place.
So Initially, I thought I'd build the bulge in place using aluminium strips to get the skeleton of the shape, then cover the whole thing with fiberglass, and skim with filler to get a nice finish. But it quickly looked like it wasn't going to work too well. However, the aluminium shapes I'd made would hopefully prove useful to give me a guide to the correct shape later.
Attempt 2
Second try, I found some aluminium modelling wire on eBay, for making the framework for sculptures. So I thought I'd try that. However it doesn't really hold the shape I'm after (which is quite a gentle curve) very well. I could perhaps have built it up with fiberglass and filler but it felt as if it was going to be very messy.
Attempt 3
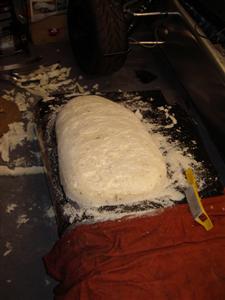
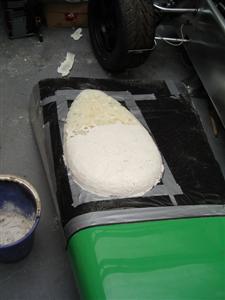
Great idea! I could use expanding "No More Big Gaps" type foam to form a buck, which I could then either make a direct fiberglass cast of, or do it properly and make a mould and then lay up the real one in that.
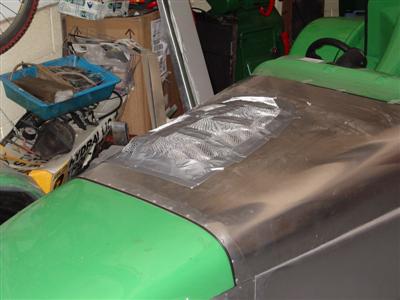
So I masked up the bonnet in bin bags, sprayed on an entire large can of foam, and left it 24 hours to fully harden:
Then roughly trimmed with a knife - it cuts very easily
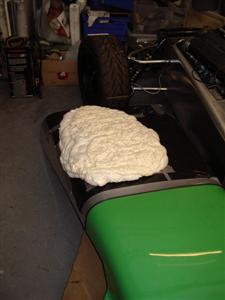
then started roughly shaping with a surform tool. This seems to work quite well, there are some large voids in the foam but nothing a bit of filler wont solve.
Quite a way to go yet but it seems promising...
20th May 2012....Update...
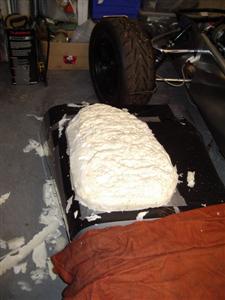
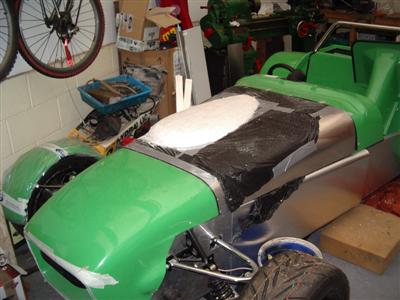
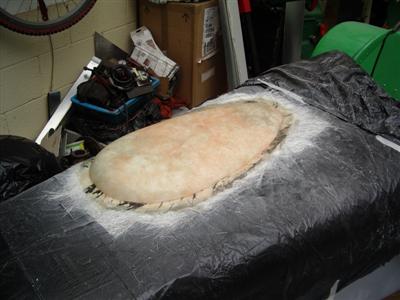
Finished carving the foam to a rough shape. I eventually needed to remove it from the bonnet, which actually made things rather easier. I marked the shape of the hole on the underside and used this as a guide to cutting the overall shape.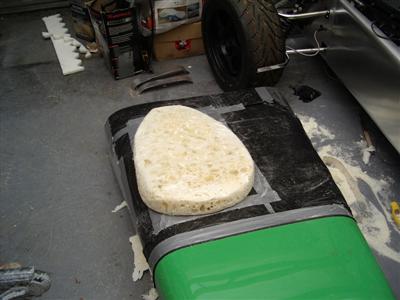
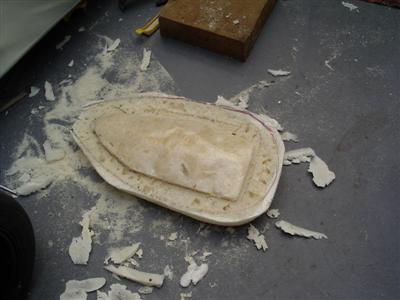
Unfortunately, the foam had more and more voids in it the deeper I went - so it ended up looking like a slice of Ementaal - but the shape was right:
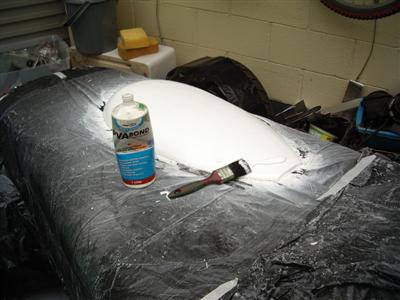
So then it's on with a few coats of filler, which I will sand down to give the final finished shape. I'm just using ordinary household filler, which seems to work ok.
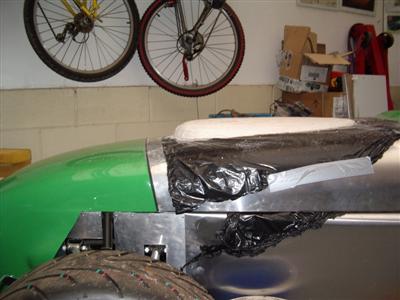
One thing which nearly caught me out - when I had the bonnet on the floor, it had sagged in the middle, as it didn't have the scuttle to support the rear eadge. This would have meant that the bulge wouldn't have fitted flush against the bonnet when it was in place, so I moved to working on the car.
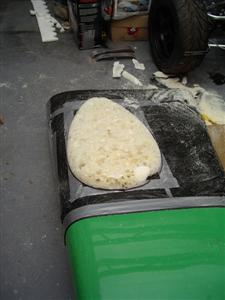
Here it is as of close of play this evening. Pics a bit washed out with the flash unfortunately. Pleased with the overall shape, I don't think it'll look half bad when it's all done.
17th June 2012
I've fallen behind with the build diary of late, must do better. Time has still been a bit lacking, and for various reasons I've seemed to be flitting between a number of jobs.
Anyway, to start with, I finished making the buck. This was an itterative process of sanding, refilling, sanding, refilling, again and again until I was happy with the shape. The filler was rather delicate, so I had a few breakages as well, which made things take a bit longer.
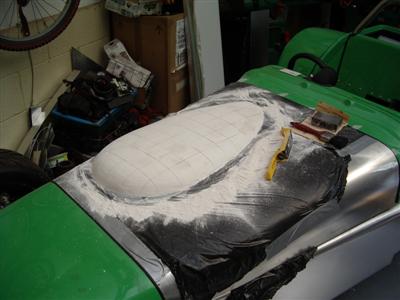 One of the many filling/sanding stages. A grid drawn with pencil on the surface helped with keeping things symmetrical.
When it was finally complete, I sprayed it with radiator enamel - aiming to get a shiny surface so that the fiberglass wouldn't stick to it. Then, I gave it 5 coats of wax - I skimped and used turtle wax rather than carnuba, (and paid the price later!).
Finally, I gave it two coats of PVA. The theory goes that the wax forms a barrier to the PVA, so it doesn't stick to the buck. The fiberglass will stick to the PVA, but this will peel or be washed of later, since it's water soluble
After all that, it was time to lay on the fiberglass. I'd done a small practice piece first to get the feel for it. Not too hard in principle, though there's definately a knack to getting the right amount of resin on and preventing wrinkles and air bubbles.
As I found out, PVA release agent is not just ordinary PVA as I've used here. It's a mixture of meths, PVA and other stuff. The ordindary stuff doesn't work at all (see below), buy the proper release agent!
I used 2 layers of medium weight chopped strand mat, and polyester resin. It's hard to find any information on how much to use, so I guessed. 2 layers is a bit sparse really, but since I only want to use the mould once, maybe twice if I ever need a replacement, it'll be fine.
After a day, it was time to remove the mold from the buck, by simply lifting if off as I'd seen on various videos.
Yeah, right.
Of course, it didn't come off at all. So it was down to plan B...carve the buck away from the mold. Using lots of water and elbow grease, I was able to carefully scrape all of the filler and PVA out of the mold. It took an entire morning, so is certainly not the ideal method!
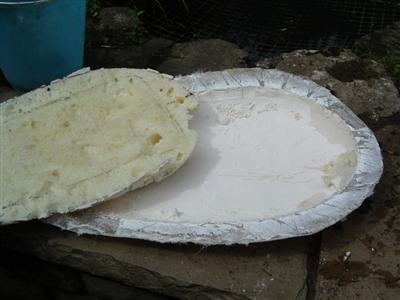
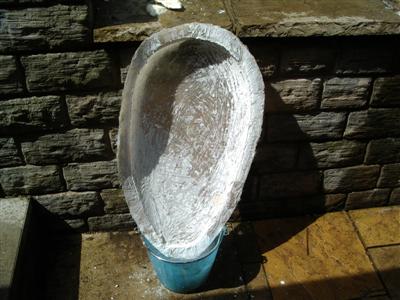
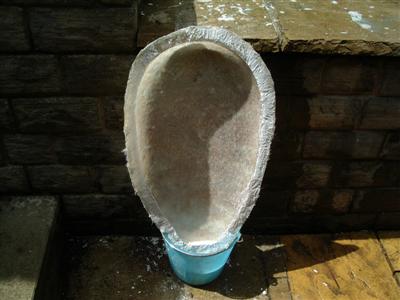
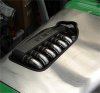
But, finally, I have a mold. I'm very pleased with the shape, it should look verging on the professional! I haven't got any further than this yet, I need to buy some more fiberglass as I'll want 5 or 6 layers for the final piece. I am also going to invest in some proper release agent and do some test pieces before I try it for real. I've got so much time and effort invested in the mold that I don't want to risk ruining it.