12 February 2010.
Dad: 22nd November 1938 - 12th February 2010

I'll miss you mate. Thanks for starting me down this path.
Engine & Bonnet...
09 March 2010
So not a very good month just passed, but things getting back to normal now, including the temperature being only just above freezing in the garage most nights.
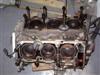
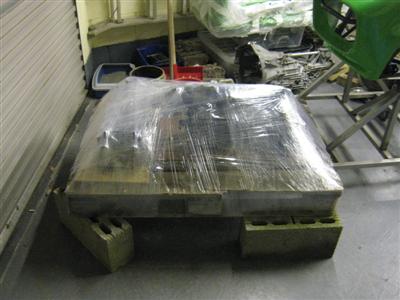
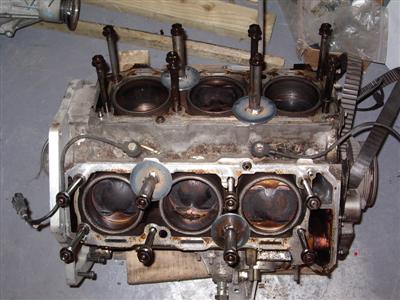
As far as the engine goes, it turns out that it is as cheap to ship a whole pallet as it would be to ship a single head. So I stripped off the other head, found myself a pallet, and packaged up both heads, plenum, inlets, and throttle body. I nailed a couple of sheets of ply to the pallet to protect the gasket surface, then wrapped the lot up in some pallet wrap I bought from eBay. That all went off at the weekend, so I should find out in a couple of weeks what the score is.
 The most fascinating picture so far?
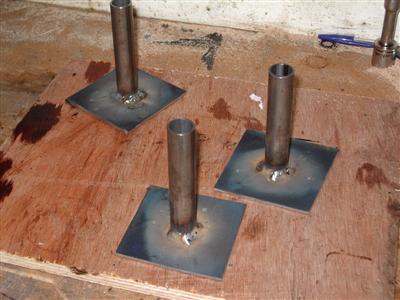
Before I forgot, I needed to make some tools to hold the cylinder liners in place in the block. I had some steel offcuts lying around, so I made some up based on the drawings in the alfa workshop manual I have. These are basically tubes to fit over the head studs, with a round flat bit on the bottom to hold the liners in.
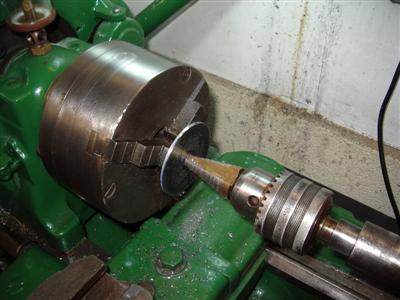
So, first part off some tube to the correct length. Then weld the tubes to some flatish, squarish bits. Then turn the flat bit into a round bit on the lathe:
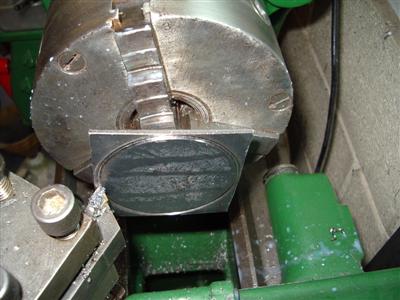
I attacked it from the face, rather than from the side, to avoid a heavy intermittent cut. I'm still waiting for a new toolpost with a proper parting-off tool, so I used the pointiest carbide bit I had, then tidied it up from the side as normal. A bit brutal, but with lots and lots of cutting fluid, it did the job.
Then, drill a hole in the flat bit, and job's a good-un:
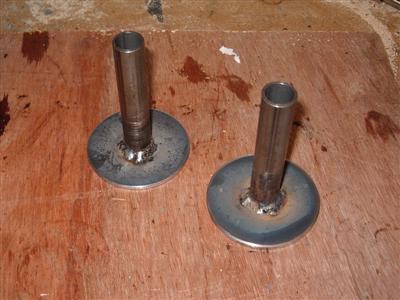
Then bolt the four of them in place, and my liners should be safe if (when) I kick/trip over the block:
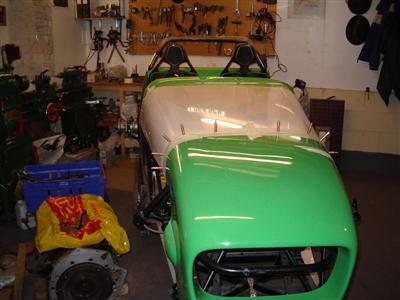
So then it was back to the bonnet and nosecone. Opinions differ on hinging the nose, particularly with the one piece ally bonnet / nosecone assembly, and it looks quite tight for clearance above the ground, so I'm not going to do that. I definately want some sort of fixing on the nosecone though, so I'll probably go for quater turn dzus fasteners, or perhaps an internal latch.
Frankly, after a couple of nights trawling through fastener catalogues, I got fed up with thinking about it, and decided to get on with fixing the bonnet. I can sort out fastening later.
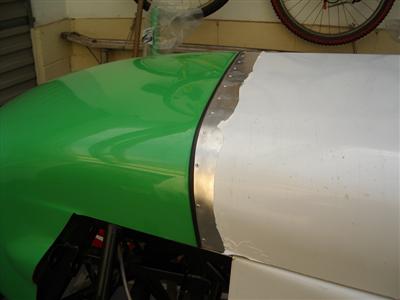
The bonnet is a bit of a pig. Firstly, it isn't properly bent to shape - I imagine that they bend it round a former of the right shape, but it then springs back a fair bit. So the sides stick out at the mo. I'll need to bend it in somewhat, but it's quite tricky with such a large and complicated shape. It's just all a bit of a pain becuase there's no fixed datum to work from - nosecone, scuttle, and bonnet can all move around, and it's a case of finding the most natural lie for it all.
To start with, I thought I'd get the front fixed to the bonnet, as that should give me a starting point. I spent a good hour or so lining everything up and checking every edge (using a short length of wing-piping to get the spacing right, then masked it up and marked out where the holes should go using my trusty dividers.
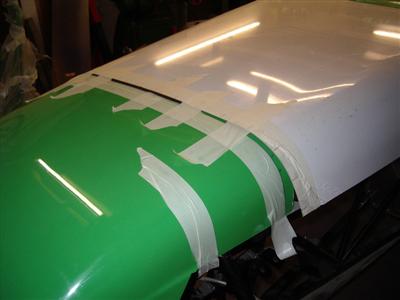
 Left - marked out. The black strip is a length of wing piping, which will fill the whole gap when finished. You can see how much the bonnet springs outwards at the moment. Right - temporarily fixed with clekos.
19 March 2010
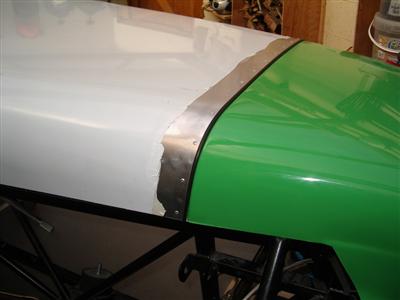
Took another couple of nights to get the front of the bonnet filed down to give a good fit with the wing piping in place, but I finally had a nice shut line between the bonnet and the nosecone. It's one of those "take a bit off, offer it up to see if it fits, remove it, take a bit more off" kind of jobs.
Once I was happy with the fit, I roughened the grp of the nosecone under the join, glued the wing piping to it with wurth, and rivetted the bonnet down:
Once that was done, I could move on to trimming the back edge of the bonnet where it meets the scuttle.
I'm in two minds as to wether it would have been easier to do this before rivetting the bonnet to the nosecone or not; although it's more unweildy to move around once it's been joined, it does hold its shape much better.
Sorting out the rear is a bit harder as there's nothing really to line the scuttle up on-the nosecone sits naturally on the chassis without too much movement, whereas the scuttle will just slide around. So I did a lot of measuring and marking to make sure that it was straight (i.e. both sides the same distance from the front), and not offset side-to-side. To do this, I used strips of masking tape on the chassis and scuttle; I measured back from one of the chassis tubes (which I will assume is in the same position on both sides!).

Knowing that the scuttle was straight, I could then file the bonnet edge so that it matched the scuttle edge. Again, a very itterative process, and a lot more (5mm or so) had to be taken off the rear of the bonnet as it had been cut very wonky. So that was another couple of evening's work.
When it was ready, I decided to glue the wing piping to the underside of the bonnet, rather than directly onto the scuttle, as the mating area on the scuttle is pretty small and I'd have had to trim the rubber, and I doubt if I'd have got a very neat edge. So I roughened the bonnet, applied wurth, and stuck on the piping. I then put the bonnet in place, and strapped it down using a ratchet strap, so that it was pulled tight around the scuttle - thus making sure that the rubber would sit properly.
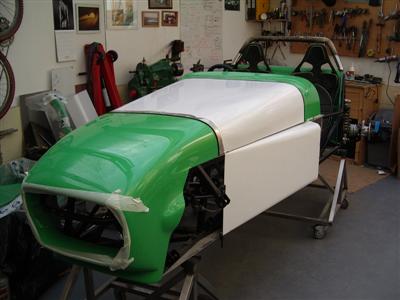
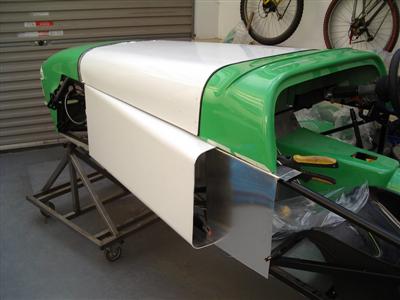
So now, after all that, I know where the scuttle is going to sit...which means that I know how much overhang there is at the sides, which means that I can order some ally to make the side panels. I couldn't resist mocking it up with one of the flared engine bay panels to get a glimpse of how it will all look:
In other news, I'm involved with a group buy of a custom-made fuel tank, kindly designed and organised by Scruffythefirst on the DSC forum (thread here). This will have a slightly increased capacity whilst still fitting in the same space, but the main feature is an integral collector with proper one-way valves. I was planning on fitting a separate swirl pot (a small, tall and narrow secondary tank which ensures supply to your main fuel pump under hard cornering etc). This requires a second pump, extra connectors and wiring, plus I wasn't sure where it was going to fit! So having it in the fuel tank itself is a much better solution. The cost isn't much more than the cost of a separate swirl pot + pump, so it seems like a no-brainer. Plus I can then sell the old tank and recoup a bit of the cost that way.