
Footwell Panels
09 December 2009
After the usual many hours of pondering, making templates, and more pondering, I got on with making the first panels. The main difficulty was replacing the front of the transmission tunnel. Actually, that's not so hard in itself, but as mentioned before I want to make sure that the tunnel is easily removable.
I decided that the best way would be to make the new flange from ally, riveted to the front of the chassis, with a sleeved section that the tunnel will fit over. With a rubber or non-setting mastic strip between the two parts, that should give a nice seal, and the tunnel will just lift off when required.
I'm using 1mm thick ally sheet, because that's what Dax use. I did buy some 1.5mm but it is considerably thicker and heavier; I might use it for the dash, but it's a bit much for general panelling I think. To bend it I'm using various lengths of timber in a cheap workmate bench to clamp the metal, then bending it using another piece of timber, helped where required with a rubber mallet. I've been pleasantly surprised at how easy it is to get a good result, even for quite complicated shapes.
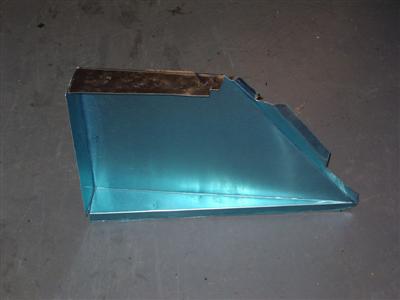
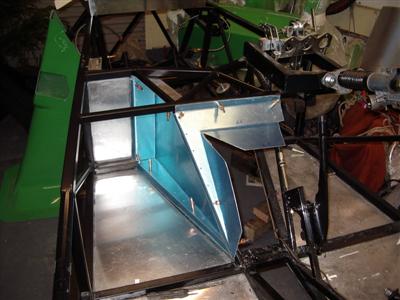
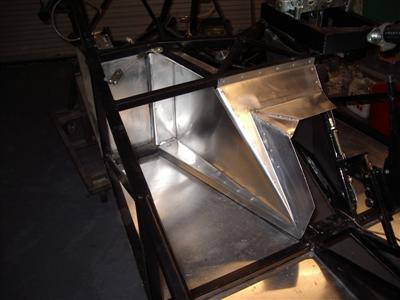
Once the front section of the transmission tunnel was done and cleko'd in place, I could do the passenger footwell panel. This was a bit harder, largely because it was in a more confined space, but by repeatedly trial fitting, taking a bit off / making a new bend, trial fitting again, etc, I ended up with a good fit. The hardest bit was around the join between the two panels - a bit of a crazy shape with chassis tubes all at odd angles and different planes.
Both panels shown below. The edges will all be fully tapped over for the final fit, but I'm not fixing them until I've made sure that I can get the engine back in! I also need to weld up the corners, and weld in a corner section on the tunnel sleve. Then the next job is to do the driver's side...
03 Januaray 2010
Bit of a long hiatus from the website over christmas, but I did manage to get into the garage a bit, albeit wearing about 15 layers of clothing. It's cold out there, didn't get above -1 in the garage all day today.
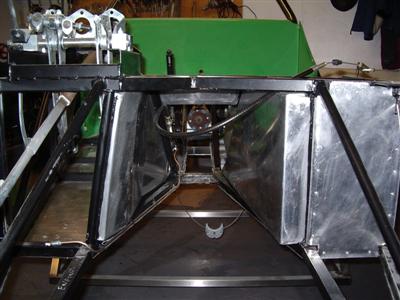
So over the last few weeks, I finished forming the driver's side footwell panel, which was a much harder shape than the passenger one. The biggest problem was that the edge of the GRP tunnel modling stands off the edge of the chassis where the moulding will meet the panel. I wasn't sure what to do about this gap, but then I noticed that it also needed an access hole cut in it to allow one of the gearbox mounting bolts to go through. Since the tunnel molding will also need an access hole for the handbrake adjuster near to this, I decided that the best thing to do will be to make a cover panel which will go over both of these holes, and the gap between the tunnel and the panel. I'll do this when I do the dash and can see exactly where everything fits.
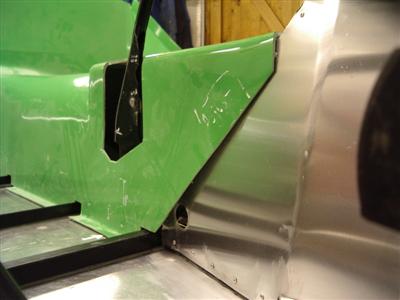 The gap between the footwell panel and tunnel on the driver's side. Also note the circular access hole for the gearbox mounting bolt, and the white rectangle is where the handbrake adjuster access hole will go.
So then it was time to weld up the seams and corners.
Whilst MIG welding ally is possible, it is renowned for being very tricky. But that just sounded like a challenge! So I set up the welder for aluminium and set about doing some practice pieces.
It quickly became apparent that 1mm ally sheet is really pushing the envelope, both of the welder and my meagre skill. But, by using a heat sink to back the ally (I used a big block or 3mm sheet of mild steel), it was quite possible to do good welds, and even to make them look quite neat. You have to move the torch pretty quickly, and it's a constant knife-edge between not enough penetration and burning holes, but it can be done.
So encouraged, I moved on to the footwell panels. Well. I made a couple of nice welds, but had terrible trouble getting the heat sink to press against the back of the panels in some of the corners and bends. Unfortunately, the slightest air gap under the aluminium and you burn a hole pretty much immediately, and that happened a lot. To rectify these, I built up a wodge of aluminium by holding the torch further away (so you get less heat, and the weld tends to build up in a blob and not penetrate). This gave a larger thickness of metal, and hence didn't burn through so easily. Then I moved the torch back closer and re-melted it. That left a weld with decent penetration, but great "pigeon sh*t" blobs of metal everywhere which had to be ground away.
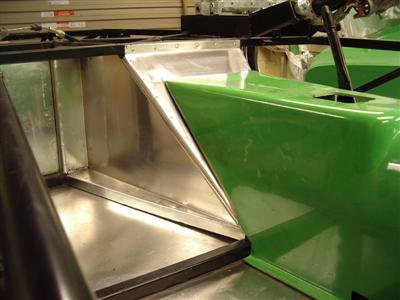
The finished result is actually pretty neat, it's just a world away from a finely-crafted TIG weld, and obviously takes many times longer. Still, the end result was some solid panels with no gaps or big obvious joins.
With that done, actually riviting them into place and tapping down the edges only took a couple of hours. Before doing so, I clecko'd them into place and made sure I could winch the engine into place, just in case! All fitted well, although it's definately a two person job with the panels in place, where I could manage on my own before.
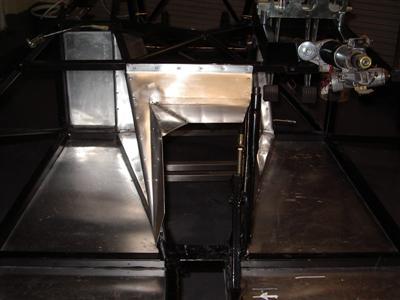

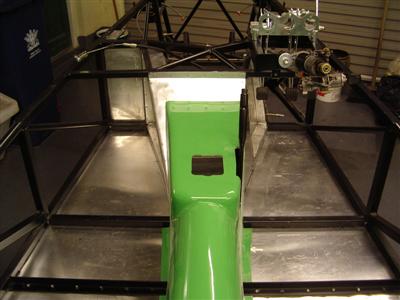
So, all in place and looking rather good I think. Plus, the tunnel molding actually fits down properly and sits on the floor. I'll need to do some more work on that especially trimming up the edges, but again that's a job for when I finalise the cockpit area.
With that done, I'll be starting to think about rebuilding and tuning the engine, and trying not to think about how much it's going to cost!