
That'll learn you
Reconditioning
5 December 2008
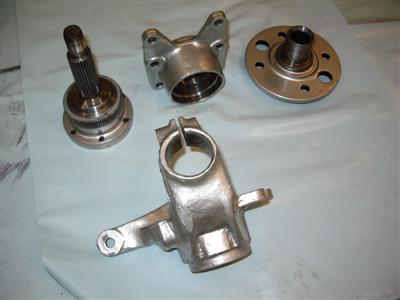
With the engine and box out of the way, and the floor repainted, I've been having a bash at the donor parts. It's been decidedly chilly in the garage this week to say the least, as a dose of snow and generally freezing weather descended on us.
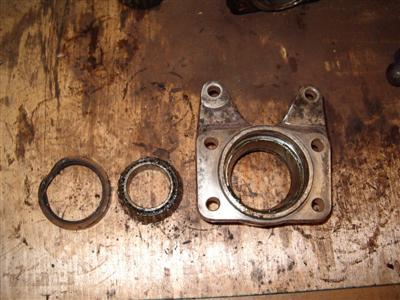
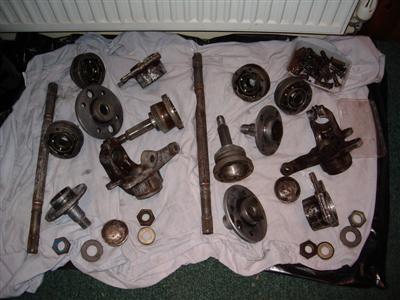
First up were the rear hub carriers. These needed a good sanding to remove the surface rust and ready them for painting, and the wheel bearings replacing. So as before, the flap wheels and dremel came out. Carrier one was done without incident, but whilst doing the second one, I was particularly dumb. Taking my safety goggles off for a closer look, I saw that it needed "just a bit more" taking off, and promptly went at it with the dremmel again, stupidly without putting the goggles back on. I was quickly rewarded with a load of hot shavings in the eye. Cursing my stupidity, I headed for the bathroom and removed a couple of chunks with water and the corner of a paper towel. However, there was a small splinter which was clearly embedded in the eyeball itself, just below the pupil.
To cut a long story short, this meant that the missus had to drive me to the nearest A&E, which was a 40 minute drive through the snow. There I had the pleasure of a nice Doctor digging the splinter out of my eyeball using a needle, which was not an experience I'd care to repeat any time soon. Not to mention that it completely wasted an evening. So, errr, wear goggles kids...
Anyway, once that was done, the old bearings had to come out. This is a case of first removing the oil seals, then the bearings themselves, and finally driving out the inner races which are pressed into the hub carrier.
The oil seals are metal caps with rubber seals bonded on which are pressed into the carrier. In this case it was very difficult to tell where the oil seal started and the carrier ended, because it was all covered in rust. Once you've found the first one, it's pretty obvious though. They are replaced with the bearings, so can be levered out without too much care.
This allows the bearing assemblies to come out, leaving just the outer races in the carrier. Following the Haynes manual, and the advice of Craig who had done the same job just a few days before (see his diary at Pint-o-Rush), you do this by tapping them out using a drift. Firm taps every 90 degrees around the race, and it will gradually be driven out of the carrier. Care must be taken not to score the inner surface of the carrier. I used a length of mild steel bar as a drift and didn't leave marks anywhere - good news for when I drive the new races in!
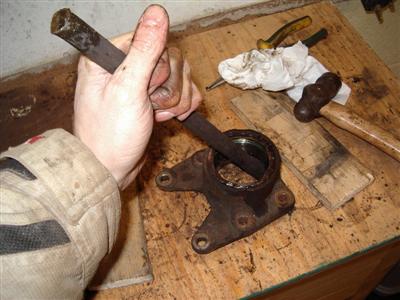 Left - showing one oil seal and bearing assembly removed. Right - driving out the inner bearing race
Out of interest, I had a peak at the old bearings to see how they were. There were a couple of small nicks in several of the races, so I guess it's worth replacing them now. My local motor factor supplied the new bearings, not cheap these days, especially the rears (from the XR4x4) which come in at nearly Ł50 a side! They had to be ordered so I'll get them this weekend. Tip - It's worth holding on to the old bearings for now, to use as a drift when putting the new ones in.
So the carriers go in the "to be painted" box, an I had a look at the front hubs. These have a large 41mm nut on the end, which I don't have a socket for. So I ordered a socket and 3/4" drive bar to match. It's also been pointed out to me that once the new bearings are in, this nut needs torqing up to "proper tight" levels, something around 250lb ft from memory, which is rather more than my torque wrench can manage. So I may need to get a friendly garage to do that bit, or work something out with weights and distances.
That left the driveshafts. I have the bolt on, rather than push-in type. Dismantling them isn't too hard, a few torx bolts, then the boots come off, finally two circlips to remove and they just pull apart. Unfortunately I broke one of the circlips, so I'll have to source another. The boots are in pretty good nick and could probably be reused for some time, but I think it's best to change them now whilst it's all in pieces.
The lobro joints themselves can't be dismantled, but I don't want to risk filling the grease in the bearings with metal fragments as I sand off all the rust. So I've simply cleaned them out (shaking them in a sealed tub full of white spirit removes virtually all of the old grease) and I'll repack them with fresh grease later. Looking at the shafts, they look to be symmetrical - but I've ground a small mark into each so that I can put each joint back on the same end that it came from, just in case it matters.
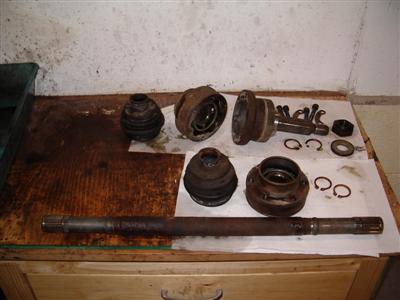
 Left - Drivshaft dismantled. Right - cleaned, ready for painting.
11 December 2008
Finished dismantling both driveshafts over the last couple of days, and removed all of the rust (see above). The boots don't look to bad, with only a few tiny cracks appearing in places - but I think I'll replace them whilst it's all in pieces. Something else for the shopping list...
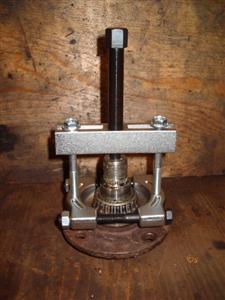
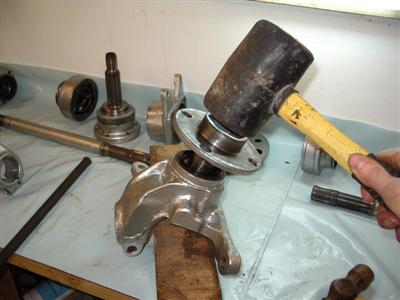
After doing the 'shafts, I moved onto the front hubs. My 40mm socket had arrived, and removing the main nuts took only minutes. Careful though, the one with the yellow insert is a left handed thread. The 600mm bar I ordered was fine, I wouldn't go for a shorter one though or it would be a bit of a strain to undo.
With the nut off, there's a large washer to be wheedled out. Then the central part is simply knocked out with a hammer. This removes one of the two bearings, (below left). The bearings are pressed onto the central shaft and are a very tight fit.
That was all well and good. The Haynes manual then says "recover the other bearing from the end of the shaft". This turns out to be one of those classic Haynes-isms, where a few words hide hours of work.
The problem is that the other bearing needs tapping off, but you can't get behind it because the hub is in the way. So I resorted to grinding bits of scrap bar into variety of wedges which I could hammer into the slowly growing gap (below, right). It took a couple of hours to do this, and all seemed rather clumsy, so I'm going to ask around before I takle the other one.
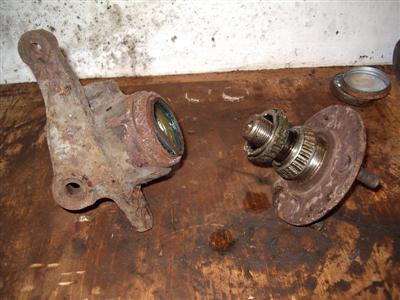
 Left - hub, centre section knocked out. The top bearing is pushed off as you tap the shaft out, but has been replaced for the photo. Right - removing the lower bearing by hook and by crook.
Finally, the two outer races are tapped out of the hub carrier in exactly the same way as for the rears (top of page), and the roadwheel studs are bashed out of the hub. Then it's on to the cleaning.
21 December 2008
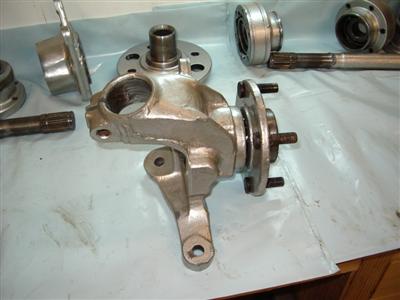
I asked on the Dax owners club forum about the front hub bearing, and indeed there is an easier way. A tool called a bearing splitter which I hadn't heard of before. Screwfix did one, a bit steep at 30 quid but I didn't fancy another 3 hour battle so I ordered one. Interestingly, many people on the forum had resorted to simply angle grinding them off, which did make me feel a bit better about my previous tactics.
That arrived in a couple of days, and made removal of the other bearing a 10 minute job. Two wedge-shaped jaws screw inwards to force the bearing apart, then tightening the top bolt simply pulls it upwards like a normal puller.
 ...and here's the right way to do it. Don't wind it in too tight though, muppet.
Unfortunately, I wound the jaws in slightly too far and did score the central shaft slightly, which made me a bit cross. Smoothed it back (very gently) with the dremel to remove any burr, I don't suppose it'll make any real difference.
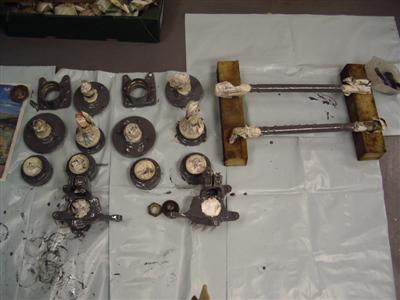
Apart from that, I've managed to clean all of the various bits, in between bouts of Christmas shopping. As before, this has just been a case of various drill and dremel attachments to grind off as much of the rust as I can. All the bits are now sitting in a big crate (in the house, because bare steel rusts up stupidly quickly), ready to be painted. The paint system I've got uses a cleaner, etching primer, then two coats of paint, all of which want to go on within a reasonably short time frame, so I'm waiting for the next weekend when I've got plenty of time.
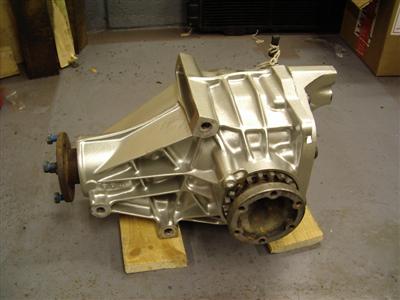
Also managed to clean and paint the diff. Since it doesn't seem to have any leaks, apart from some seepage from the breather hose, I decided not to bother renewing the oil seals. I've been re-reading some other people's build diaries and words like "nightmare" seem to keep cropping up in relation to these, so I'm going to take the "if it aint broke..." approach.
A couple of sessions with a scrubbing brush and various degreasants didn't manage to remove all of the grime from the various nooks and crannies in the casing. So I took a leaf out of Alex's book (or online diary) and bought some small stainless steel brush attachments for the dremel. It took a couple of nights with these to clean it all up, but they do work a treat. I went through 3 cup brushes and 2 of the smaller straight ones doing this.
A facemask is a good idea for this, because there is an inordinate amount of dust produced. Once that was done, I hosed down the diff, sprayed it with "Marine Clean" (water-based degreaser), hosed it off again, sprayed it with "Metal Ready" (an etching primer), left for 20 minutes, hosed it down again, and left it indoors to dry.
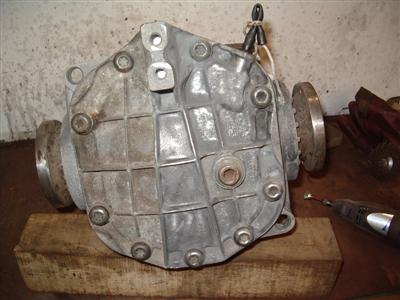
 Half way through cleaning the diff. Note breather hose tied off to prevent it leaking. Right, masked ready to paint.
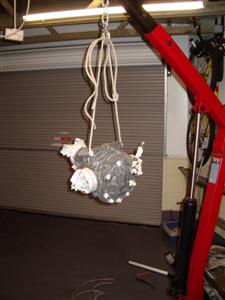
When it was dry, I hung it from my engine crane and masked it up. Then it was just a case of 3 coats of Plasticote "brushed nickel" spray, and the job was a good 'un. Looks pretty good I reckon:
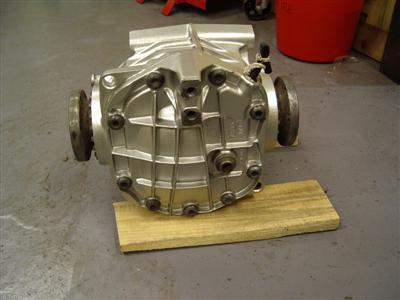
All that I shall do now is drain it and refil with fresh oil; I was going to take the cover off, but dismantling the alfa one sated my urge to "see how it works". I think that the lug at the back needs a lump taking off it as well, (I need to check the manual), but I'll probably wait until I have the chassis and can see how it all looks.
Speaking of which, Dax has put my build date back to the middle of feburary - can't blame them to be honest. The engineer is now working on the engine and box, but unfortunately he needs to strip the box down to get the input shaft out. This is so that he can weld a small extension on it to fit into a roller bearing which will be fitted into the end of the crankshaft. I was going to go with a bronze bush but he says that they wear quite quickly, and can cause the input shaft bearings to go, so he always goes with a bearing. Upshot of this is a few days extra delay and a couple of hundred pounds more...but I didn't fancy rebuilding that gearbox myself. I'd have needed to invest in various new tools and would have almost certainly have lost/broken some bits if the alfa one was anything to go by. Even the engineer uses a specialist gearbox firm rather than do them himself, which tells me I'm probably making the right decision! The downside is that the more this costs now, the less I have to spend on engine tuning later...but that's the price of doing something different I guess.
08 January 2009
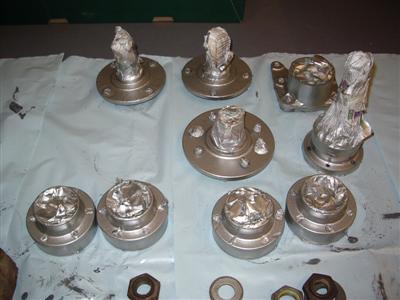
Over the last couple of weeks I've been painting up the other sierra parts. Quite a time consuming process - as with the diff, everything was first cleaned with Marine Clean, then treated with Metal Ready, then rinsed and brought inside to dry without getting rusty. You can see the zinc coating that the Metal Ready leaves on everything as a kind of white bloom in the left hand pic below:
Annoyingly, the very cold weather of late must have caused some condensation, as there were a few rust spots on my carefully cleaned steel. Where this was on a bit which was going to be painted, I didn't care, since POR-15 can be painted straight onto rust. Where it was on bearing parts, I figured it would be best to deal with it after painting. Then it all had to be masked up, treated with two coats of POR-15 (right hand pic), and finally sprayed with two coats of plasti-cote. Given that each task took an evening, it's easy to see where the time goes.
The POR-15 seems to be quite heavy-duty stuff. It also goes a surprisingly long way - I used only half a small can doing all of the parts, which is slightly annoying since I bought two cans! You definately want to wear gloves when you're doing it though.
Once it was all painted and dried, it was a case of removing all of the masking (which takes as much time as putting it on in the first place), sanding back the odd paint dribble, and dealing with the new rust patches. This was pretty easy, a quick blast with the dremel wire brush getting rid of it with ease. Then I washed everything off with white spirit to remove any debris, dried it, and sprayed with WD-40 to prevent any further rusting.
The finished parts are looking much better having been painted - next step is to start putting eveything back together with the new bearings.
One thing I found out much, much later when fitting the brakes was that the PQR 15 is thick enough to affect the alignment of things bolted onto it. So keeping paint off of the mating surfaces of the calliper mounting lugs, particularly on the front hubs, is a good idea.
12 January 2009
Spent a couple of hours on sunday cleaning up the garage. Everything was pretty gungy, with the oil, dust and rust from all the cleaning and grinding. With that phase now over, its time to get back to a clean working area.
That done, I started on the front hub bearings. The first step is to drive the new outer bearing races into the hub carrier. This was easily achieved by tapping them in gently with a hammer, using a mixture of the old races and a metal bar as a drift. Much the same as removing them really.
I gave the inside of the carrier and races a final clean to make sure there was no debris in there, then packed the bearing assembly with grease and placed in the race. The oil seal was then driven in on top of it, using a small piece of softwood as a drift. Then the hub is located in the hub carrier and hammered in - this drives the bearing onto the shaft. Then the other bearing assembly can be put in the other side; this needs tapping onto the shaft, I used an old bearing as a drift. A bit more grease, then on with the washer and hub nut. The last job was driving the wheel studs into the hub.
 Left - Driving the hub into the hub carrier to seat the bearing. Right - all done
After doing one, the second one took about half the time. It felt good to have these done - they are the first parts of the car I've actually assembled. Although I will still need to take them to a garage to get the nuts done up to the correct torque.
20 January 2009
I've bought the rubber boots for the driveshafts from my local motor factors. Three are standard, but the left-hand inboard one is supposed to be a smaller one from a drum-braked sierra (these had different driveshafts, which are often referred to as the "push-in" type). Anyway, the one they supplied for this was wrong, so I asked on the DSC Forum for the part numbers. As it happens, Alex (of v8 Project fame) has one going spare and has said he'll send it to me.
In the meantime I could assemble the other one, which was just a case of a bit of grease, sliding the lobro joints on, replacing the circlips, and fitting the boots. I bought some stainless jubilee clips to replace the nasty single use clips which came with the boots. Looks quite shiny:
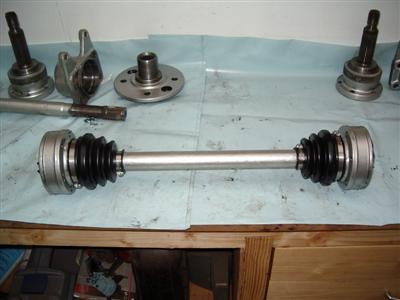
I've also bought a selection of circlips so that I can replace the broken one. I couldn't source one thick enough, so I'm using two thinner ones, which I'm sure will be fine as it's only for location.
The engineer tells me that my engine should be ready at the end of this week, hurrah! Apart from shipping that down to Dax, there wont be much more I can do until the kit is ready, which will be somewhere around the end of feb. In the meantime, I've bought some books on engine rebuilding and tuning, so I can decide what I'm going to do on that front.