
The Underside
Sept-November 2015
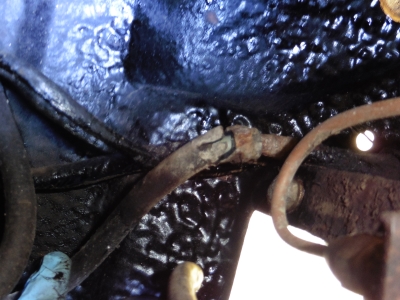
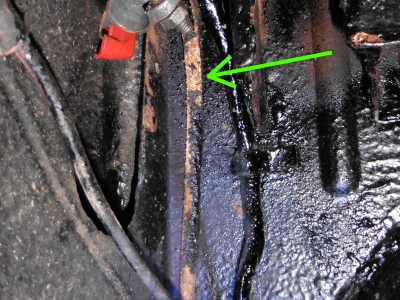
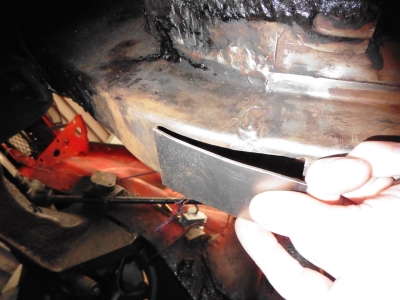
With the axle off, it was now easy to get at the brake and fuel lines which are above it. The splits and cracks where fuel had been pouring out could now be seen in all their perished glory; the hard steel line wasn't looking too clever either, looking very corroded:
So I stripped all of that off. The hardline, brake line and cables run up to the front of the car and are held in place by screwed on clips. It was a messy job removing it all as it's all covered in a good layer of underbody sealant. But nothing technical. It also gave me a good look at the chassis and floor. Most of which was good news, up to the footwells at least - more of which later. But the rear half of the car is very sound, a few places where the underbody seal had come off, a couple of very minor areas of surface rust and that was it. I dealt with those over a few evenings, cleaning up, painting with anti-rust primer, then covering with fresh underseal.
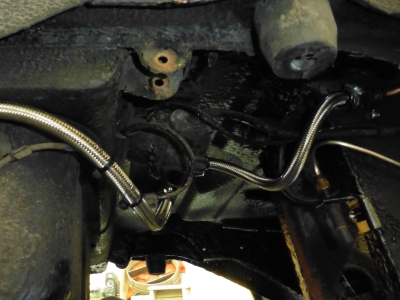
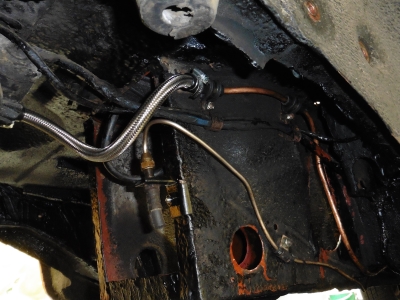
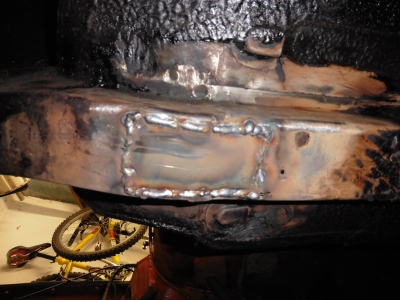
I had a few bits of of aeroquip hose left over from building the Dax, plenty in fact to replace the rotten rubber ones. I replaced the hardline with new copper pipe of the same bore. Bending such a long length to match the old one was entertaining, to say the least, but I got it close enough that I could fit it and tweak it as I went. I also replaced the rear brake line which was a similar challenge.
I replaced the old rusty metal clips with new mikalor stainless ones, and rerouted things slightly around the rear axle area. Looks much better now. An extremely messy job with all of the underseal floating around, I heartily recommend using disposable gloves.

So that was really all of the good news. Things got progessively less simple from there...
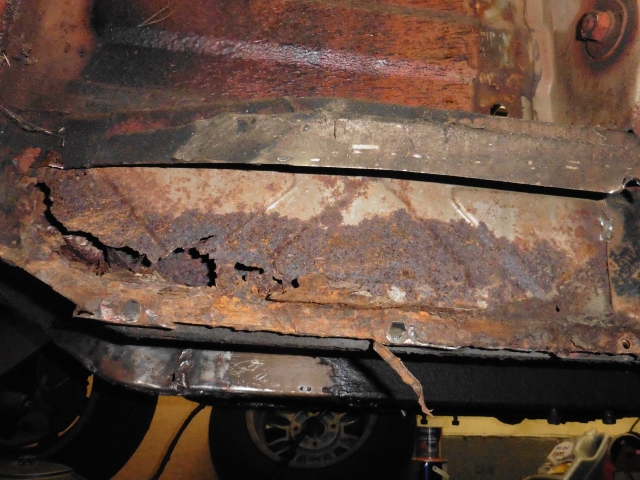
While I was underneath, I noticed some unpleasantness around the passenger chassis leg. A bit of probing with a screwdriver made clear that it was rusted right through in places; so I had to strip off the underseal and have a look. A wire brush in the drill is the best way I've found of doing this, very messy though.
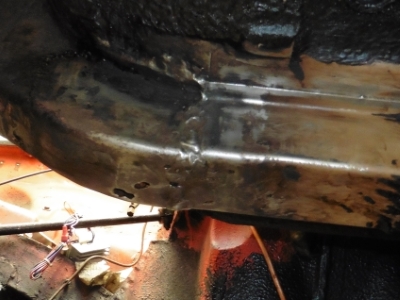
 Passenger side front chassis rail, looking from outside, underneath, and from inside the engine bay
So a couple of things there. One, it's rusted to buggery, and two, it's been replaced once before. Interesting...
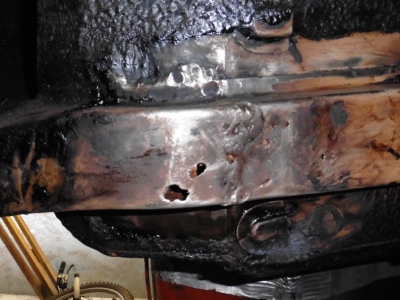
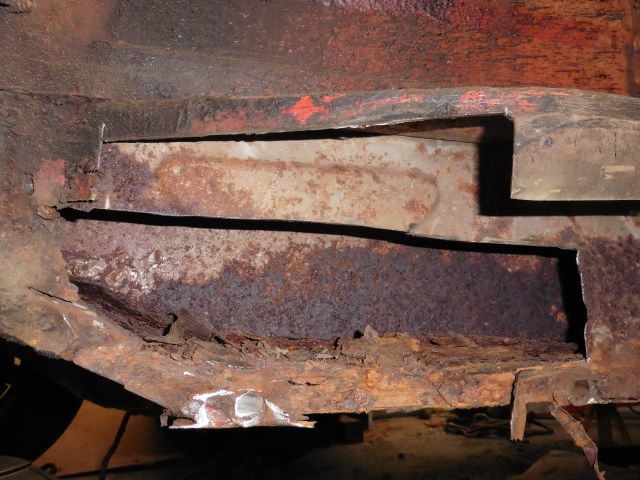
Some reading ensued, and a bit of consulting on the Pistonheads MG forum, from which I gathered that the thing to do is to cut out the rust and weld in a new section. The consensus seemed to be that nothing would collapse when I did that, especially without the engine in there. So it was out with the angle grinder and off I went...
I did one side at a time, so that there was at least something holding it together at all times. Fiddly because it was all working upside down, but not technically too hard. Welding upside down is always hard to get neat, but I took the trouble to practice a lot on some scrap, and it didn't turn out too bad.
 The first of several patches, others were required forward and aft of this, and on both upright sides.
There was a lot of rust inside which I cleared out; fortunately it seems localised to that spot, a good bashing all along the rest of the rail showed that it was sound. It will need a good spraying all up the inside with waxoyl or similar. I haven't dared look at the driver's side one yet, that'll have to wait until the car has its rear suspension back on and I can turn it around.
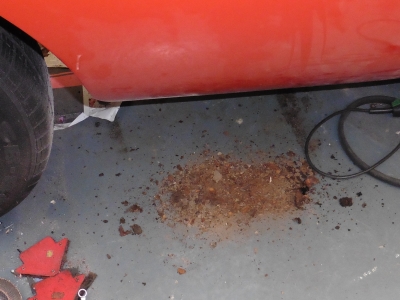
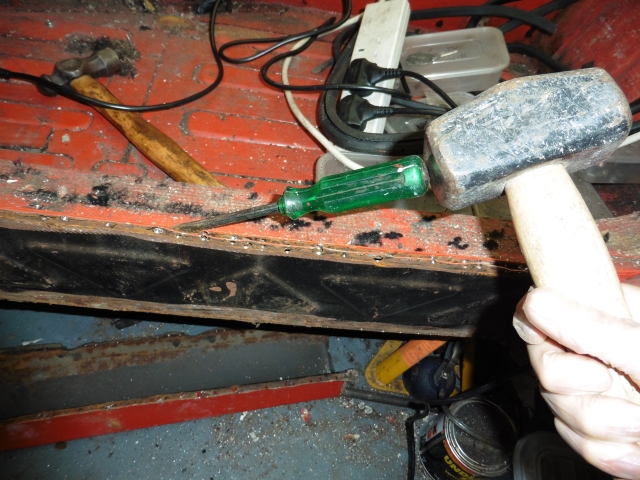
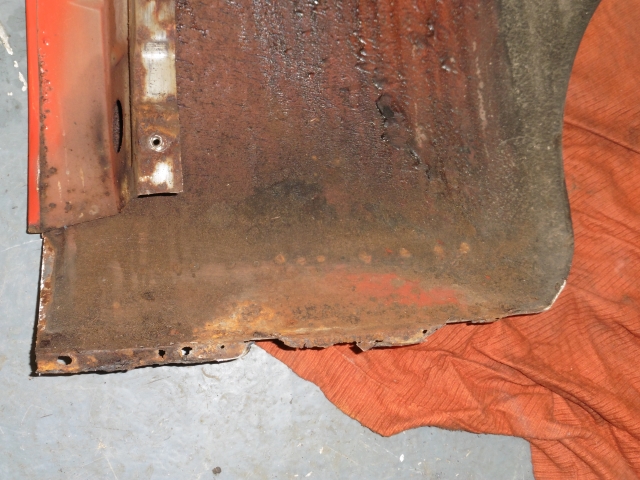
During all of this, I noticed that the wing wasn't looking too clever. A quick blast with the drill wire brush exposed that much of the bottom of it, and the front of the sill, was in fact filler. A bit of prodding resulted in a disturbingly large pile of rust and debris:
That looked like the sound of inevitability Mr Anderson to me, so off came the wing.
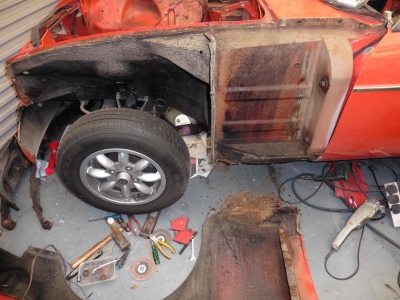
And what I now understand to be the classic MGB issue was revealed. I wasn't previously familiar with the construction of the sills, but some reading was necessary at this point to see what was going on.

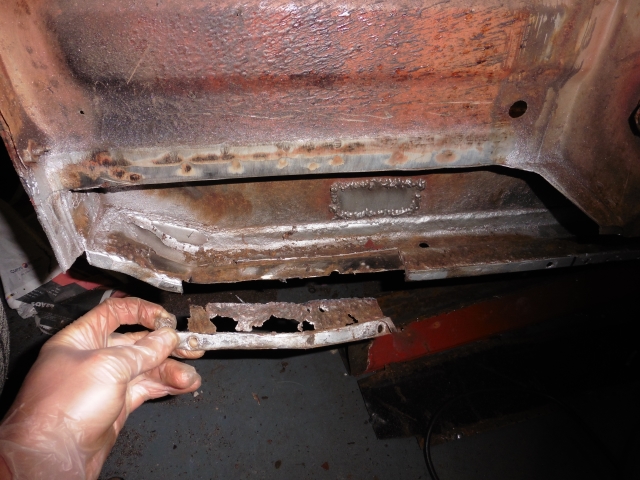
This is the end of the outer sill...or rather where the end of the sill should be. It has almost completely rusted away; a build up of damp mud and debris in the cavity between the wing and this sill causes it (and the bottom of the wing) to dissolve. It was also apparent that a new centre section of sill (under the doors, to the right of the pic, arrowed) has at some point been put in. Presumably replacing the whole lot was deemed too hard for some reason.
Anyway, I cut that away to see what was underneath. The sill is in three parts, an inner, a flat piece termed a membrane, and an outer. Cutting the outer away revealed the membrane:
Yeah, that was pretty shagged too. So I chopped that out as well, to show...the inner:
I managed to poke one small hole in the inner with a screwdriver, but that aside, it seemed sound...I hoped so as replacing the inners involves vast amounts of work, as opposed to just loads. However, I could only see the front quarter of it, who knows what was hidden behind the new centre section? I resolved that I'd have to cut that off to be sure. Since I was already in for a penny, I may as well go the full pound.
Removing the sills involves drilling out all of the spot welds, chiselling it out, and cutting across the rear with the angle grinder. This is a frankly crappy job, slow, hard work, and makes a right mess of things.
Miserable, but the good news was that the inner sill was fine underneath; and the rear wing also. So I'd cut out as much as I needed, now the repairing could begin. I ordered a new membrane and outer sill, and set about it.
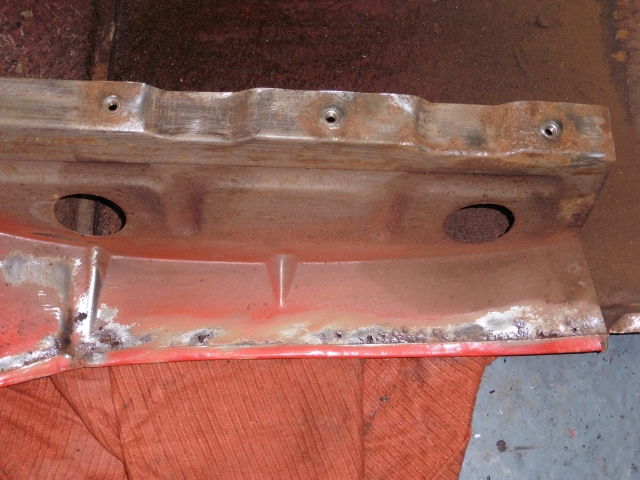
It became apparent pretty quickly that the castle rail (bottom section inside the sill) was also a relacement, being an oversized number which had been sort-of-welded over the original one. It was in fine condition, with the original one inside almost totally rusted away for the front 1/3. This rusted part was so knackered that I decided to cut it away and fabricate a new section so that I had a good strong flange to attach the new panels to.
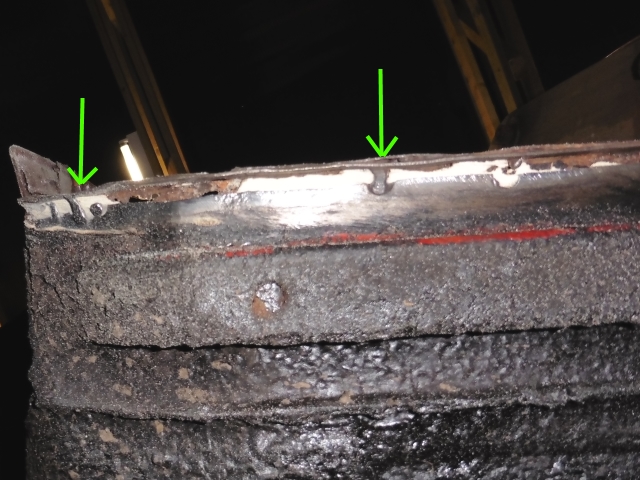
 Left - underside, showing the rather sparse welding of the new castle rail to the existing floor (arrows - 1 blob every 6 inches? Really?). Right - inside, cutting the rusted sections out. Also showing the repair patch over the one hole in the inner sill.
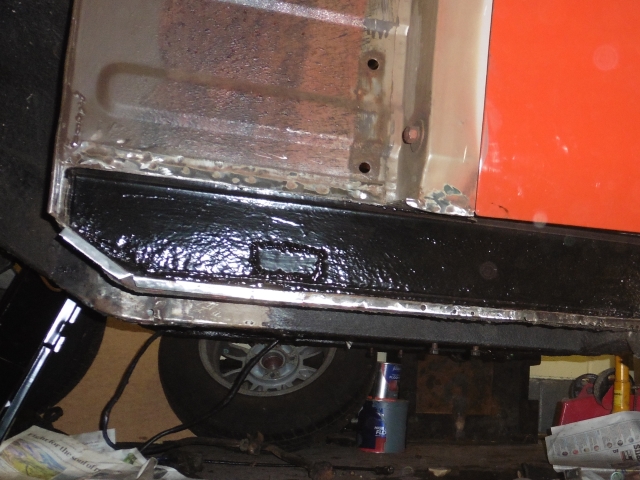
I made a new flange section and welded it on with 1" runs at 1" spacing, as described in Lindsay Porter's book on restoring the MGB, rather better than what it replaced! I gave the inner sills a good going over with a cup brush in the electric drill to remove surface rust, then followed with two coats of Hammerite "Rust Beater" primer, and a couple of coats of hammerite black. I'll also spray the insides with waxoyl when it's all together. But that lot should keep it safe for another 30 years at least.
Then it was a case of welding in the new membrane (which was easy, 'cos it was flat). Again using runs of roughly an inch and the same space between them. Then you have to grind them off flat so that the outer section fits flush.
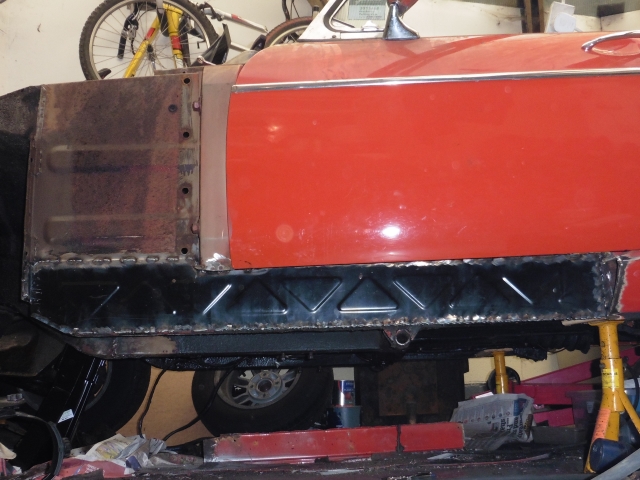
The outer section was rather harder, because it's not flat, and has to match at the rear edge, and around the door pillar, both very visible areas. Some cutting and bending and hammering was required at the front to get it to fit around the odd bulge here and there. I should say that I've invested in one of the generic kits of metalworking hammers and dollies which made things a lot easier, as did the anvil I bought a while ago to do some blacksmithing on. As Lindsay Porter says, "prepare to take endless time to ensure a good fit", and he's not wrong.
The rear proved very difficult; the new section should fit inside the rear wing, however the remains of the previous replacement outer sill are welded in there with no way of removing them. So the best I could do was get it close, weld it, then add a small filler strip of metal which I welded in on top to fill the gap as best I could. It needs a skim of filler to smooth things out anyway, and this way will be good and strong.
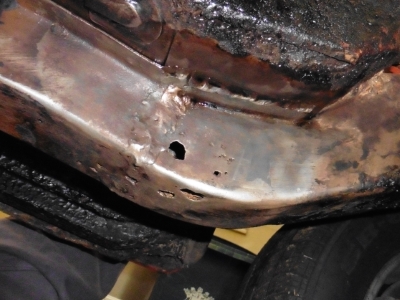
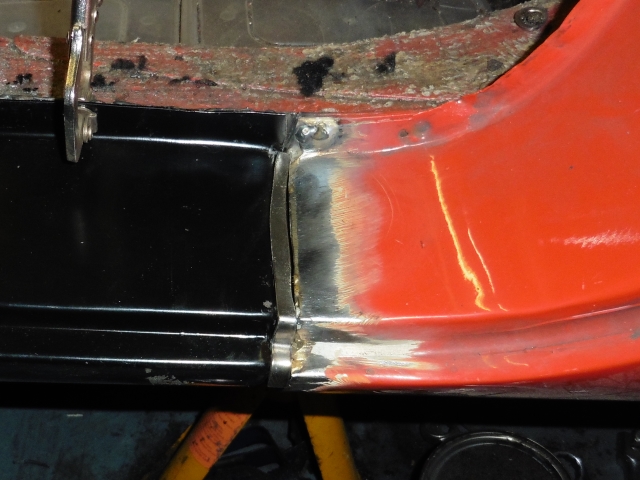 Filler strip at the rear of the sill, prior to welding up
Eventually it was all on, I gave the front section several coats of hammerite and a couple of underseal to keep it rust-free for as long as possible. I refitted the door but didn't bother lining it up properly at this point. I then moved on to the wing - I knew it needed a bit of work to the bottom and I was in a metal bashing mood.
Front Wing
Here's a pic of the rust to the bottom of the wing - not massively bad but would need a patch making and welding in.
As I was tidying up the rest with a wire brush, I came across this at the rear. Hmmmm, not great:
Then, the crowning turd in the water pipe as it were...the top edge had rather a lot of filler on it. I noticed because it cracked off as I was attempting to bash the top flange into a better shape. The more I explored, the thicker the filler layer got, and the worse the underlying metal was.

Hard to see the state of the metal in that pic, but it looks as if someone has taken a hammer to it. At first I thought it had maybe been in an accident, but it doesn't really look like that to me. It's just battered, is the only way I can describe it. Unfortunately, the position of the damage means that you can't really get at the inside of it to hammer it out, presumably why they just whapped a load of filler on it. Very good filler work though. Anyway, at this point I started looking for used wings on eBay. I haven't done anything yet, but I suspect that I will get a replacement one, as I think that this one is really beyond repair.