
Engine and Gearbox Removal
01 June 2015
Knowing how these things can go, I put aside a clear weekend for removing the engine. The Haynes manual has it at about 3 steps and half a dozen bolts; but I'm wise to their games.
Engine Out
In truth, it's nothing complicated. But it did take most of the first day just to disconnect everything, somewhat contradicting the nice people at Haynes. There are rather a lot of bits not mentioned. The rear gearbox subframe particularly is hilariously bad; you have to slacken the front gearbox mounting bolts which are only half exposed, and barely accessible, then unbolt the subframe and lower it. This then gives you access to the rear bolts. Incredibly fiddly. The engine mounts are almost as bad, they seem designed to make things as hard as possible for you.
The rest was just unbolting stuff really. Various bits will need replacing of course, but nothing major.
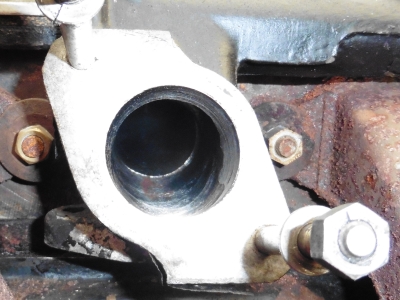
Along the way I saw this lovely bit of port mismatch in the inlets - some scope for improving that by grinding away the lip. By all accounts it doesn't matter if a small hole goes into a big one, but any sort of ridge or lip like the above is a bad thing for airflow.
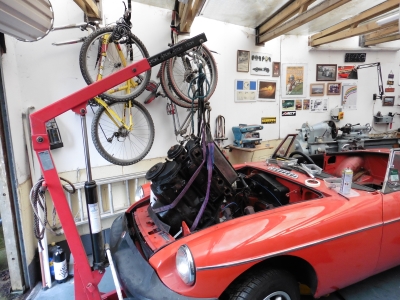
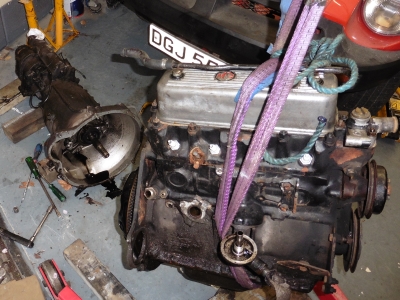
On the sunday I had a clear run at actually lifting the block. A bit of a faff getting it clear of the engine mounts, but with the usual wiggling and levering with big lumps of wood, out it came. I'd actually put the slings too far forwards so it came out at a hell of an angle, but it showed no sign of moving so I carried on. It's very hard to judge where the slings should go, as the gearbox end was resting on the floor. I needed to lift the gearbox by hand to clear it over the front of the engine bay (while the missus operated the crane), and man it is heavy. The Dax engine and box seems featherweight in comparison, despite being physically larger.
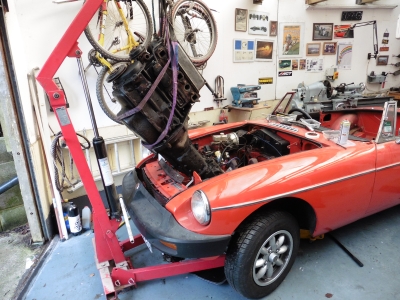
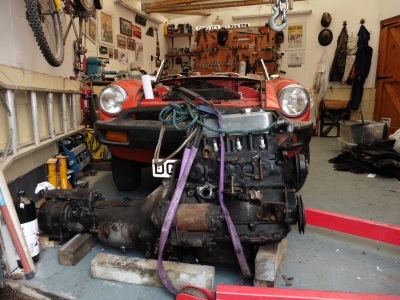
I left it out in front of the car as the day was running out. The next evening I set about splitting the engine and box apart, so I could stash them somewhere a bit more out of the way. This was as easy as it ever is, remove the bolts, a bit of levering (big graunching screwdrivers are needed here), and using the crane and wooden blocks to keep the two assemblies in line to avoid straining the input shaft.
With them apart, the oil leak was obvious, although not the source of it. There's a big pool in the bottom of the bellhousing but it's not clear if it's from the rear of the engine or the front of the gearbox. I'm expecting it to be the engine though.
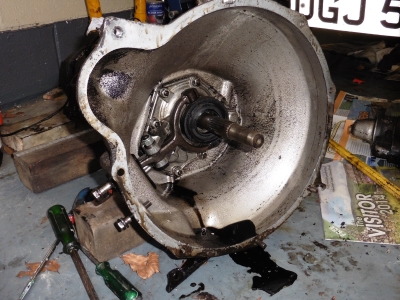
Doesn't really matter though as it happens. I gave the gearbox input shaft a bit of a wiggle to see how it was, and oh dear. Vast amounts of play in it (like several mm). So looks like a gearbox rebuild is on the cards as well as an engine one. That's one job I will probably farm out to a specialist.
The stater motor housing was broken when I removed it, around one of the mounting holes - exactly the same as the one on the Dax, coincidentally enough. This one is a bit worse, and easier to come by, so I can just replace, rather than having to get it repaired.
I also noticed that the flywheel ring gear is a bit worn:
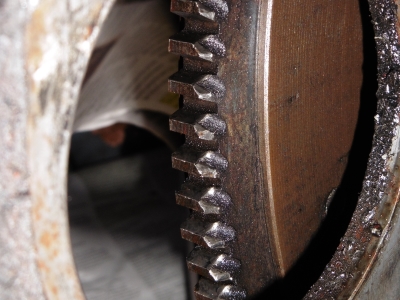
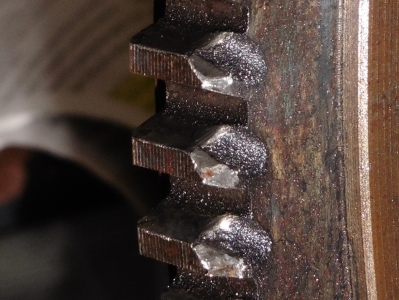
I don't think it's quite as bad as it looks, as the front of the teeth have a bevel machined into them to make the starter gear engage more easily. I'll have to have a look at it with the starter gear at some point to see if it's enough wear to bother changing the ring gear. Now is the time if it needs doing.
Anyway, all that is for later. I craned the engine over to a space at the side of the garage, and stashed the gearbox likewise.
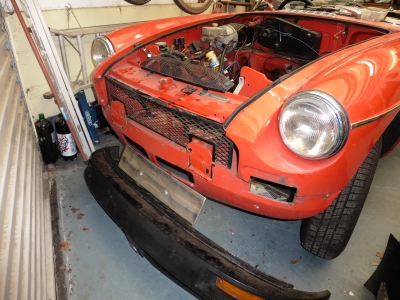
Front Bumper
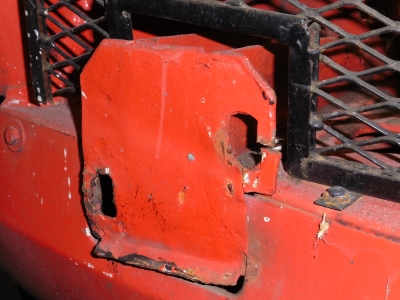
I took the bumper off, because it had to anyway, but largely because it meant I could move the car about 8 inches further forwards, the damn things are huge. I should have done it before taking out the engine really as it would have improved access for the crane. No problems here, except that both the mounting plates are cracked. I'll be binning the rubbers anyway, but otherwise I'd need to replace these:
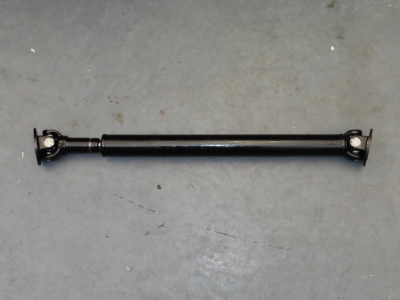
Propshaft
This of course has to be disconnected to get the engine out, so it was half off anyway. I wanted to check it and see if it was the source of the mystery vibration.
Surprisingly, none of the bolts were siezed, so removal was pretty easy.
Initial inspection suggested that yes, this was the source of the vibration:
Stripping out the spiders showed that two of the joints had lost all of their bearings completely. The others were horribly pitted and scored and generally knackered; the front joints were far worse than the rears.
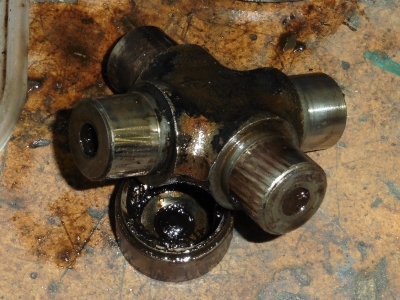 Score marks in the bearing where the needle bearings have embedded themselves
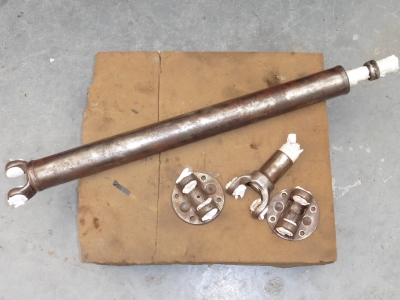
This was actually good news, as it's something obvious and easily fixable. A new set of bearings comes in at about 15 quid, and a couple of hours toil. I also stripped and painted it whilst I was in there:
Plan
The order of things is becomming a bit clearer in my mind. I need to strip it right down so that I can do any welding on the body; this will mean removing the brake and fuel lines etc in order to get at the footwells. I can do all of the body work modifications, and replace the suspension, then refit brakes and steering. At that point I'll have a rolling chassis with brakes which seems like the minimum things I'll need to get it to the body shop and back for a respray.
Somewhat parallel with that will be rebuilding the engine and gearbox. Then it's "just" a case of building her back up.