Started at last!
The Build Begins
April - May 2009
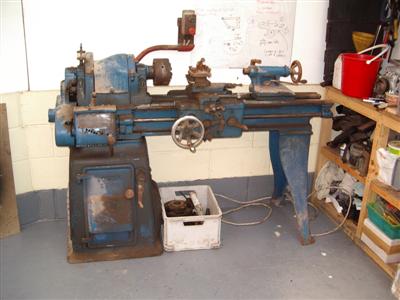
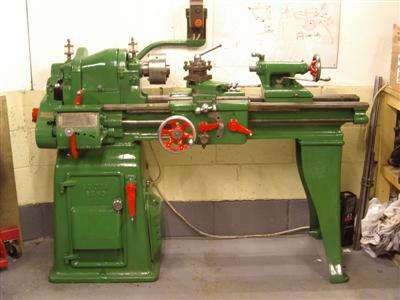
It's been a busy couple of weeks since I picked up the kit. Mostly I've been stripping, cleaning and repainting the lathe I bought - a lot of work but it's turned out pretty well. Once I learn to use it with some sort of competance, it should give me a lot more options during the build.
I also went through all the bits of the kit, and it turns out that I'm missing a couple of things...the wiring loom and a gearbox mount are what I've noticed so far. Dax knew this, so will send it on later. No worries as long as it doesn't hold me up.
It was also the National Kit Car Show at Stoneleigh over the bank holiday weekend. A great show, it seemed bigger than last year. The Dax stand certainly had more cars on it, a great turn out. Always good to look at other people's Rushes, and I had a good look round the other club stands for ideas. Mostly looking at details like dashboards, vents, seats etc. My main reason for going was to pick up a load of tools (riveter, rivnut tool, clekos, metal nibbler, holecutters, some measuring gauges, and various other things), which I succesfully did.
 The Dax Owner's Club stand at Stoneleigh

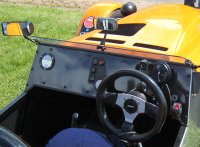
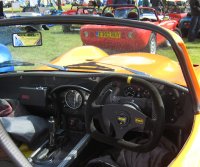

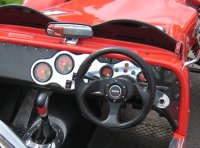 Details, details...mostly not Daxs but why limit your sources of inspiration?
17 May 2009
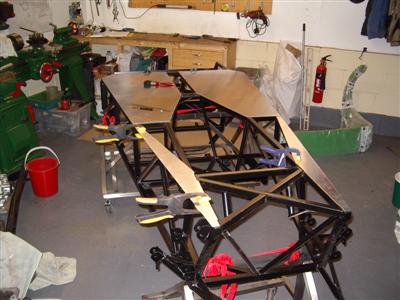
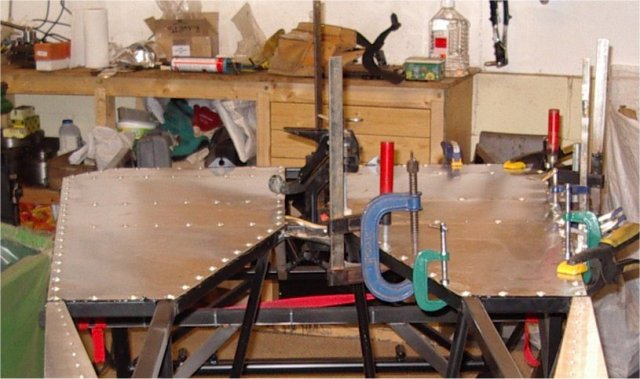
Today I finally got around to starting the build proper. The first job was to turn the chassis upside down and put the floor panels on - thanks to the missus for help with that. After a bit of time unpacking the aluminium panels and working out which went where, it was time to do break out the tools.
The floor consists of two large panels and a couple of small "infil" panels. Each is supplied roughly cut to shape, but a good 1/2 inch oversize, so they have to be trimmed to an exact fit. That's where the nibbler comes in, hard work on the old forearms of course but I'm sure it's good for you. After trimming, I ran around all the edges with a file and finished off with a sanding block to remove any sharp bits. And I still managed to cut myself, d'oh.
19 May 2009
Had a couple of hours last night, so I finished off doing the floor panels. Next job is to drill all of the holes ready for riveting. I'm going to see if I can hire an air riveter over the weekend and save my hands!
The other thing worth saying is that having build stands on castors is fantastic - being able to move the car around when working on it, and push it to the side when not working on it, is really helpful. If you're making stands, my advice would be to put wheels on 'em.
27 May 2009
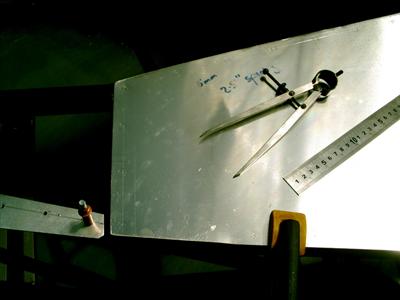
During the last week, I marked out the panels for drilling, and drilled all the holes ready for riveting. Marking out was a slow process, but then I wasn't in a hurry and I didn't want to make any mistakes. A pair of metal worker's dividers is a great help here, mine cost about Ł3 I think, and were particularly useful for spacing holes equally, and then transfering measurements from one panel to the other. Once all the hole positions were marked, I punched them with a centre punch and it was on to the drilling.
Drilling was again more time consuming than I'd imagined. The "clekos" (temporary rivets) I'd bought were very useful here for holding the panels in position for drilling. I also found that I wore out my 5.5mm drill very quickly - it was a posh titanium coated one as well. After that, I drilled smaller pilot holes, then took them out to 5.5mm afterwards; this seemed much quicker and didn't wear out the drill. I also used a drop of cutting fluid for each hole, which probably helped keep things cool and sharp.
 The copper thing is a cleko
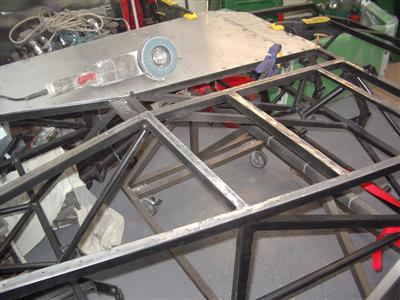
With all holes drilled, the mating surfaces need to be sanded (in the case of the ally floor panels), and have the powder coat ground off in the case of the chassis. I used emery paper and a flap wheel in the angle grinder respectively. Grinding the powder coat off seems oh-so-wrong, but I guess the Wurth sealant will provide enough weatherproofing for the bare metal.
So to tonight, and it was time to start the riveting. As I mentioned above, I was going to hire an air riveter. However, a trawl of the local hire shops came up blank. HSS have them, but they were all in Ireland or the Isle of Man. So I resigned myself to doing it by hand.
...which as it happened, was no trouble at all. The first side (floor panel and infil panel) only took about an hour to do, which surprised me; the big rivets are a bit of a stuggle at first, but there's a bit of a nack to it and it seemed to get easier as I went on.
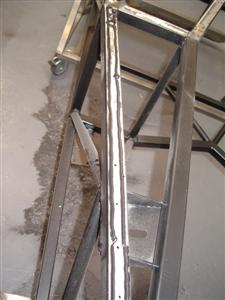
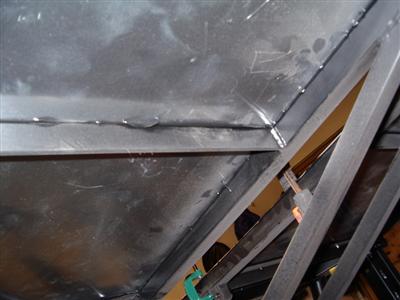
The build manual says to use a "generous" bead of sealant; I ran a bead down each side of the rivet holes (below, left). Once riveted on, this seems to have been just about right, with just a small bead oozing out of the sides (right)
So with that success egging me on, I stopped for a chinese takaway, then went back out to the garage to do the other side. This was going even quicker, until....I realised that I wasn't going to have enough rivets.
Now given that I've follwed the spacing recommended (2.5"), and that there are other things to be riveted later on, I confess that I hadn't checked how many there were. I didn't expect to run out on the first task. I'm not sure if Dax didn't supply me enough (which I suspect), or if I've used too many (can't see how though). What I have is 106 large rivets, which seems a rather odd number, and certainly not enough to do both panels into all the chassis rails at 2.5" spacing.
Anyway, this left me (a) rather cross, and (b) with a panel that was sitting on some rapidly-setting wurth, with several rivets already in it. So I did the only thing I really could, which was to put every other rivet in, and scavenge every clamp I could find to clamp up the places where the rivets were missing. This should hopefully mean that the wurth dries in the right places for when I put in the missing rivets.
So a mixture of success and failiure tonight. Tommorow I will have to see if I can pick up some more 5mm rivets from somewhere. Grrrr.
30 May 2009
Well, big headed rivets are apparently a bit hard to come by in normal hardware stores, so I rang Dax about it, and they posted me some off the same day. Unfortunately, there's still not enough. However, it was the monthly North West Dax Owners club meeting today, and a fellow builder sorted me out with some which he had left over. This meant that I was able to finish riveting the floor in today, instead of having to wait until I could get some by mail order.
And in other news, several months of ebay trawling finally came up trumps:
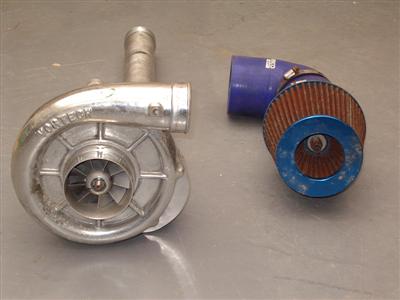
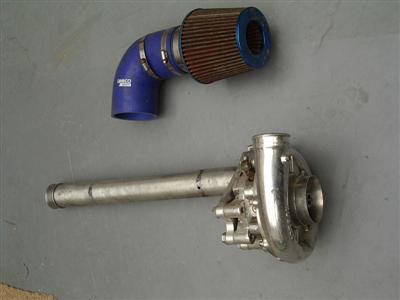 Vortech V5 G-trim supercharger
This Vortech V5 is a from a Ripp Mods kit for a Mitsubishi GTO 3.0 v6. I haven't (as yet) found a compressor map for it, Vortech's site doesn't seem to have one; however given that it's from a fairly similar engine it should suit mine. My first choice would have been a Rotrex, largely because they have a sealed lubrication system, whereas the Vortech (well this model anyway) requires an oil feed from the engine - not the end of the world, just a bit more complexity to deal with. However, the price was right and I couldn't pass it up, as these things don't come up very often.
The supercharger is pretty big in diameter - larger than I was expecting, so I'm not sure yet how (or if) it will fit. I'll try my damndest though! It has a long driveshaft to allow it to be mounted at the rear of the engine, which might give me a few more options - or I should be able to remove and stick it on the front if that's better.
31 May 2009
Today, I turned the chassis over and started looking at the various other panels. First though, I'd noticed a number of places where the powdercoat had been scratched off, or hadn't fully covered the metal. Some of the larger welds were particularly bad for this as there are lots of nooks and crannies. So I spent some time going over these spots with the leftover PQR-15 paint I'd bought to do the sierra donor parts. I'll get some black metal paint to topcoat it with tommorow. Can't be having rust getting at the chassis!
 Holes in the powdercoating around the differential mount. I've started to sand the area ready for painting with PQR-15
So onto the panels. First off, it looks like the footwell panels are the place to start, however it's not quite that simple. The driver's side footwell end panel can't be fitted yet, as the steering column goes through it, so that one will have to wait. A lot of people do the footwell top panel, which forms the battery shelf, however this covers the transmission tunnel so I want to leave that off for a bit for better access, as all the fuel and brake lines have to go through there. So that one's out. That leaves the footwell inner panels (basically the sides of the transmission tunnel where it flares outwards), and the passenger side footwell end panel.
I spent some time playing with the GRP inner panels; since my chassis is modified to take the honda gearbox, they don't really fit:

Looking at other build diaries, there seems to be a lot of chopping and patching to get these to fit. I'm currently in two minds as to whether to do that, or whether to fabricate some out of ally sheet. The latter wont be easy because of the shape, and I do quite like the way the green colour will continue from the transmission tunnel; but then it looks like it's going to be quite fiddly either way.
So I basically decided to mull on that for a while, which left only the passenger footwell end panel to do. This is quite a complicated shape with lots of cut outs, and to make matters worse, is virtually impossible to get in place, because of the various chassis members. You have to be a bit brutal with it and bend it to get it into position, then push the bend out when it's in place.
It's also very hard to get the drill and riveter in to actually fix it; I managed a reasonable coverage, apart from the very top outside corner, under the VIN plate. So I've wurthed and clamped that end in place, which will be plenty strong enough. (below, left). On the other side of the panel, I left an overlap of couple of cm or so, and tapped it around the round chassis tube so there was no gap (right).
Pretty happy with that; next I'm going to move onto the rear suspension and differential.