
Gearbox, meet engine.
Mating
(of gearboxes to engines, that is)
Waiting...
08 October 2008
So now it's getting to the point where I need to start thinking about how the s2000 box fits onto the alfa block. Before I did this, there was some tidying up and cleaning to be done, which took a couple of hours. I also spent some time playing with the bits of the alfa gearbox, until I could see how it all worked. Finally I understand!
First up, there were a few more bits to be removed from the engine, in order to be able to see the wood for the trees. So the rest of the loom, the starter motor, the aircon pump and some of the fanbelt pullies came off. Nothing to hard there, though I was a bit annoyed to see that the starter motor bracket had cracked:

I'm guessing I did it when I was helping the gearbox off...bugger. Never mind, 'tis only a bracket so shouldn't be too hard to sort out. For now, it goes into my rapidly growing box of salvaged parts...
The other exhaust manifold probably should come off, but two of the nuts are well and truely rusted on. They're the most innacessible ones as well (surprise), but I'll ignore them for now. I've also sold a few bits from the alfa to people online, so I've spent a few hours dismantling other things for them.
After that, it was time to shift the engine (there's been a lot of lifting it and turning it around to get access to the various parts - while the donor car is still in the garage I've had to keep it up against a wall) and move the new gearbox into position. Took a couple of lifts to arrange the engine so that the supports where clear of the clutch. Then I hoisted the gearbox and offered it up to the engine, before putting supports in underneath it.
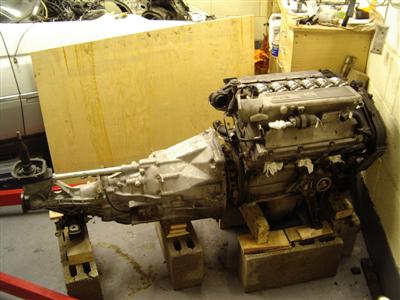
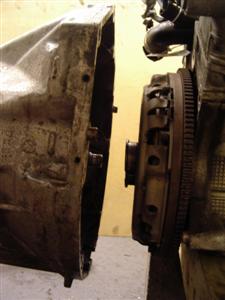
As can be seen from the right hand picture, the honda bellhousing is rather taller than the alfa one. Around the left hand side it's quite a close match, less so around the right.
14 October 2008
Well, I've taken everything I need from the donor, and the weekend gave an opportunity to push it out of the garage. The missus helped me muscle the car back onto the drive and out of the way. She says I really know how to treat a girl, but I think that may have been sarcasm...
With that done, I was able to clear up the pools of oil and piles of debris, and move the engine into a better position. The crane was then taken down, and I had a general tidy up of tools etc. This resulted in a much better working area:
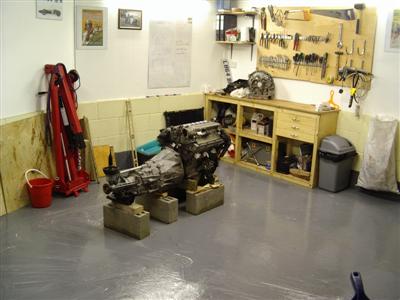
I've still got a few people asking for parts from the alfa, but as soon as they're done I'll get it towed away.
Over the next couple of days, I finally got around to removing the other exhaust manifold, which had two rusted on studs. A combination of belting it with a hammer, driving on an undersized socket, and large slip-joint pliers won out, as usual. I also cleaned a lot of the gunge off; it'll need a lot more before I can think about tarting it up with paint or whatever, but it reduces the amount of general filth.
I then had a look at the clutch and input shafts of the two gearboxes. It looks as if the honda one runs in a bearing at the extreme end, whereas the alfa shaft seems to be supported by the cluch release bearing itself, and does not bear on the flywheel at all. Thus the splined sections of shaft are quite different:
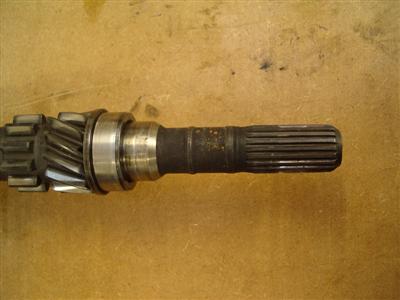
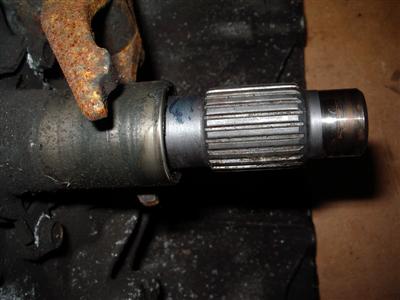 Alfa on the left, Honda s2000 on the right
This will all matter more when I have to sort out a clutch, but for now I've just photgraphed and measured everything...not a lot else I can do at the moment.
I had the day off on monday and spent a lot of it looking for someone who could do the necessary modofications to adapt the gearbox to the engine. Didn't have a clue where, so I simply looked under "precision engineers" in the phone book and off I went. As it happens, the second place I tried pointed me in the direction of a small firm which seems to specialise in this area, and does all sorts of modifications for motorsport. The downside is that it'll be around a month before they can fit me in, but they seemed totally unfazed by the idea at least. So I've booked in with them for a few weeks' time. I'll have to take them the engine and box, and hopefully they can do the required chopping and welding. This means that there's no chance of getting the engine down to Dax for the end of this month, so I had to ring them and put my build date back, again. From what they said though, they're quite busy anyway and they quite welcomed the chance of a bit more time. So my provisional date is now the 15th December.
I also asked about alloy bonnet and side panels for the car engined chassis - they are a free option, just as for the bike chassis. Also about custom colours, I still haven't decided what I want yet but I've a few in mind which are not on the standard Dax colour chart.
And finally, I ordered a welder - a Sip Weldmate 105P Mig, as recommended in one of Practical Performance Car's tests the other month. I wasn't impressed with the Fedex goon leaving it outside the front door all day in the pissing rain however. Anyhow, I've had a quick go and it all seems to work. Looks like I'll need a lot of practice before I can do anything useful though, so I need to get hold of a load of bits of scrap metal. Along with this, I also got a couple of C02 fire extinguishers and hung them in the garage - not cheap things, but I've seen a few horror stories online of people burning down their garages/cars/houses and don't want to take any chances...
29 October 2008
Not had a lot of garage time over the last couple of weeks, and to be honest there's not a great deal to do with the bits I have at this stage. Mostly, I've been playing with the welder when I get a spare half hour, with varying degrees of success...but it's best to get the practice in before I actually want to use it properly.
I did spruce up the oil cooler which was looking rather tatty (although it looks to be completely mechanically sound). The connections needed some considerable persuasion to come off, so that took a while. I was being particularly careful as I didn't want to risk graunching the threads, which are aluminium. One of them is a bit damaged, but not enough to matter I don't think. After that, I got rid off as much of the old paint as I could, using a flap wheel in the electric drill for the frame, and a toothbrush for the delicate matrix bits. Then I rinsed it off, and sprayed with some high temperature paint. To be honest I suspect that ordinary hammerite may have done, but I'm not sure exactly how hot it's likely to get, but I figure that it will be up around boiling point, so I played it safe. It looks a lot smarter now anyway:
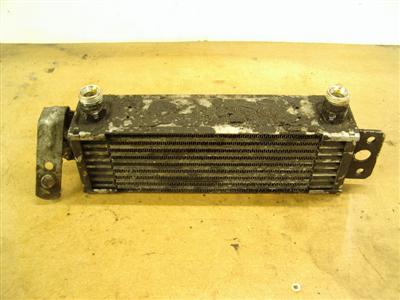
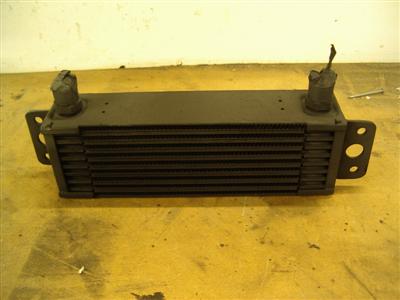
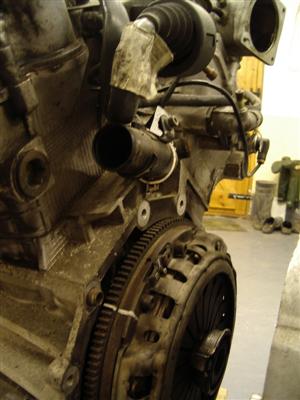
I was also a bit worried about the working area around the back of the engine where the gearbox has to fit. The connection for the radiator bottom hose is a metal pipe which runs from the pump at the front of the engine, all along between the two heads, and comes out of the back of the engine, rather close to the top of the gearbox:
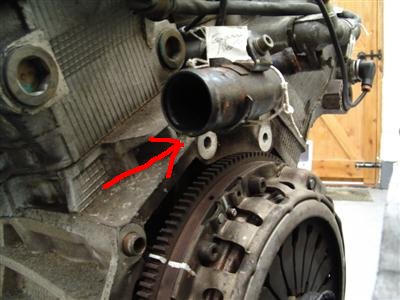
As you can see, there isn't a lot of clearance between the pipe and the top bellhousing bolts (arrow), which will probably make the engineer's job harder. So I thought I'd have a bash at moving it, or removing it.
Unfortunately, the manual I have wasn't much use here as it describes the 12v engine, where this water outlet comes directly off the front of the engine, without this metal pipe. So this meant I was on my own. I couldn't really see how the pipe was connected, it looks like you really need to take a head off to get at it, which I don't want to do yet. So I elected to dismantle the water pump assembly and see if I could get it out from that end. Fortunately nothing too hard, it did mean removing the cam belt and one of the idler pulleys however. So I marked the cam pulleys so I'll have a rough idea of where they should be. I'm not too worried about loosing the timing at this stage as I'm going to be stripping it all down, and possibly fitting new cams anyway - but it always helps to have reference marks!
A couple of the bolts were a bit fiddly to get at, but it was pretty simple stuff apart from that. Ultimately, I found that the metal pipe is fixed to part of the water pump casing, so there's no way of actually removing it without taking the heads off. However, with it now disconnected at both ends, it can be pushed up and back a couple of inches, which will probably help somewhat:
9 November 2008
Still waiting for the engineer to tell me he's ready to take the engine and box, so again not a great deal to report. However, I have got rid of the alfa, taken away by the scrap man last week, for which I recieved the grand total of £20. Still, not so long ago you had to pay them to take stuff away, so I'm happy with that. I used one of those internet scrap car collection sites, did the job nice and easilly.
With this and the sale of various parts, the engine has so far cost me £320, which isn't at all bad. That'll probably triple by the time I've changed the cam belt (around £200 for the belt, new idler pullies and tensioner), and reconditioned it. Still good though, when you look at the price for an engine from a scrappy (800-1000), which wont have any wiring, probably not all of the sensors, and no ecu or ancilliaries - and will still need a cam belt change. Plus I know that this one was running.
I've done a bit more cleaning up - the throttle, airflow sensor, and horns. A few hours spent with white spirit, the dremel, emery paper and steel wool does a world of good. The horns in particular were very rusty, but I liked the sound, so I thought I'd see if they could be salvaged. I ground all of the rust off and they have come out ok - the surface is pitted, but I think they'll look quite reasonable once they're painted up. And every pound saved on things like that is another pound I can spend making it go faster...
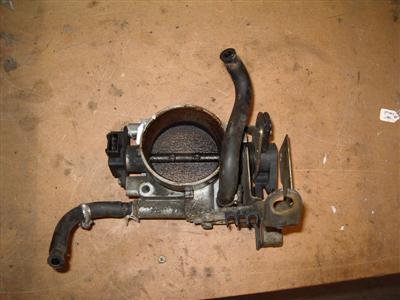
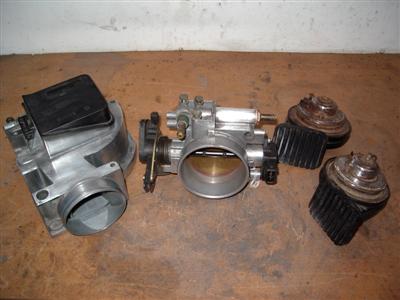 Left: The throttle body as removed from the car. Right: Cleaned throttle, airflow sensor, and horns.
The airflow meter is a huge clunky thing - must weigh over a kilo. It uses a spring loaded door to measure airflow - which must affect the airflow quite considerably itself. A friend of mine who works on engine sensors tells me that modern versions weigh 30g! More than the weight, the size is bothering me - in the alfa it sticks out a long way (maybe 10 inches) from the back of the engine, and there might not be room for that in the Dax. Still, can't worry about that until I have all the bits and can see exactly where things are going to be.