
Oh, so that's how it's attached...
Major Dismantling
21 September 2008
Got a few good hours in over the weekend. I started by attacking those screws which were up under the windscreen. After a bit of thinking, I took one of those plug-in screwdriver heads, and cut it in half to make it shorter. It then just fit under the windscreen, and I was able to inch it round, a tiny bit at a time, using a long pair of slip-joint pliers. A bit of a faff but less so than taking the windscreen apart! However, that seemed to make no difference at all. Hmmmmmm.
So I did a bit more looking on the web, and finally managed to find an actual set of workshop manuals for the 164. This is on a dutch site, but the manuals are in english. Anyway, they have step-by-step instructions on how to remove the dash.
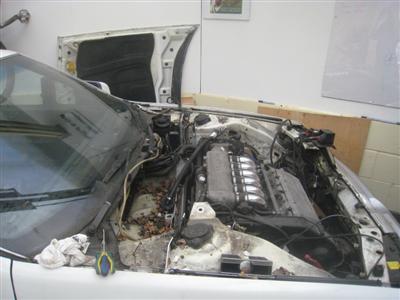
First, you have to remove all of the fan/aircon gubbins from the engine bay. I'd been avoiding this, but it didn't take too long in fact, and has made a lot more space (left). This reveals yet more bolts holding the dash on. Then, you go back inside the car and remove most of the interior, starting with the centre console (right).
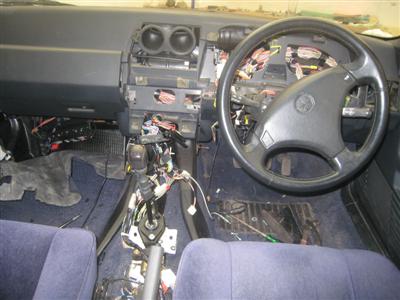
The dash still wasn't looking like moving much at this point, so things were't looking too great; but as it happens, it didn't matter. As I peeled back a bit of the carpet, I saw the ecu nestled in the passenger footwell:

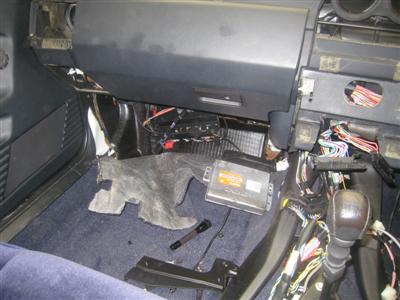
So that hunt, at least, is over. If I'd have known where it was to start with, it would have taken an hour, hour and a half, tops - instead it took two days. Still, taking things apart is interesting if nothing else. I'm hoping that the humungous connector on the ECU cable will actually fit through the hole in the bulkead - I really don't want to cut it.
With that done, I was in a wiring (well, de-wiring) mood, so I went back into the engine bay to try to make sense of it all. As more and more parts are stripped away, the remainder becomes clearer and clearer. You can start making out the various branches of the wiring loom, the HT section for the ignition, a branch each side for the headlights and brakes, and the engine sensors. By tea time I'd disconnected (and labelled) the loom on both sides of the car right back to the bulkead, and hung the cables over the sides out of the way. Another step closer.
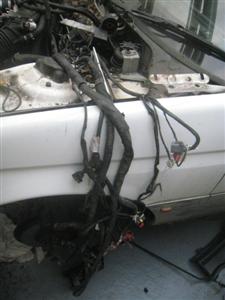 Wires, wires, everywhere...
22 September 2008
All of the wiring is now disconnected from the engine and the looms stripped back out of the way. So it's time to start on some of the more meaty bits of engineering.
Tonight it's the driveshafts. The nearside one connects by a flange (titter) to the differential; the offside is connected to an intermediate shaft which runs across the car, through a bearing inside the engine mount, and then via another flange to the driveshaft which connects to the hub.
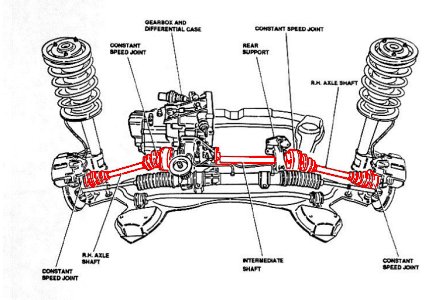
So I started with the nearside one, 'cos it looked easiest. The flange is held on with 5 X 10mm allen bolts, and is a bit tucked away - it actually took me longer working out how to attack it than to do it. I used the handle from my jack as an extension bar on the allen key, and with another bar wedged between the wheel nut studs on the hub, prevented the whole lot from rotating.
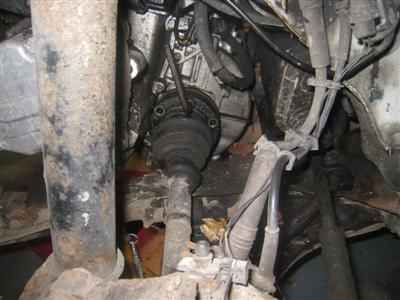
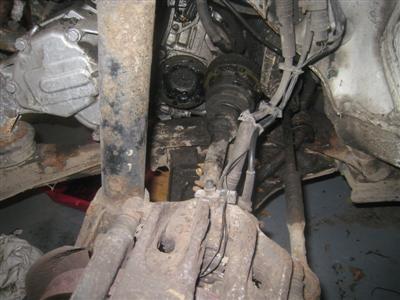
One down, one to go. And as expected, this one is rather more problematic. It seems to me that I can either disconnect the driveshaft from the hub, and lift the whole lot out with the engine still attached to the diff; or I have to remove both the driveshaft and intermediate shaft.
The problem with option (1) is the very large (36mm) socket which holds the driveshaft on the hub, and which is torqued up to over 400nm (that's four times as tight as a wheel nut). I suspect that might require at least one other person and a pair of very long extension bars. Option (2) would be ok except I'm dammed if I can see how you can possibly get at the flange bolts; and getting an extension bar in for added leverage is out of the question. Even with an air tool, it must be all sorts of tight. you really want to remove the engine to get at the bolts to remove the engine...
 I can barely reach it, let alone undo it!
So I drained the gearbox oil and retreated for the night, to do a bit of reading and thinking about my next move.
24 September 2008
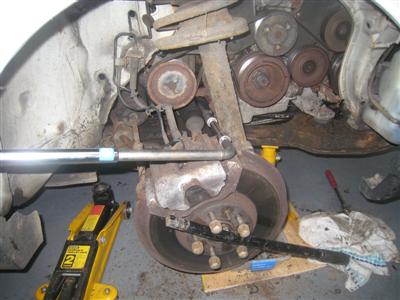
OK, so in the cold light of day things didn't seem quite so bad. I couldn't find anywhere which did a 36mm socket nearby, so I had another look at the flange bolts. As it happened, there is a tiny window through which it looked like you might be able to reach the bolts from the outside - if you have an 8mm hex socket and a long enough extension (fnaaar). I didn't, so off to the tool shop to buy said hex socket and an extra 10 inches.
I ended up with a nice long 18 inch reach, cobbled together from a number of bars and adaptors stuck together. And it did just let me reach the bolts. A long bar to jam the wheel nuts and stop it all turning, and with much groping about, managed to get all the bolts undone. So the second driveshaft is disconnected. While I was under there I disconnected the power steering pump as well. Not quite as smelly as gear oil, but a close second.
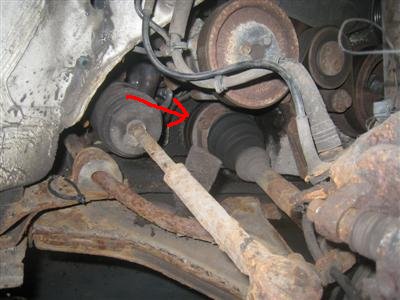
 Somewhere in there is a bolt...
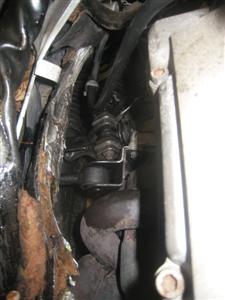
Emboldened by that success, I moved on to disconnect the gear linkage and reaction rod. Nothing too clever here, just some very inaccessible bolts. A slow and painful process, but otherwise easy enough.
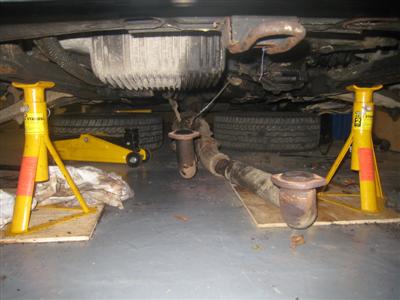
It was going well, and there was only one thing left to disconnect...that rear exhaust manifold with the rusty bolts. So back under the car (laying my head in a puddle of power steering oil in the process, nice). I got the first one off using the old, "hammer a socket a size too small onto it" trick, surprisingly easy. The final one wasn't having it though. No space for the angle grinder so it was down to drilling it out. A complete pig of a job due to the confined space, and took around 40 minutes in the end, but eventually, off it came. In the pic below you can also see the wire going from the underside of the car to the lambda sensor which is mounted just in front of the cat. I'll need to take that out, along with the wiring, as it's part of the engine management system.
So that's (hopefully) everything disconnected (apart from the engine mounts). In the meantime, I've assembled my engine crane, ready for the big lift at the weekend...