Stripping and Painting
November 2014
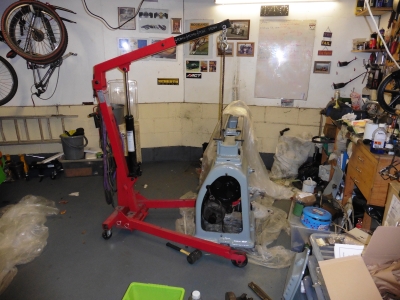
The weather was still fairly kind at the begining of the month, so I was able to have a bash at the main body of the lathe. Getting at all of it meant moving the car out of the garage for some space, and using the engine crane to move the lathe away from the wall. I thought that a couple of hours would see it done, but it took over a day in the end. I used paint stripper, then a scraper, then finally a cup brush in the electric drill. I then craned it outside, jetwashed it, dried it to prevent rust, and craned it back in.


I found some more of the original cream colour in various places - interesting but enough to convince me that I didn't really want to repaint it the same!

Stripping the paint off also revealed some other "history", in the shape of a whole load of welded repairs I'd never noticed before. I knew that the top pully cover had been re-welded at the back; but I also found repairs to the mount for the large tube which holds the switch, and the bushing which holds the main belt tensioning handle, as well as the handle itself. At some point, (or indeed at several points), someone has dropped it or driven something heavy into it. Anyway, it was quite an interesting process from that point of view.
I gave it a quick rub down with white spirit before putting the paint on, and I was shocked how much gunge still came off. I'm assuming that it's residue from the paint stripper, but apparently a proper jetwashing with loads of solvent isn't enough to get rid of it. Horrible stuff, but I'm not sure what else you'd use. So that turned into a slow rub-down.
I'd chosen a light grey alkyd enamel paint (RAL 7001, "silver grey") and matching primer. The primer is very fumey, but at least dries quickly. The enamel is, well, horrible frankly. Rather like honey, it's very thick and sticky, and takes an age to dry. It all looks fine for 30 minutes, then you go away, and when you come back it's slumped and made horrible runs everywhere. It does dry to form a nice tough coating and is the stuff recommended for machinery, but also seems to show every blemish on the underlying surface. The ordinary hardware store metal paint I'd used previously gave a smoother, more "plastic" finish and I think looked a bit better. Of course the lighter colour will show the wrinkles in the casting more than the dark green did as well.
Speaking of the casting, it is pretty rough - naturally, it's a working machine, not a sculpture. They did a bit of grinding and filling to get the worst of the edges off, but mostly it's as from the mold. To get a really nice finish, you'd have to do what others have done and skim the whole thing with filler, then smooth it all down with sandpaper before priming. Part of me would like to to that, but I've simple got too many other things I'd rather be getting on with. I take my hat off to those who've spent the time, you could spend litterally weeks on it I reckon.
Frankly, as far as the main body goes, unless there are lots of chips in the existing aint, you'd probably be as well to just paint over what's there - it'll help smooth out the roughness of the metal underneath, and would save 10 or 12 hours of preparation work. A full strip to bare metal makes more sense for the mechanical parts such as the apron and gearbox.
So over the following days and weeks, I stripped the smaller parts in a builder's bucket or on sheets of newspaper, cleaning, priming and painting them in batches, making sure that I had each bit ready for when it was time for it to go back together. It's an ongoing task alongside the rebuild.

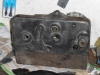
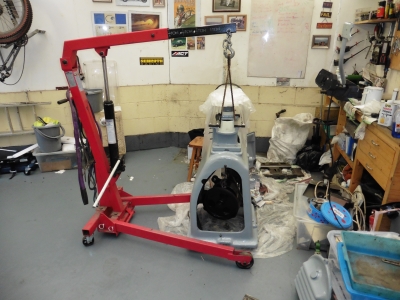
 Left: The Apron, stripped to the metal. Right: Running out of room!
Starting the Re-Assembly
One of the first jobs to get done was to move the main casting back to its normal position against the back wall. The paint takes 7 days to cure properly, and I needed to get the motor in while it was in the middle of the room. I wasn't going to paint the large cast plates which hold the motor and cone pulley so that meant I could get straight on with it. I again used the crane to hold the heavy assemblies in position while I drove the pivot bars through.
I did one part at a time - the cone pulley first:
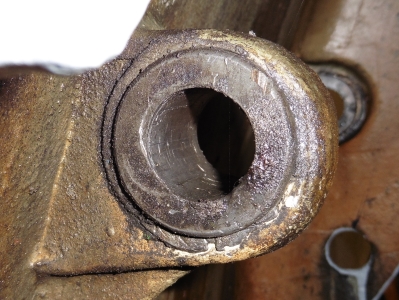
This went in pretty easily - it's the one with the babbit bearings so I was careful to clean everything out first. I also worked the shaft (I say!) with some sandpaper to smooth off any nicks and bumps. The bearings themselves looked pretty good, a few scores from removing the shaft, but I figured they'll get smoothed out with the weight on them anyway. Again, that's the original paint on there - I didn't repaint the inside of the motor cabinet. Mostly because I'm too lazy but also I thought it would be good to leave some of the original colour somewhere on the machine.
The next bit, the motor assembly, proved much harder. The difficulty is in getting a rope or sling around it in such a way that it's hoisted up and the pivot holes align. Because the cone pulley is now above it, it's hard to route the rope usefully. I managed it after several attempts as shown below - the rope going behind the cone pulley pivot bar and tying onto the back part of the motor mount. It's really hard to get the holes aligned, and because it's so heavy, you can't easily just nudge it while you slide the shaft in. (look, I tried several ways of writing that, but they're just all rude ok?)

The only other thing for which I needed access to the rear and side of the lathe was the switch mount, that's a nice-n-easy 3 bolt job though. By then, it was getting late, but I reckoned another 10-15 minutes to crane it back against the wall would be a good way to finish for the evening. Of course I then made a collosal balls-up of it and ended up taking over an hour. I lifted it a bit too far, and it swung out of position so that the main motor cabinet was on top of one of the crane legs, rather than between them. Bit of a problem, that - it's far too heavy to just swing back on your own, with someone holding the crane still I might have managed it, but I was on me tod. Eventually I collected a load of bits of timber and managed to rest it on them, while I moved the crane away from under it and repositioned it all. Then managed to lift it off the wood and back down to the floor.

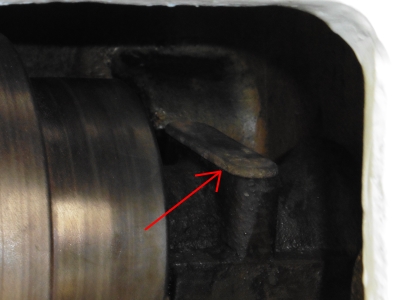
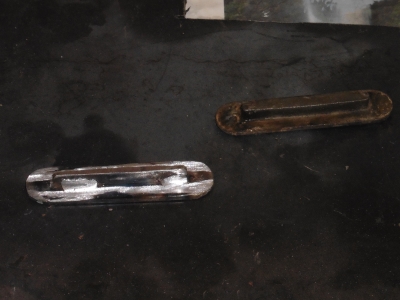
Apart from fitting and adjusting the drive belts, that was the motor assembly pretty much done. One final piece I'd noticed - the oil wells for the cone pulley spindly had small cast covers which sat on top. I'd noticed that one of these was missing, so I made a new one of those. Original one shown in place on the left, new one and original shown together on the right. Nothing clever, just two bits of mild steel welded together, but fits perfectly. Fill the wells with oil and the motor is ready to go - or will be once I've wired it all up again.